Prime What? How I saved a Prime Rib roast that I almost ruined....

My latest cooking adventure with Prime Rib and why I think it’s ok to be intimidated by cooking something new

Ok, it’s now been a few years since I’ve been cooking SWF beef exclusively and you’d think I would have tried and true recipes for each cut of meat.—Not so much—I learn every time I’m in the kitchen and I’m always experimenting.

This particular time I was slightly intimidated…

By intimidated I mean— that feeling you get when you have a beautiful piece of protein or a vegetable for that matter that you’ve gone out of your way to purchase or grow and you’ve looked up a few recipes, chosen one and then you just can’t get started….It’s painful. You procrastinate, maybe even convince your family to go out to dinner instead of cooking, anything to get away from the cooking stress.

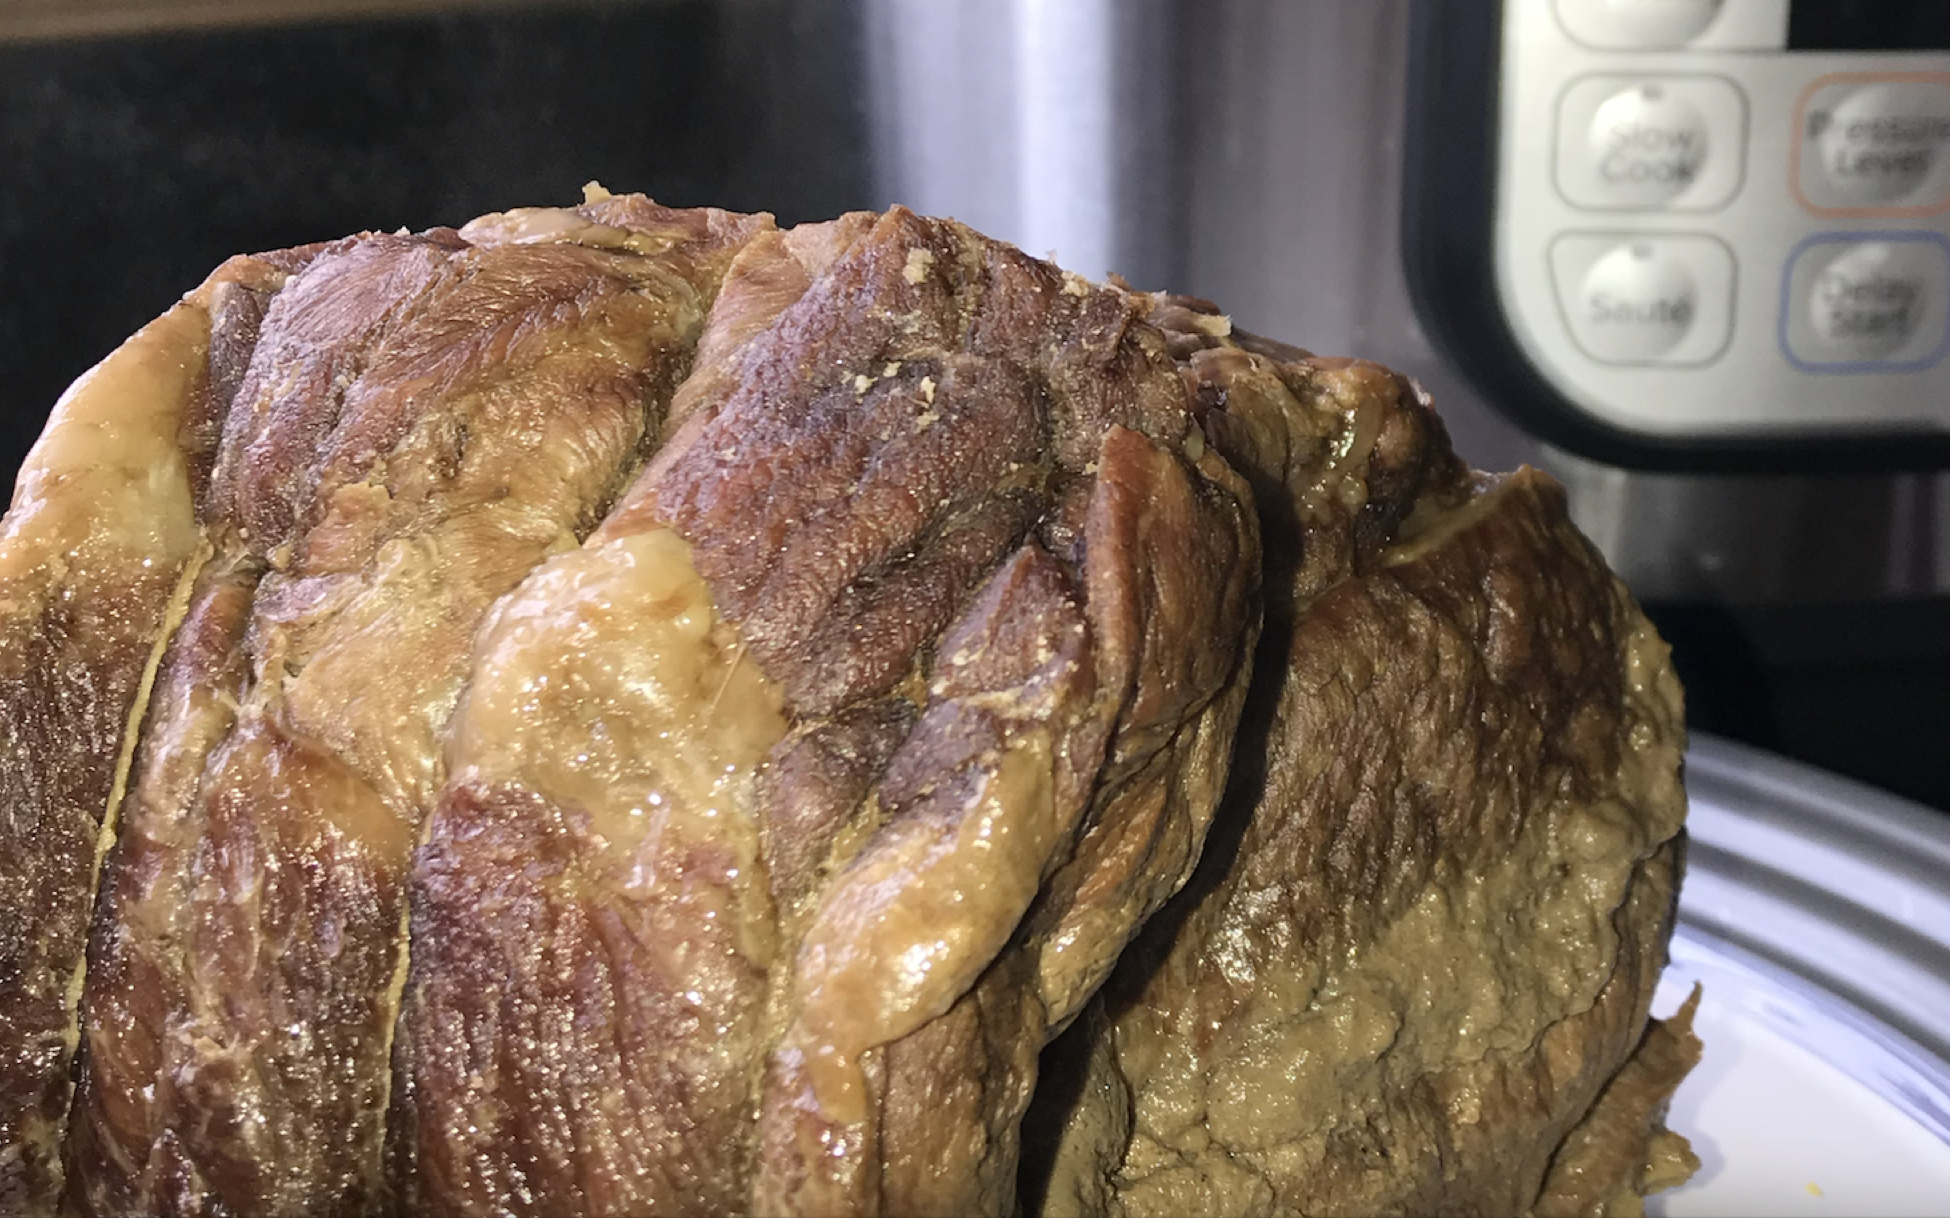
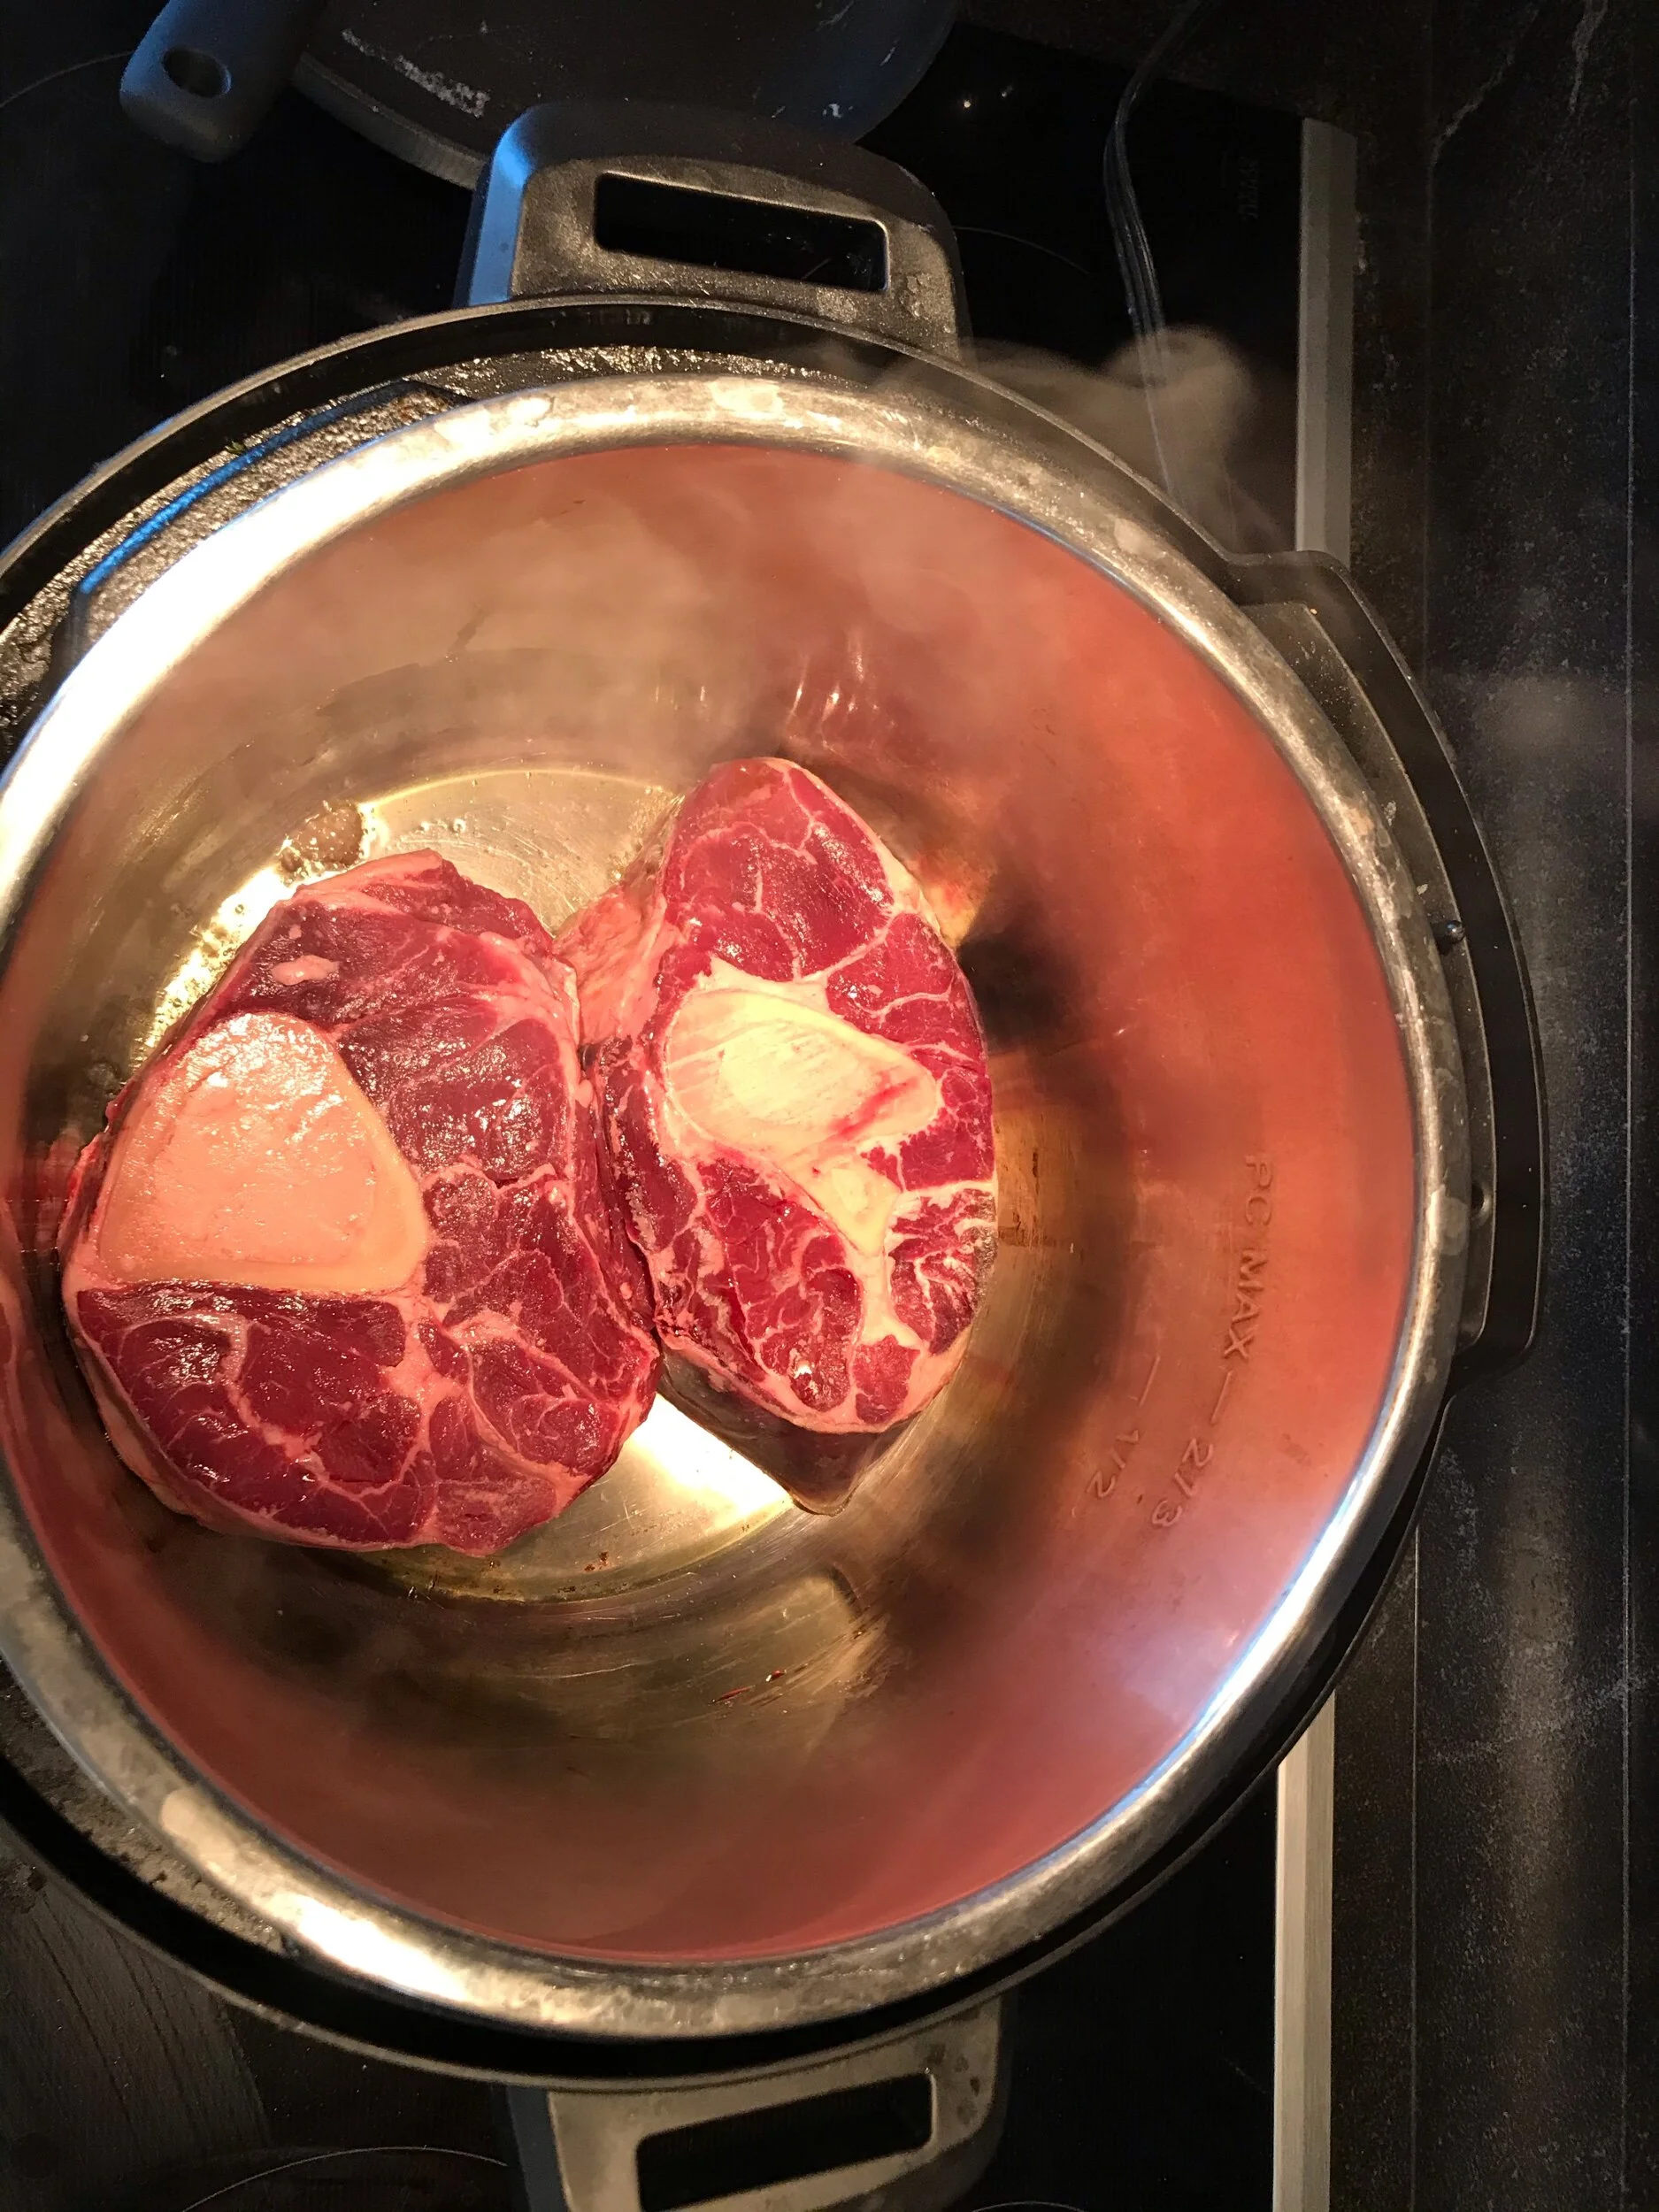
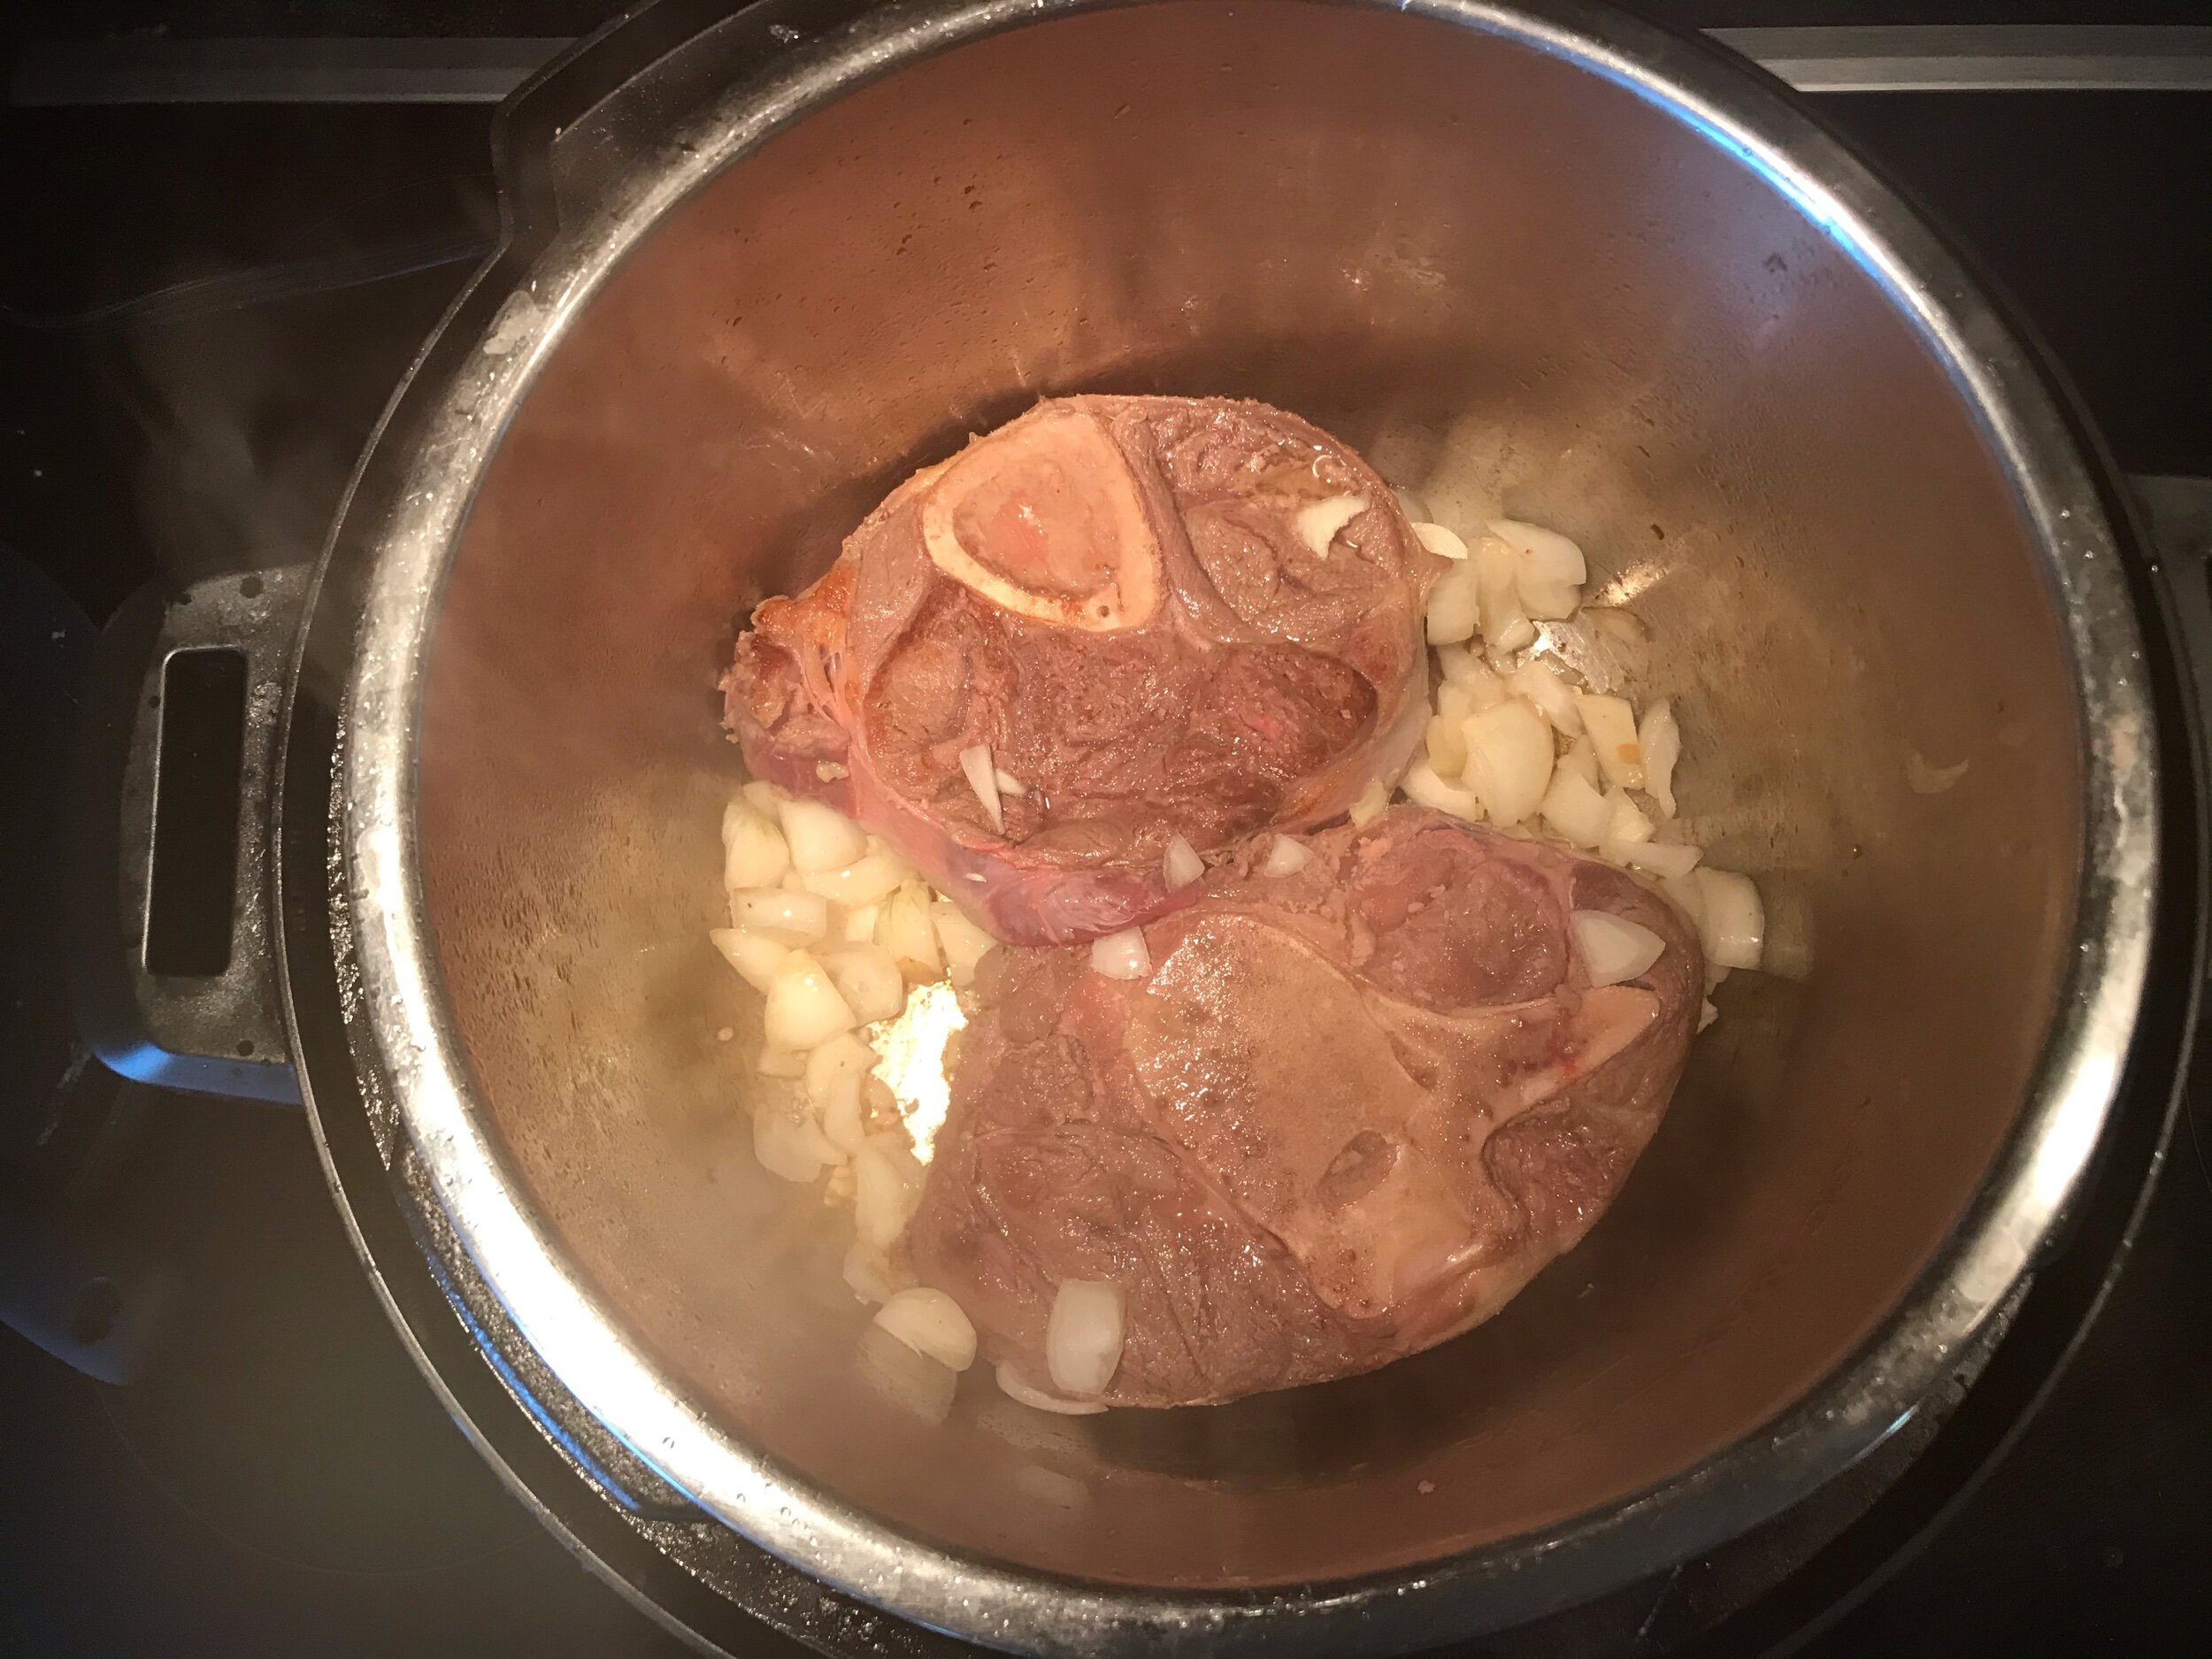
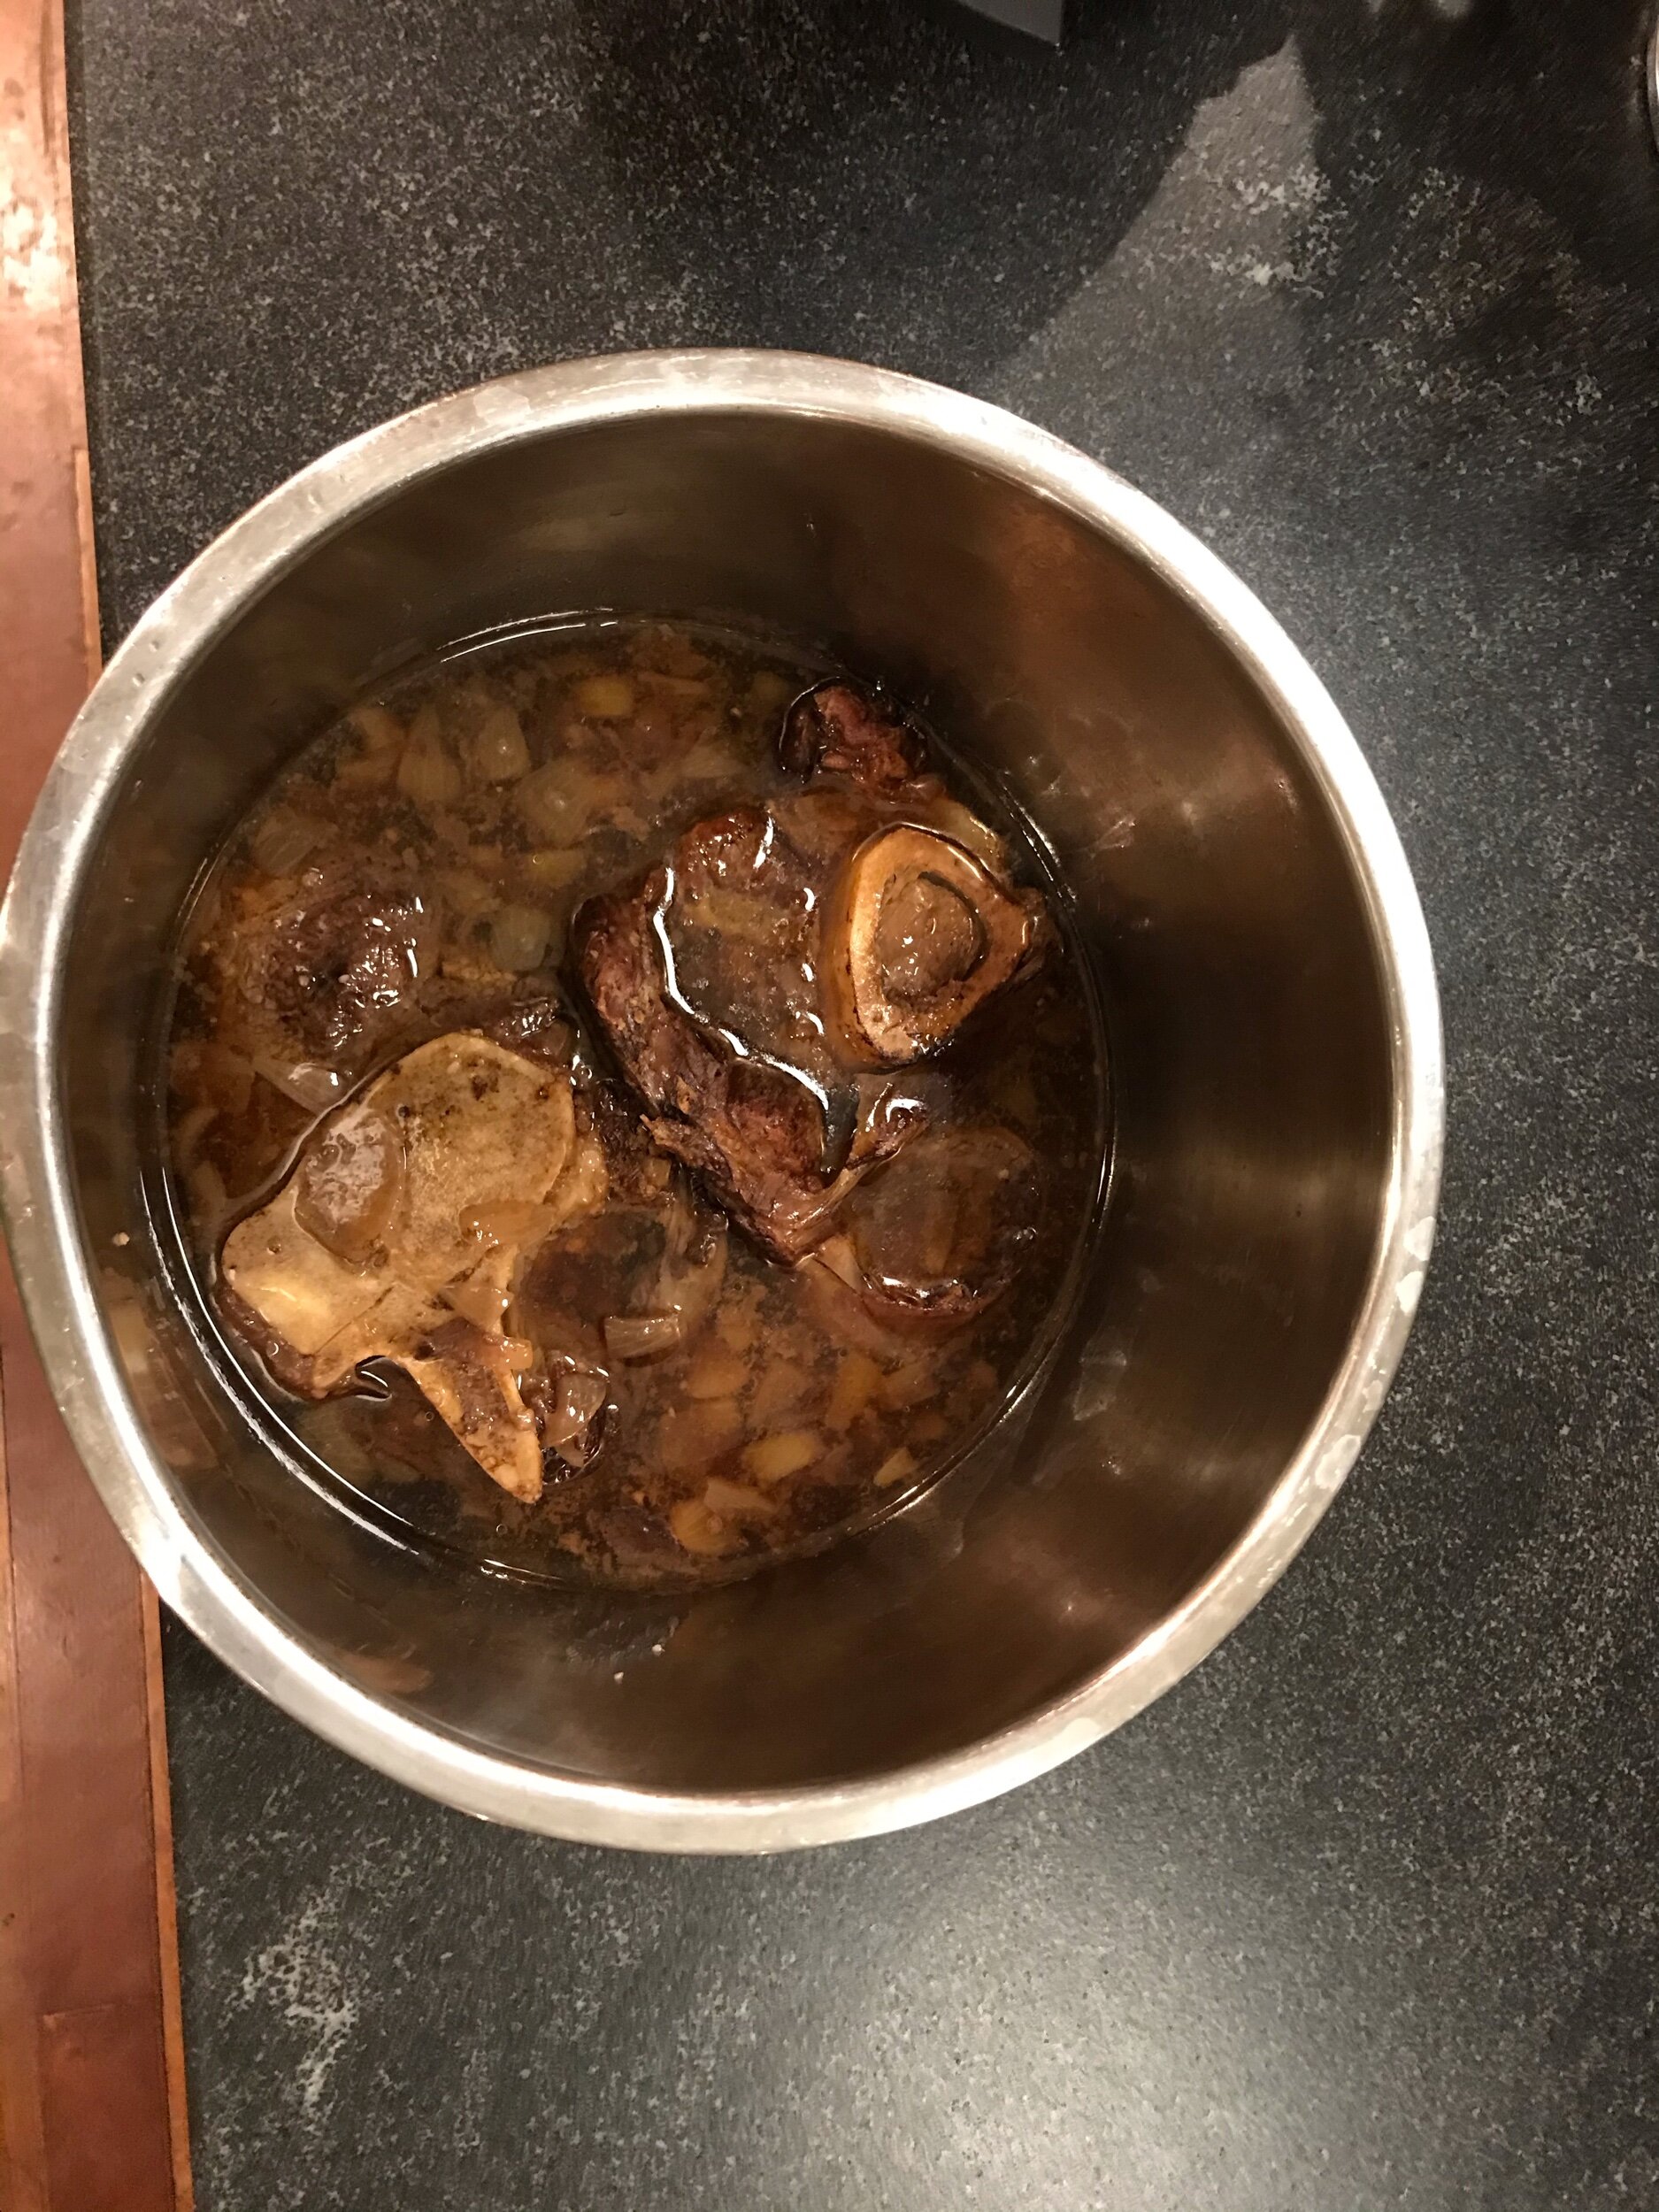
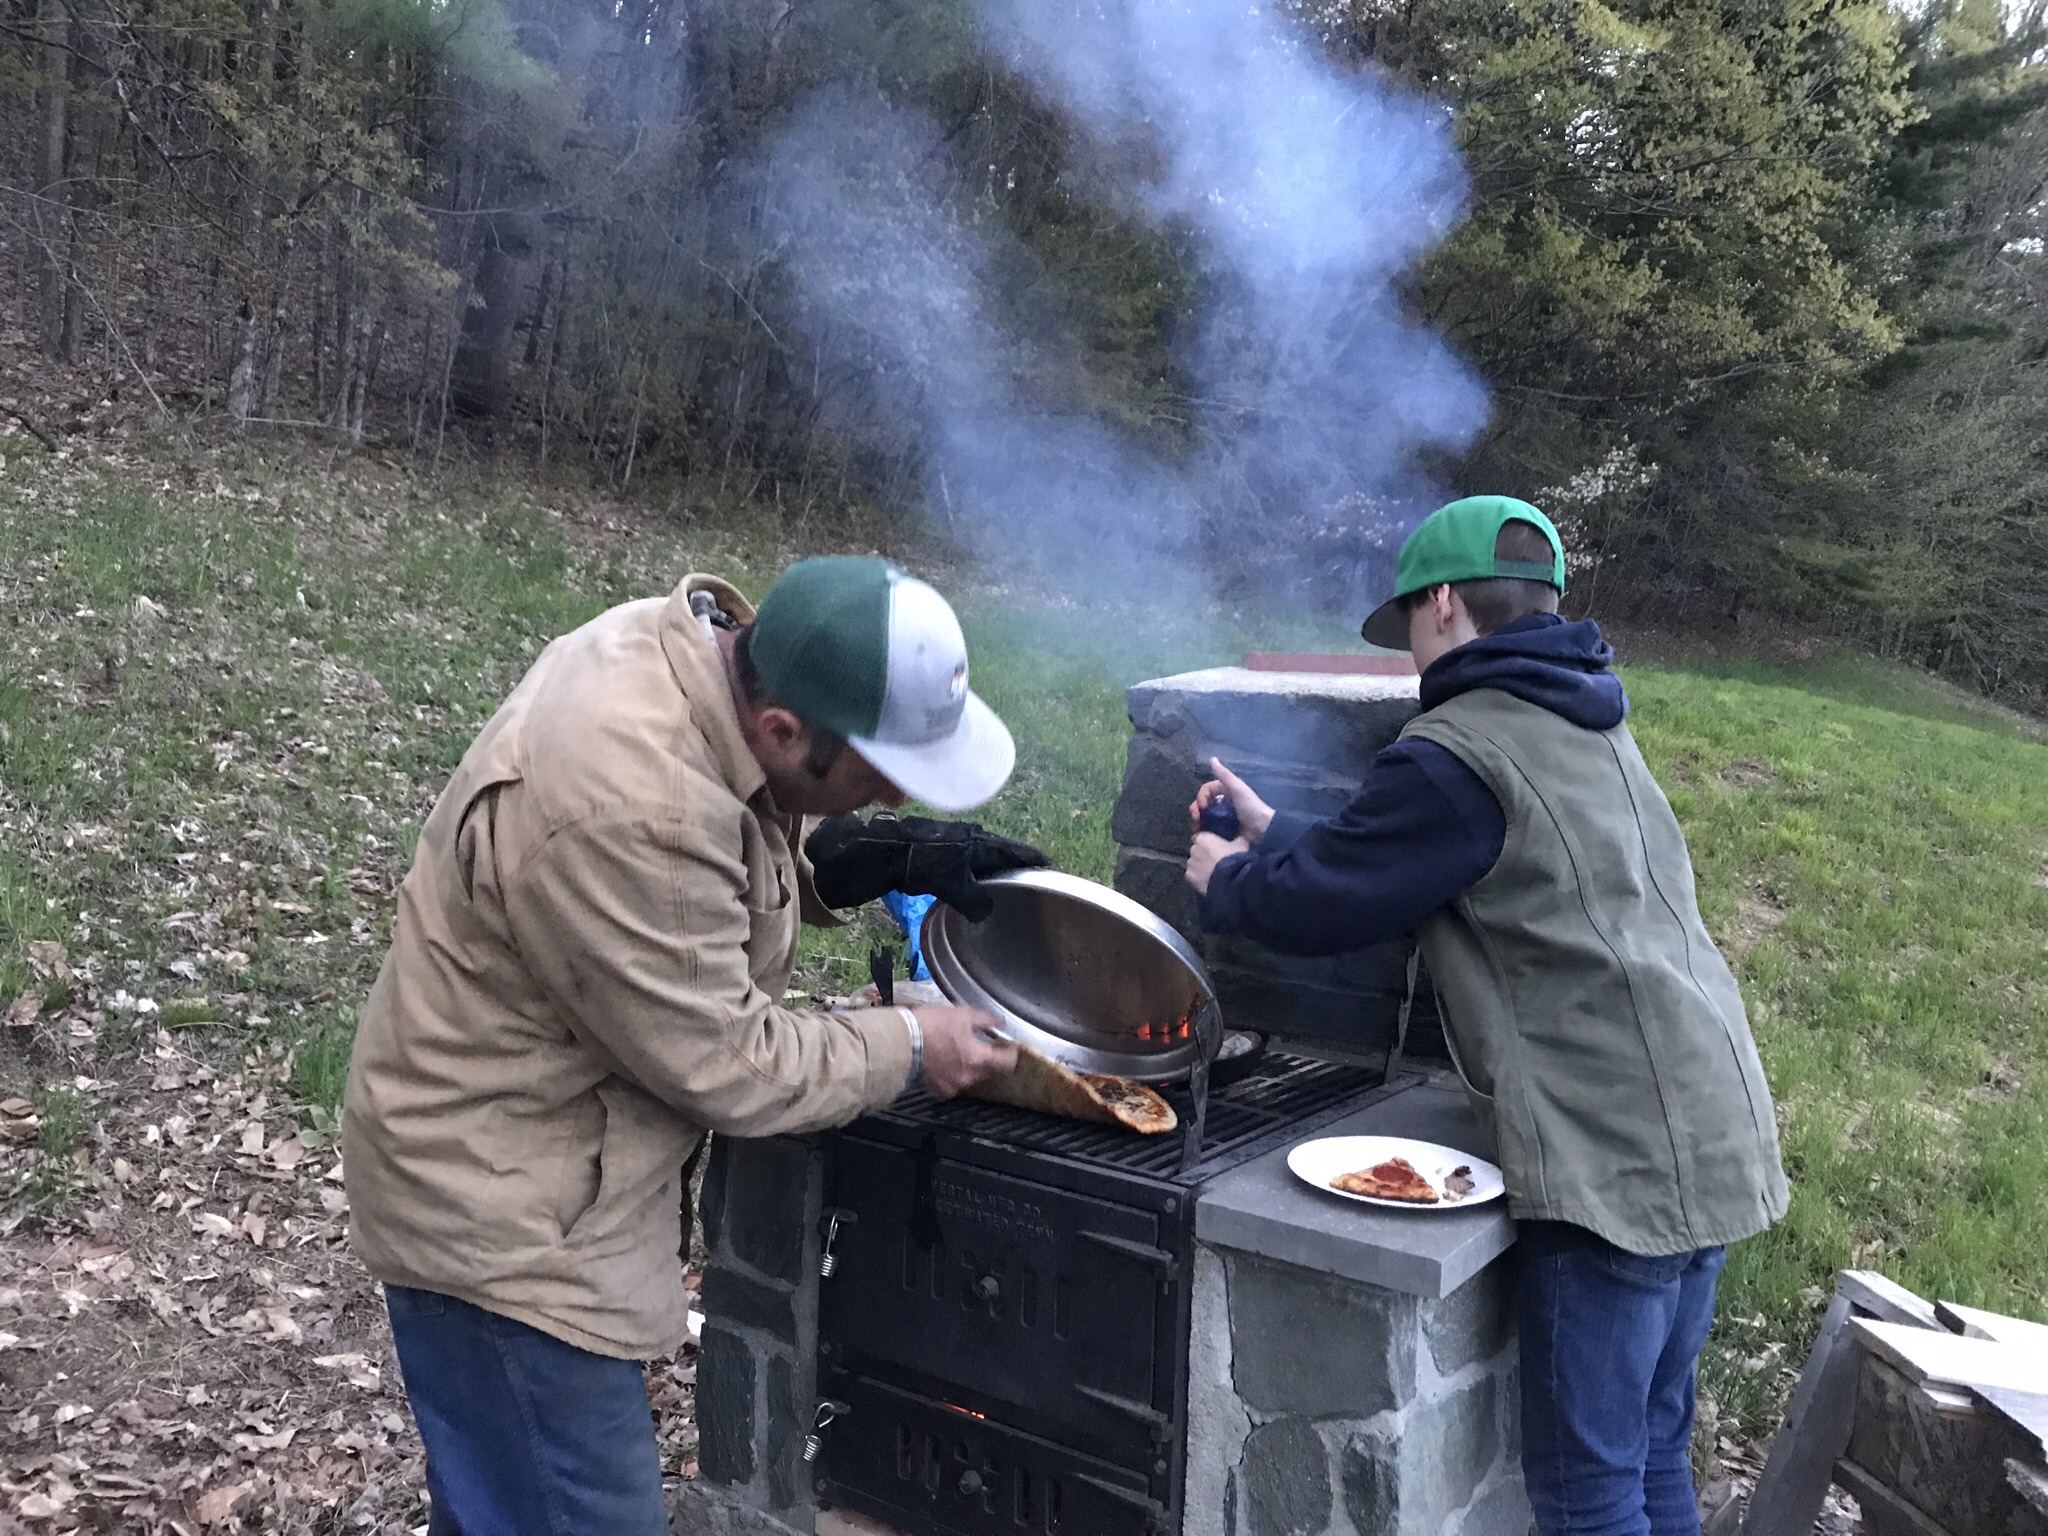
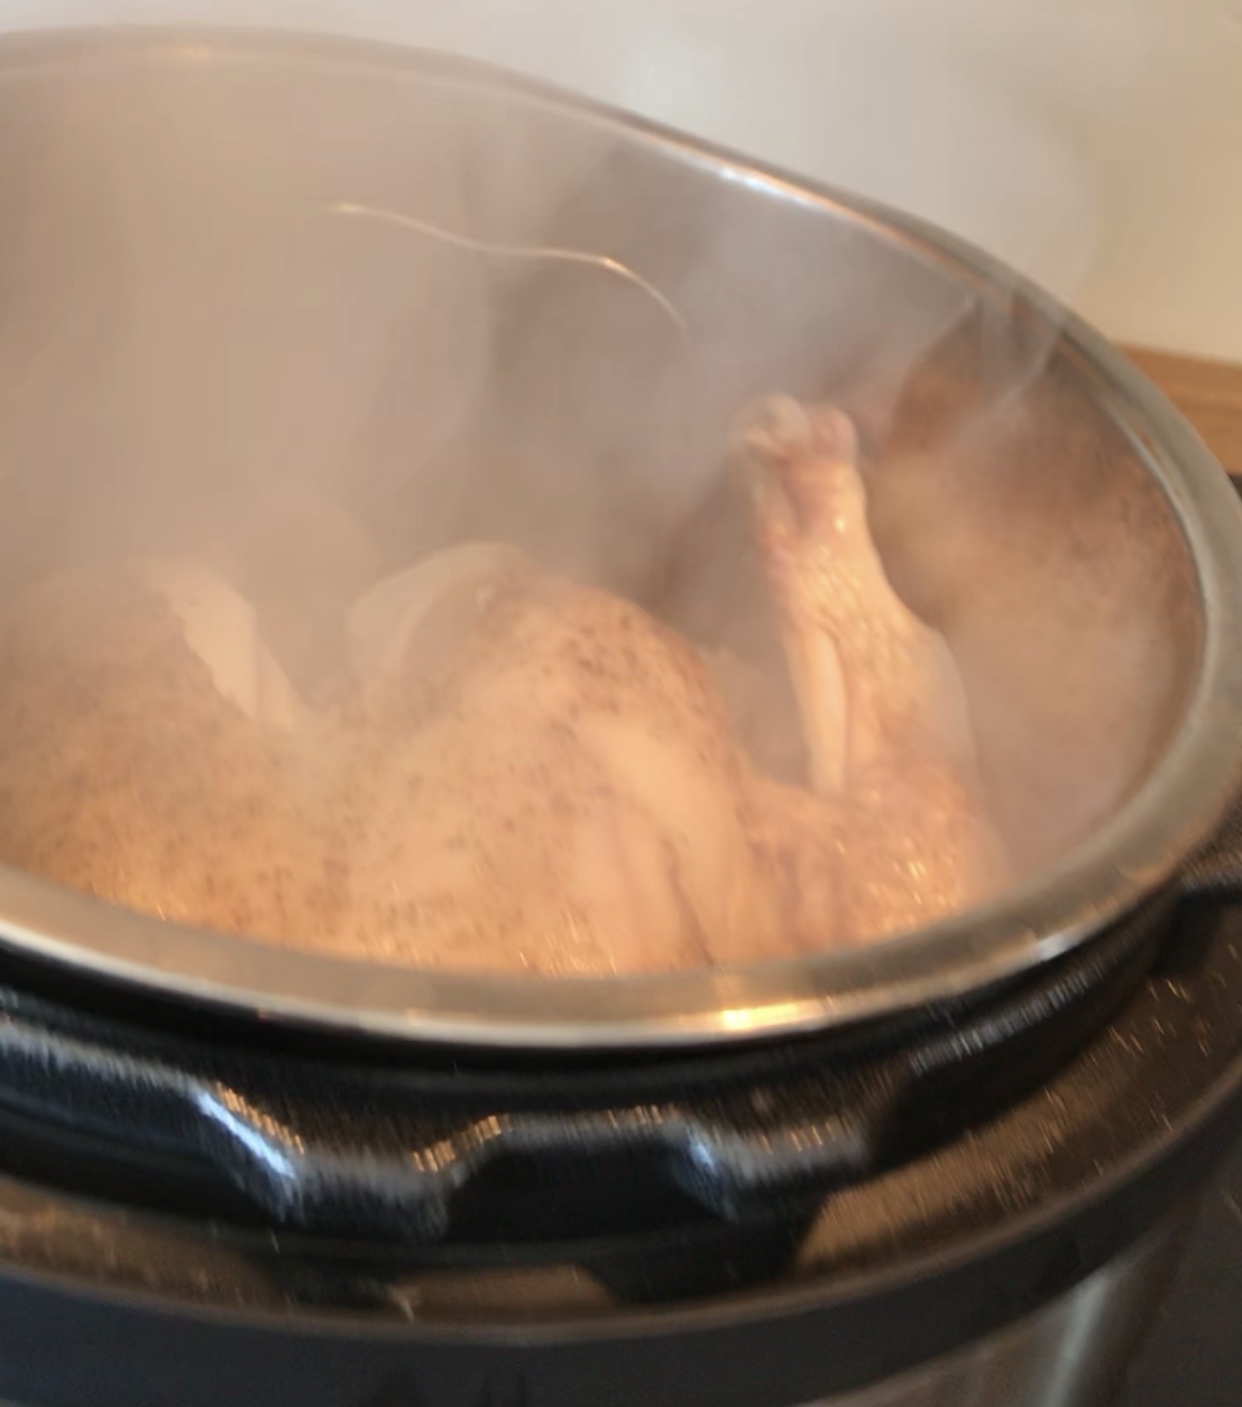
Ok, time for my story.  So I had this 7 lb, 4 beef rib roast, I was saving it for a special occasion, one came along and….I did the usual steps. Thawing, rubbing I decided to try the reverse sear method. I was supposed to cook it low and slow at 250 degrees and then sear it in the last few minutes of cooking, then rest it for 20 min to bring it to the correct temperature before carving the roast.

It was getting late in the day….Although I had been in the kitchen the better half of the day—-I had resisted the urge to put it in the oven because I didn’t want to over cook it and I was following a new recipe. I generally slow cook or braise roasts for hours on end so this is a little out of my comfort zone.

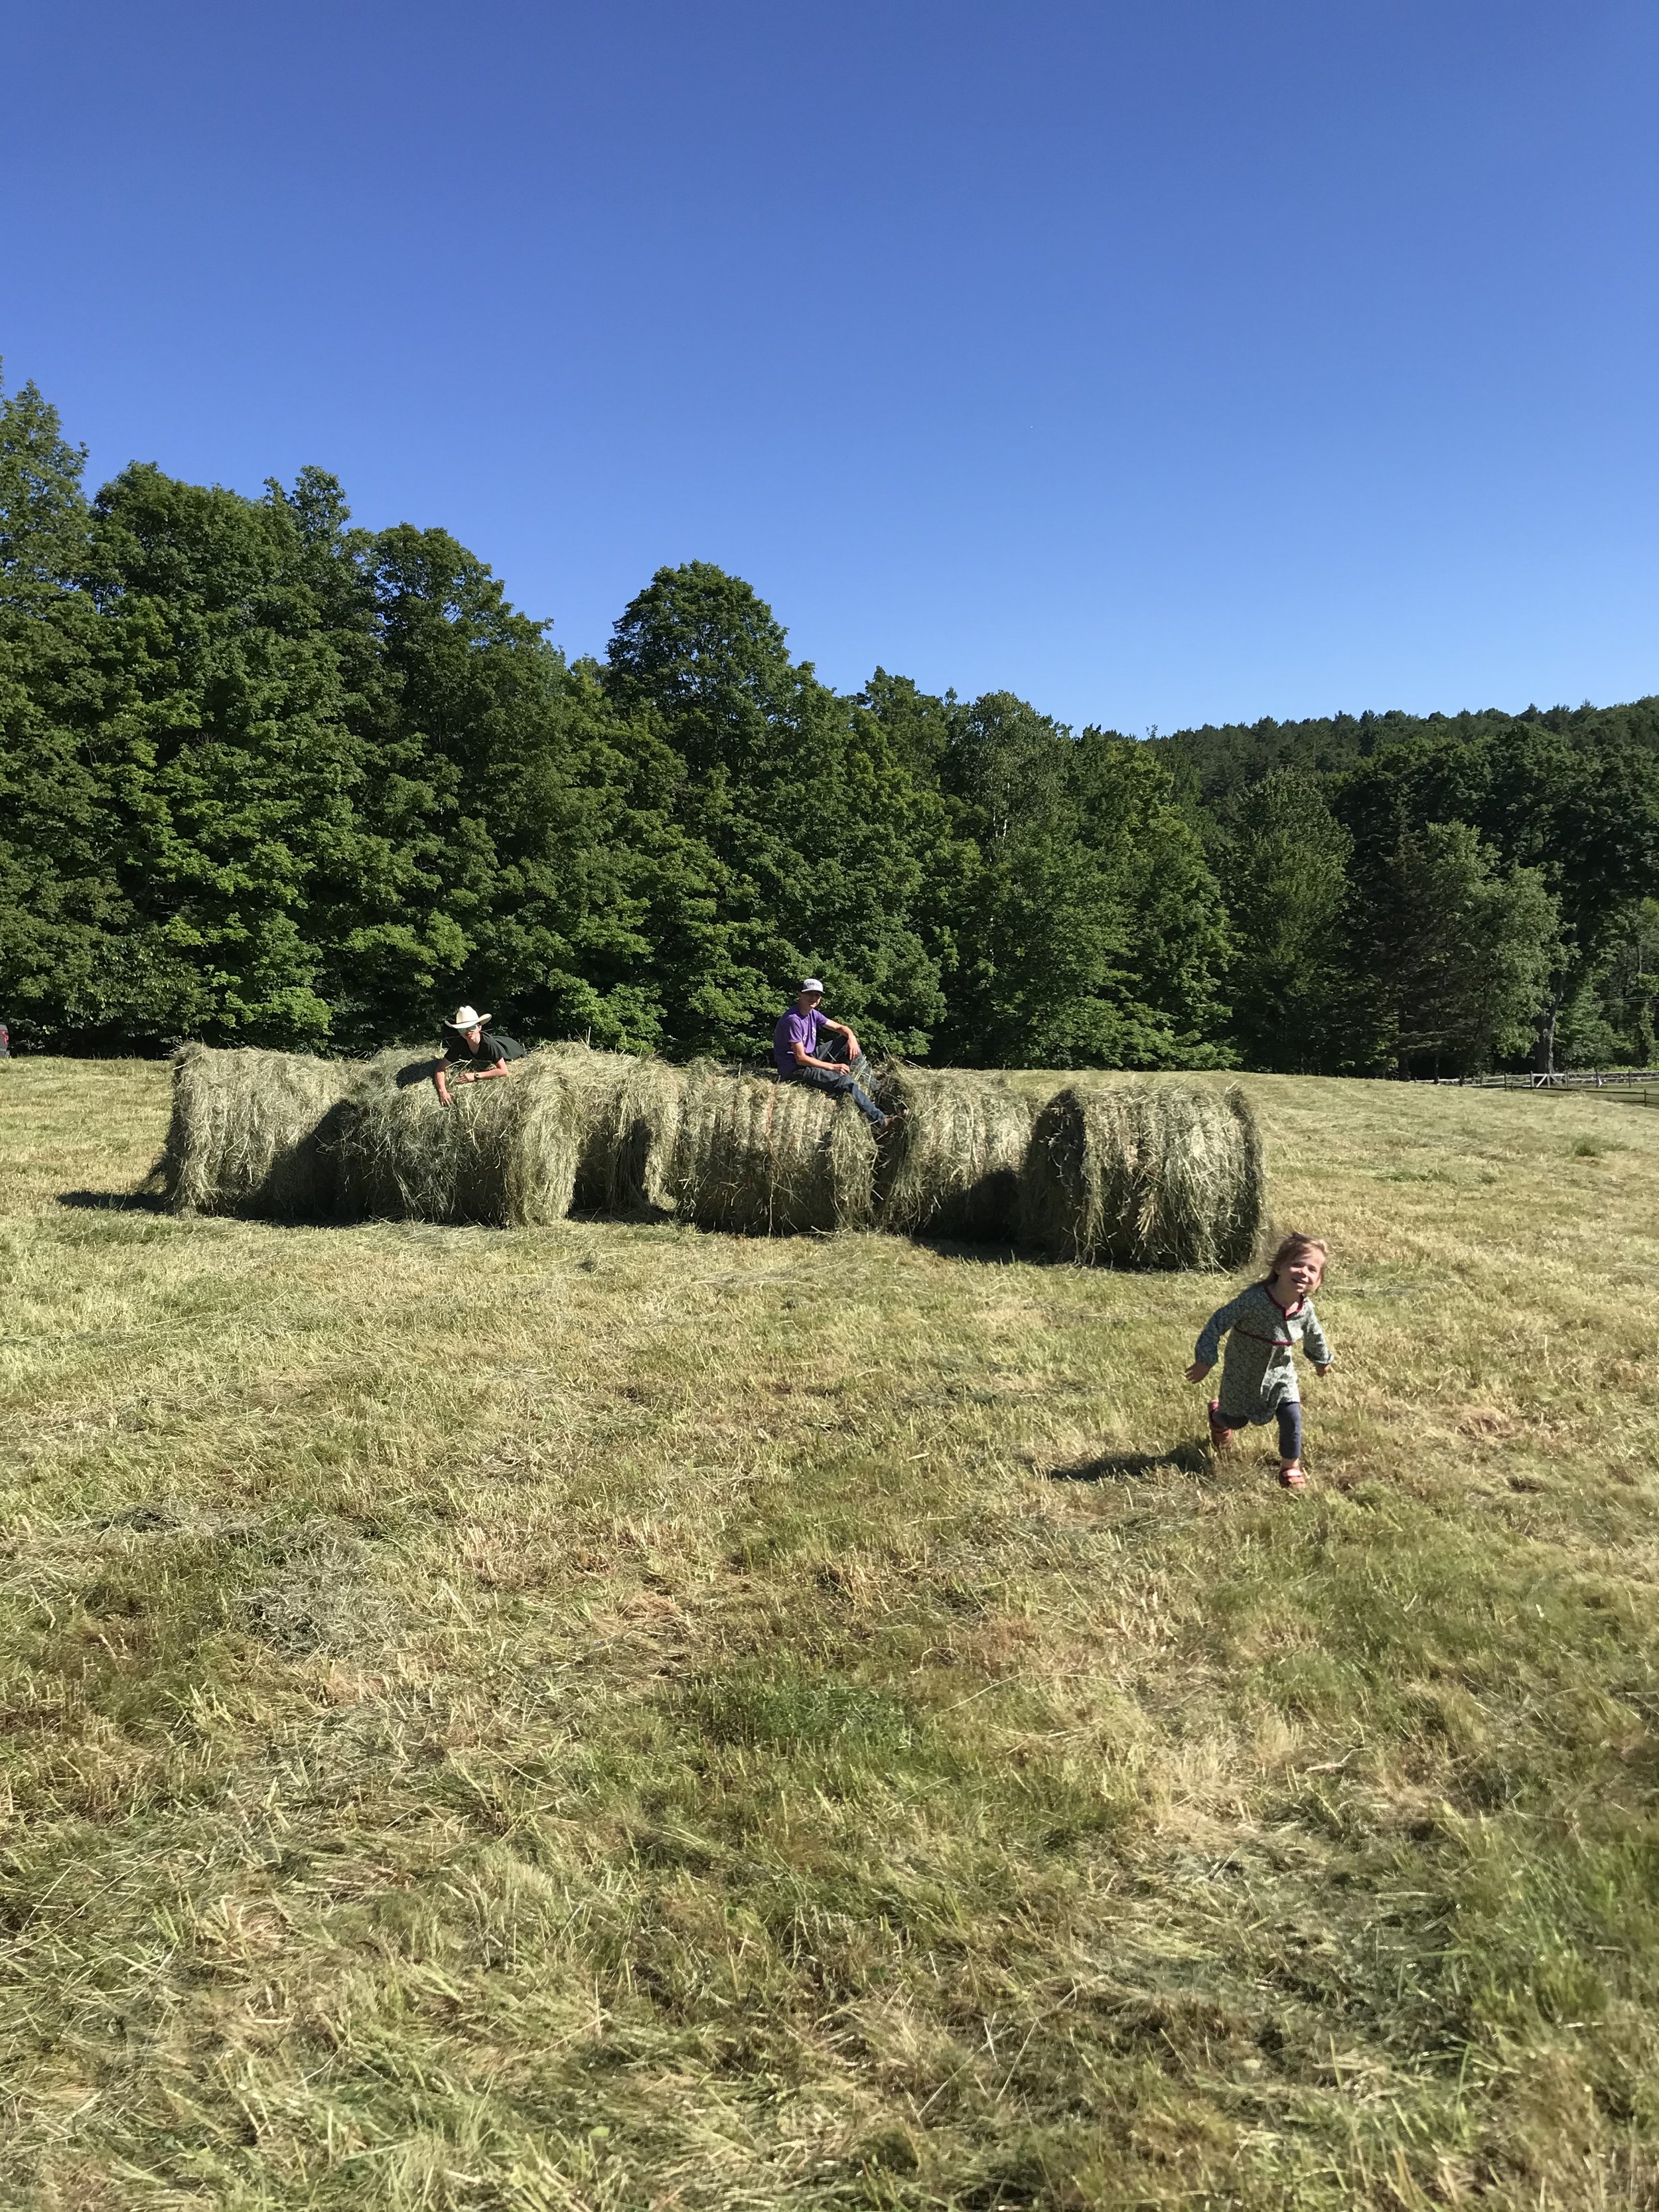
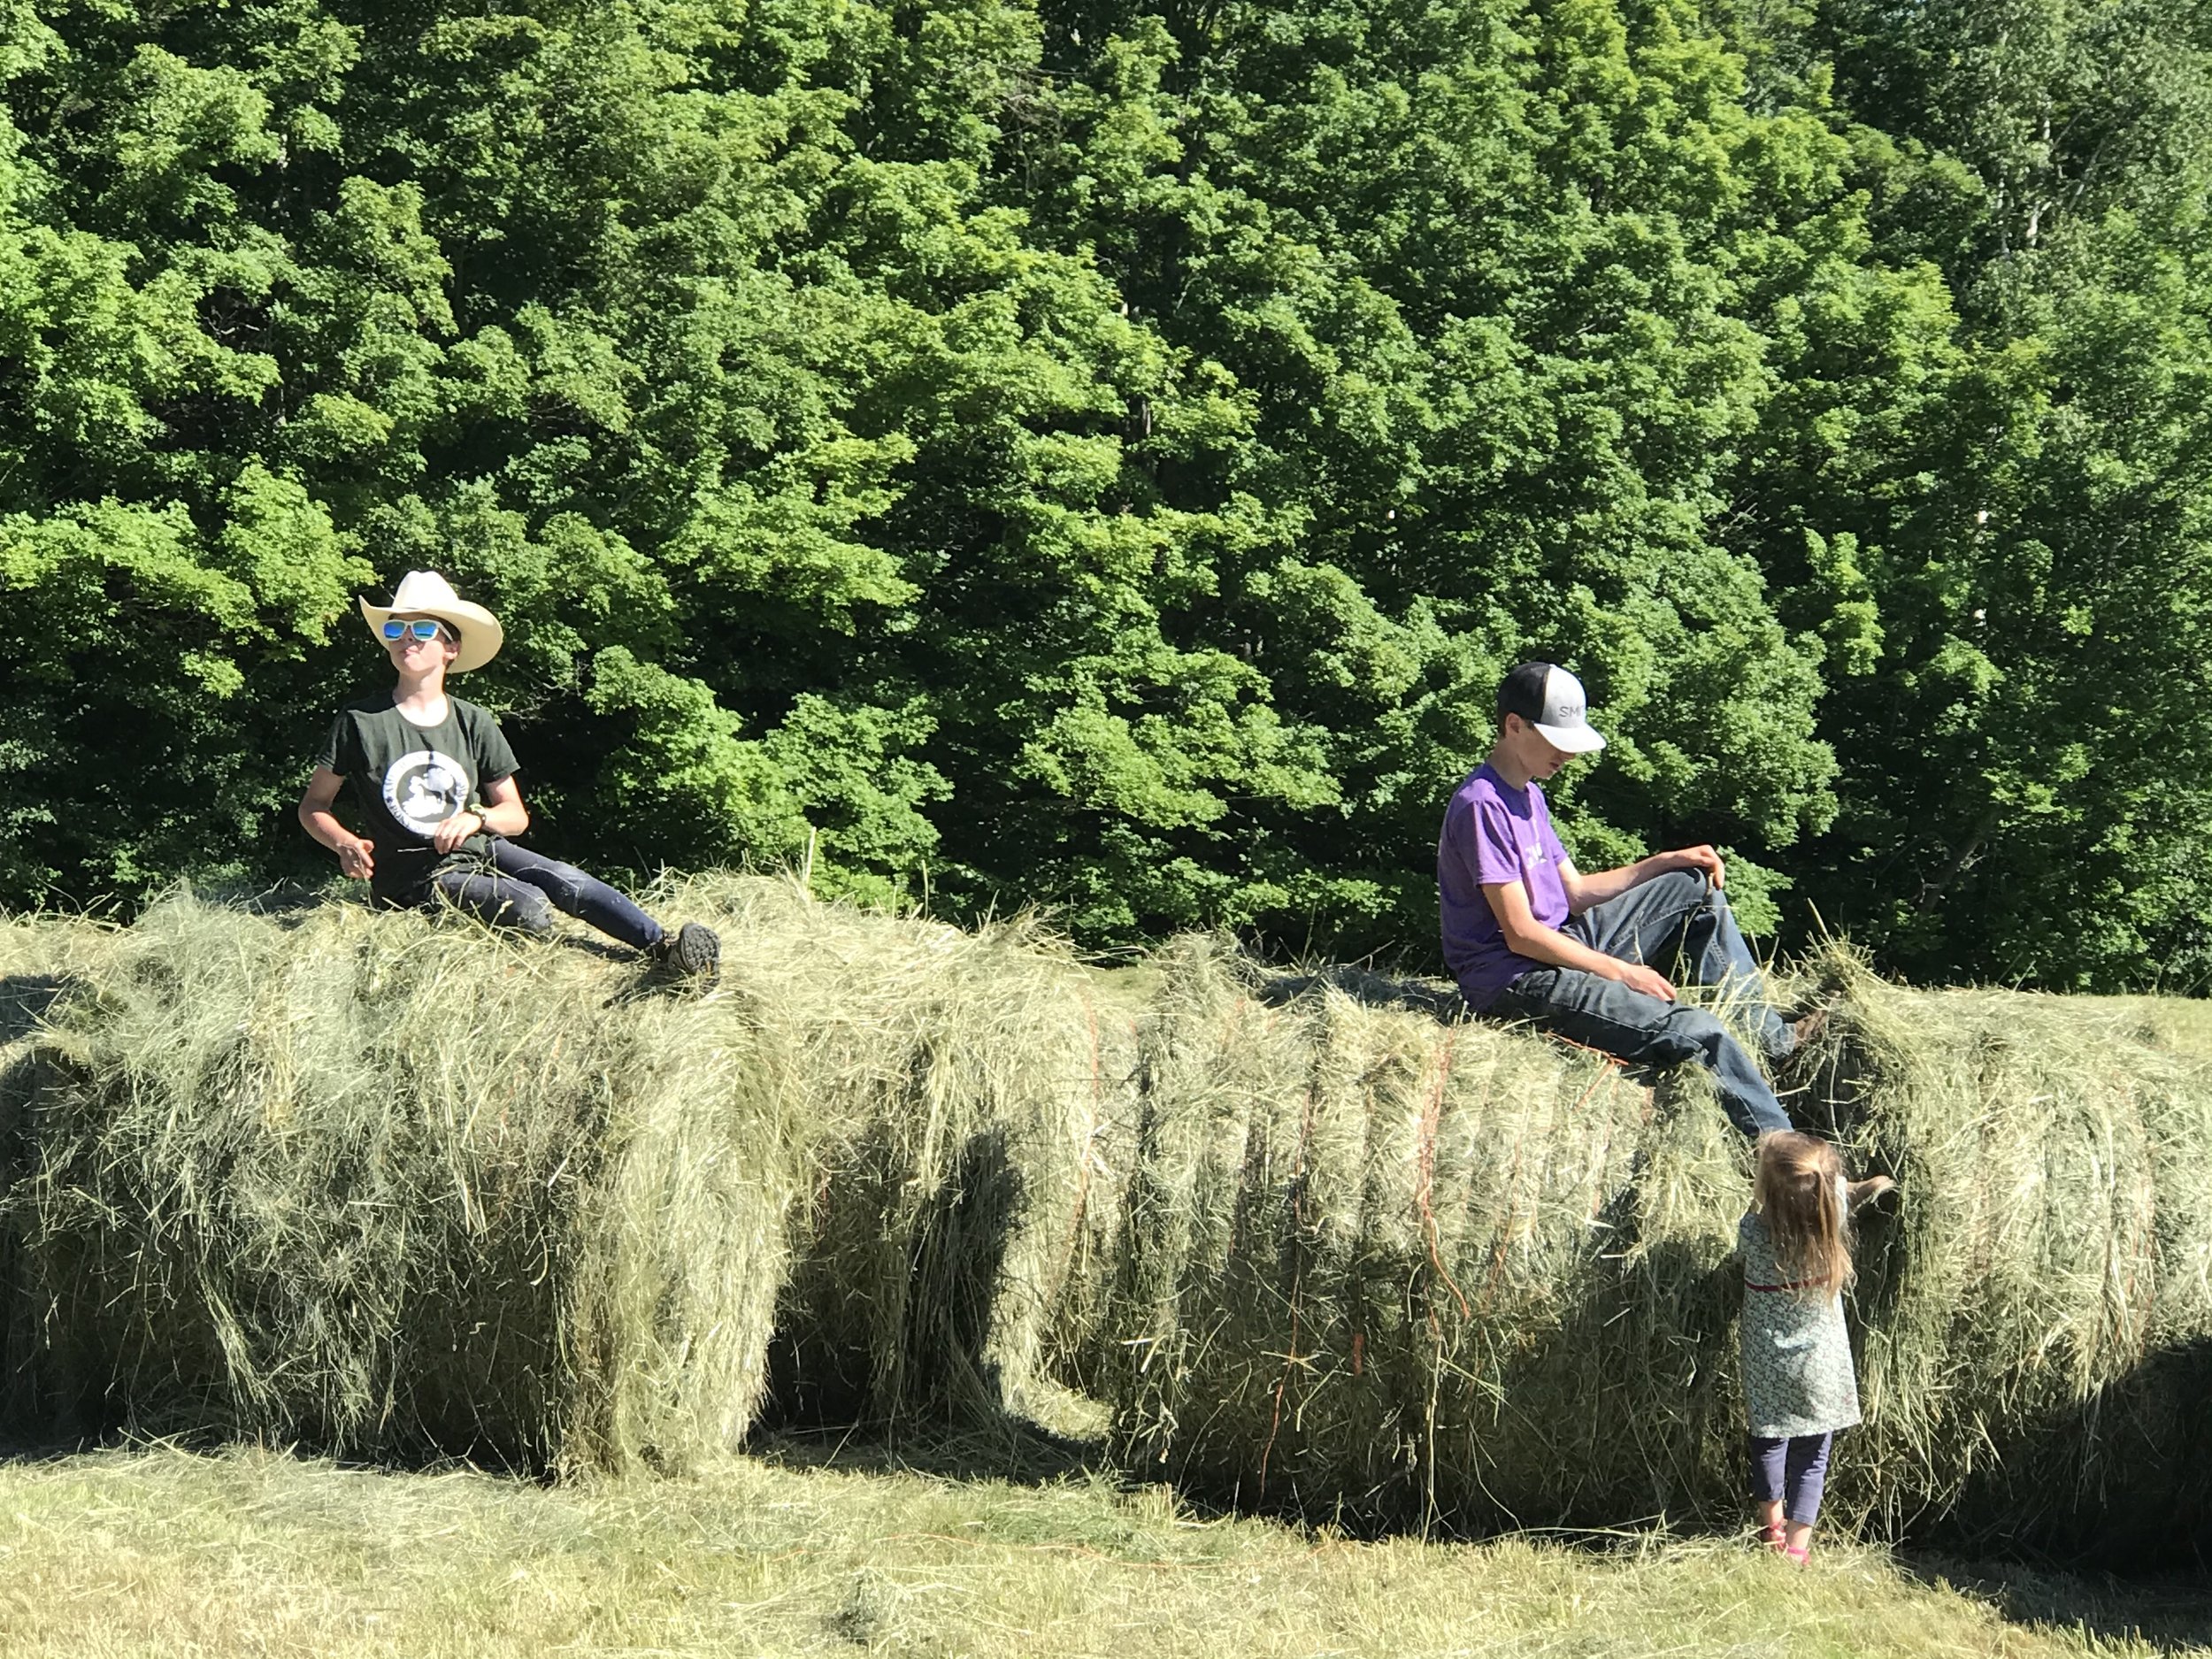
One hour later,—well maybe  more than that—I loose track— I came back from the barn, expecting to be getting ready to sear and rest the roast and guess what—the roast was only barely warm and the oven was off.  “What happened” I exclaimed to the three kids who were scattered about the first floor. For the first time in a while they were all in the same room.

“The oven started beeping so we turned it off”—said Eden joyfully. The boys were just staring at me. “OH CRAP” I said, now what am I going to do? I thought,  it’s late, the kids are hungry and the food isn’t even close to being cooked—and I don’t have anything else to serve.

So, on to plan B.  I covered the roast and turned the oven up to 375 degrees convection setting—not usually recommended, but whatever. Lets GOO. . . I needed it to cook.

This time I inserted a thermometer when I put it back in the oven, thinking that would be wise—usually I just go by weight—but I didn’t want to mess around this time—after all I was tired and grumpy.

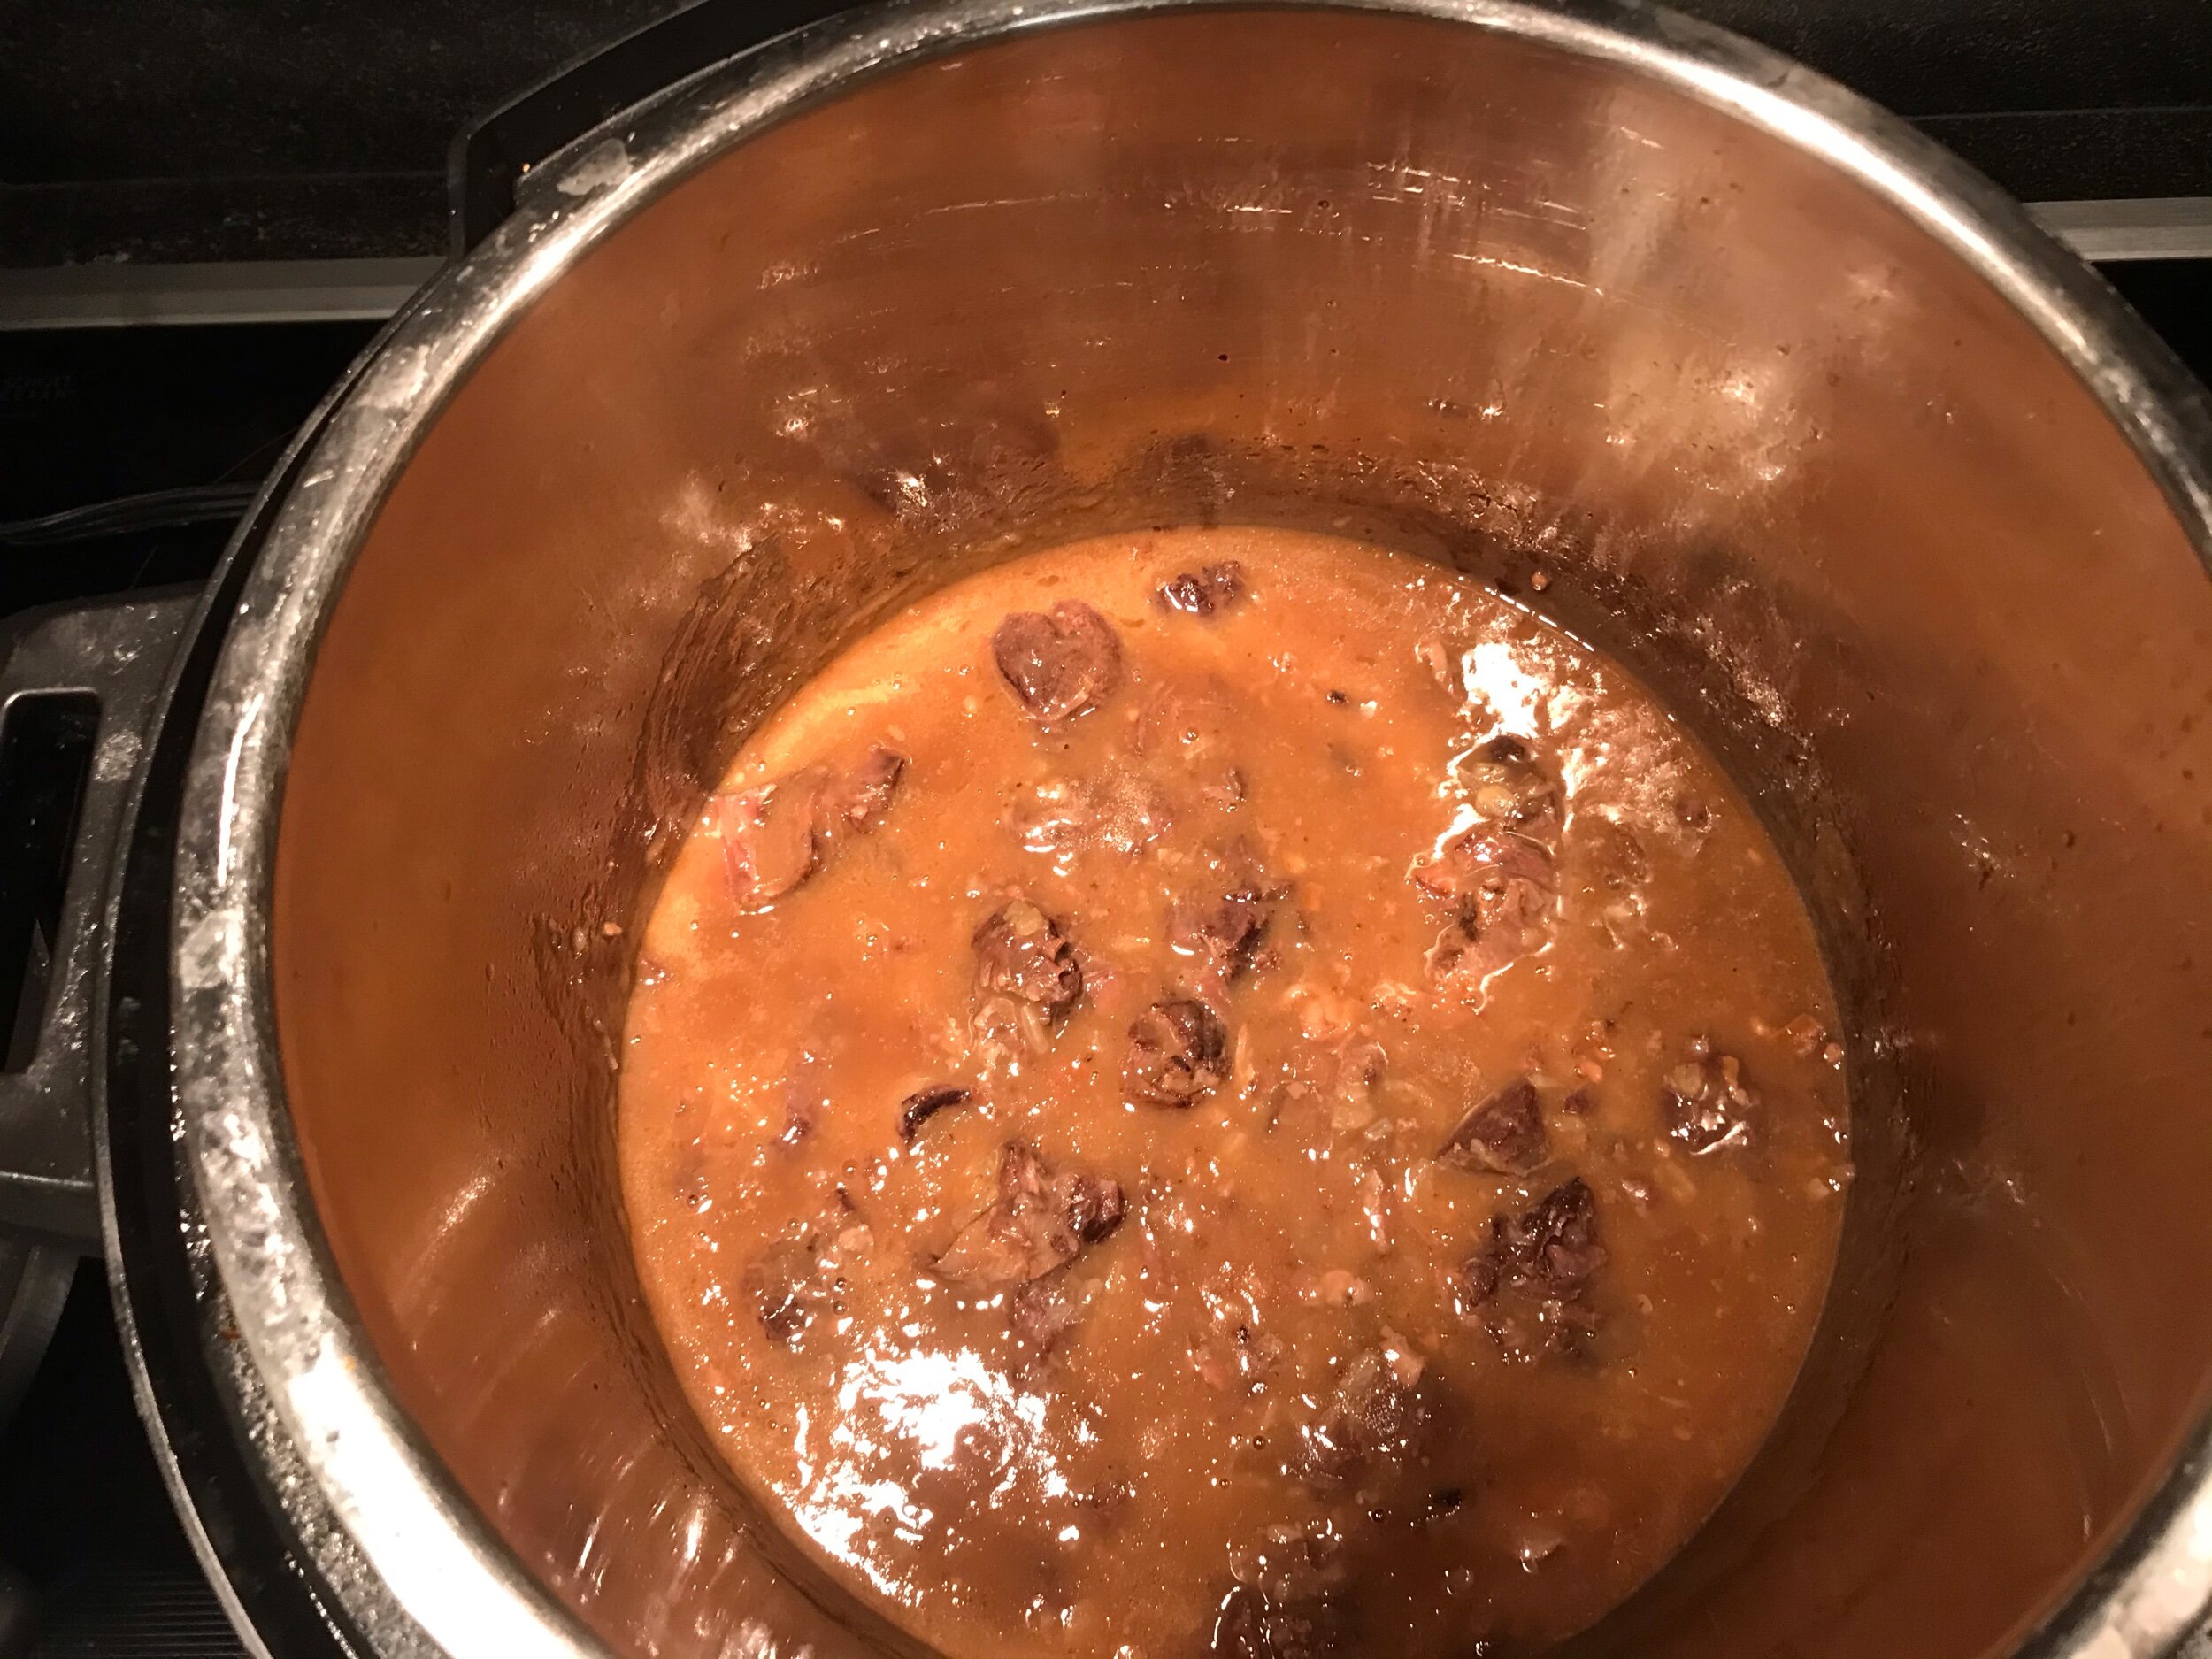
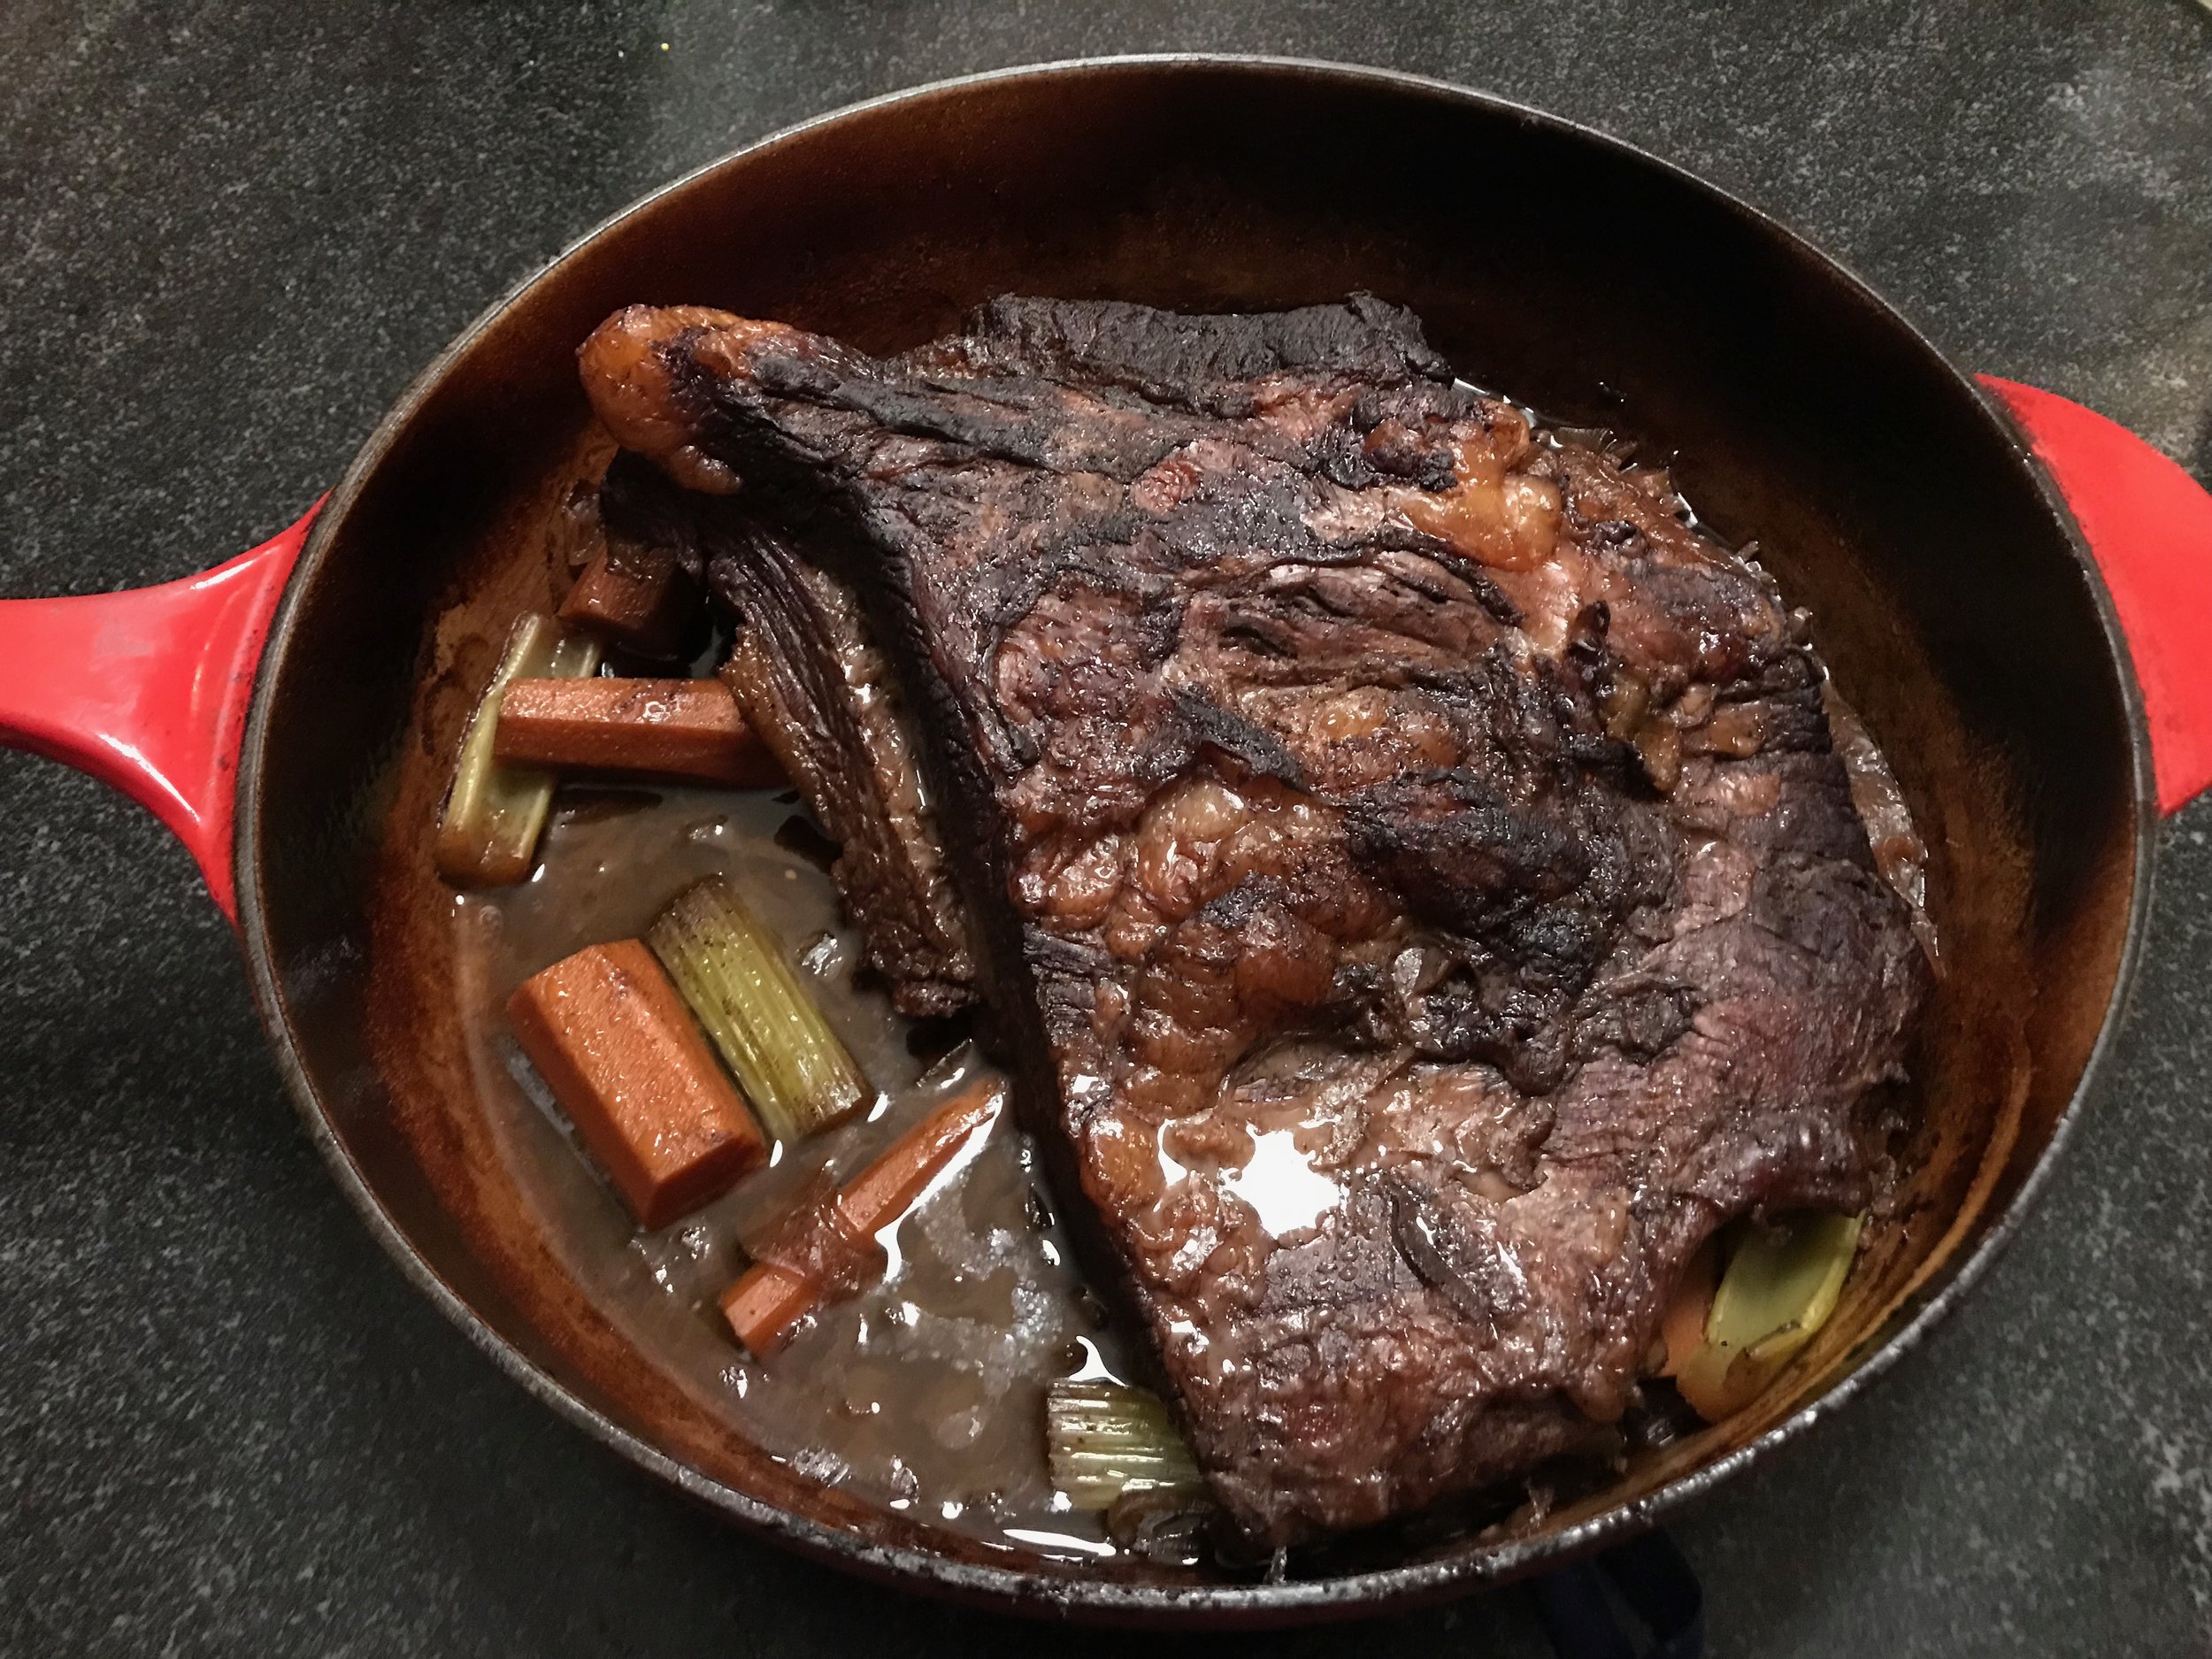
So, I waited for the temp to come up to 119 degrees—which was FOREVER-like hours.  And then as I took the roast out of the oven I watched the thermometer go up and up and up to 130 degrees in a split second—the thermometer was going crazy, maybe malfunctioning?—that’s why it had taken so long. “Oh crap, I overcooked this beautiful roast” I said aloud.

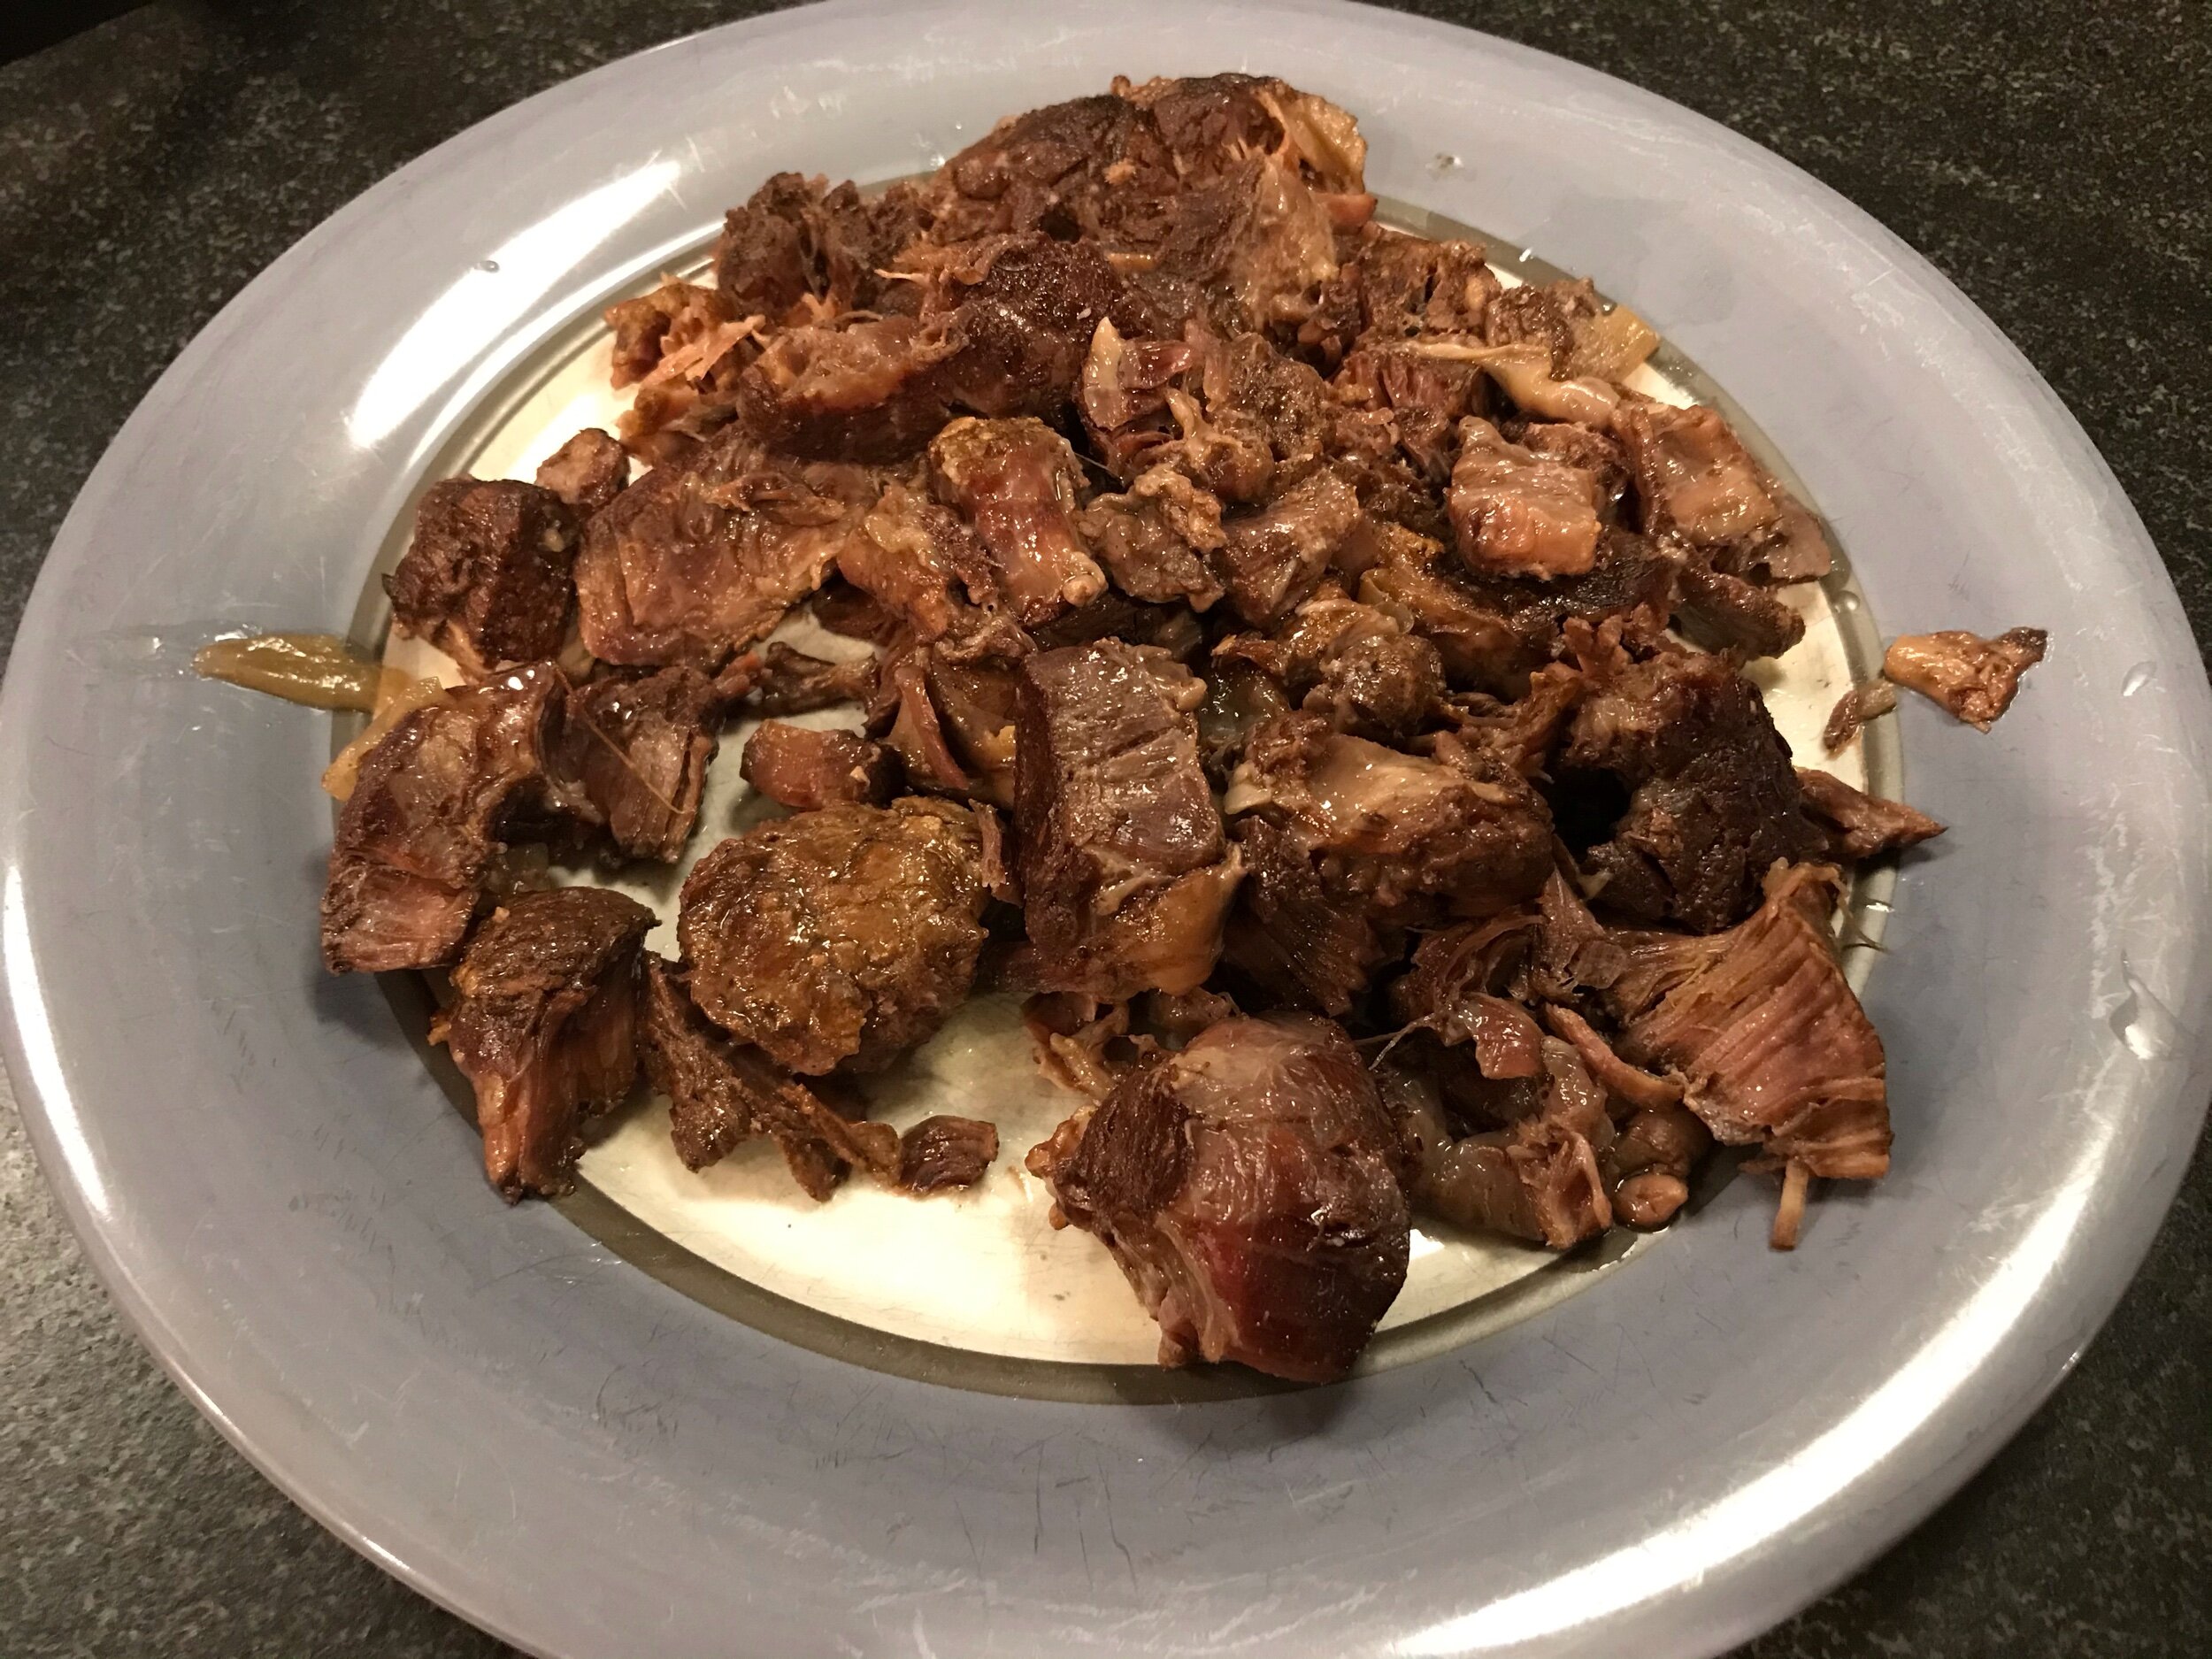
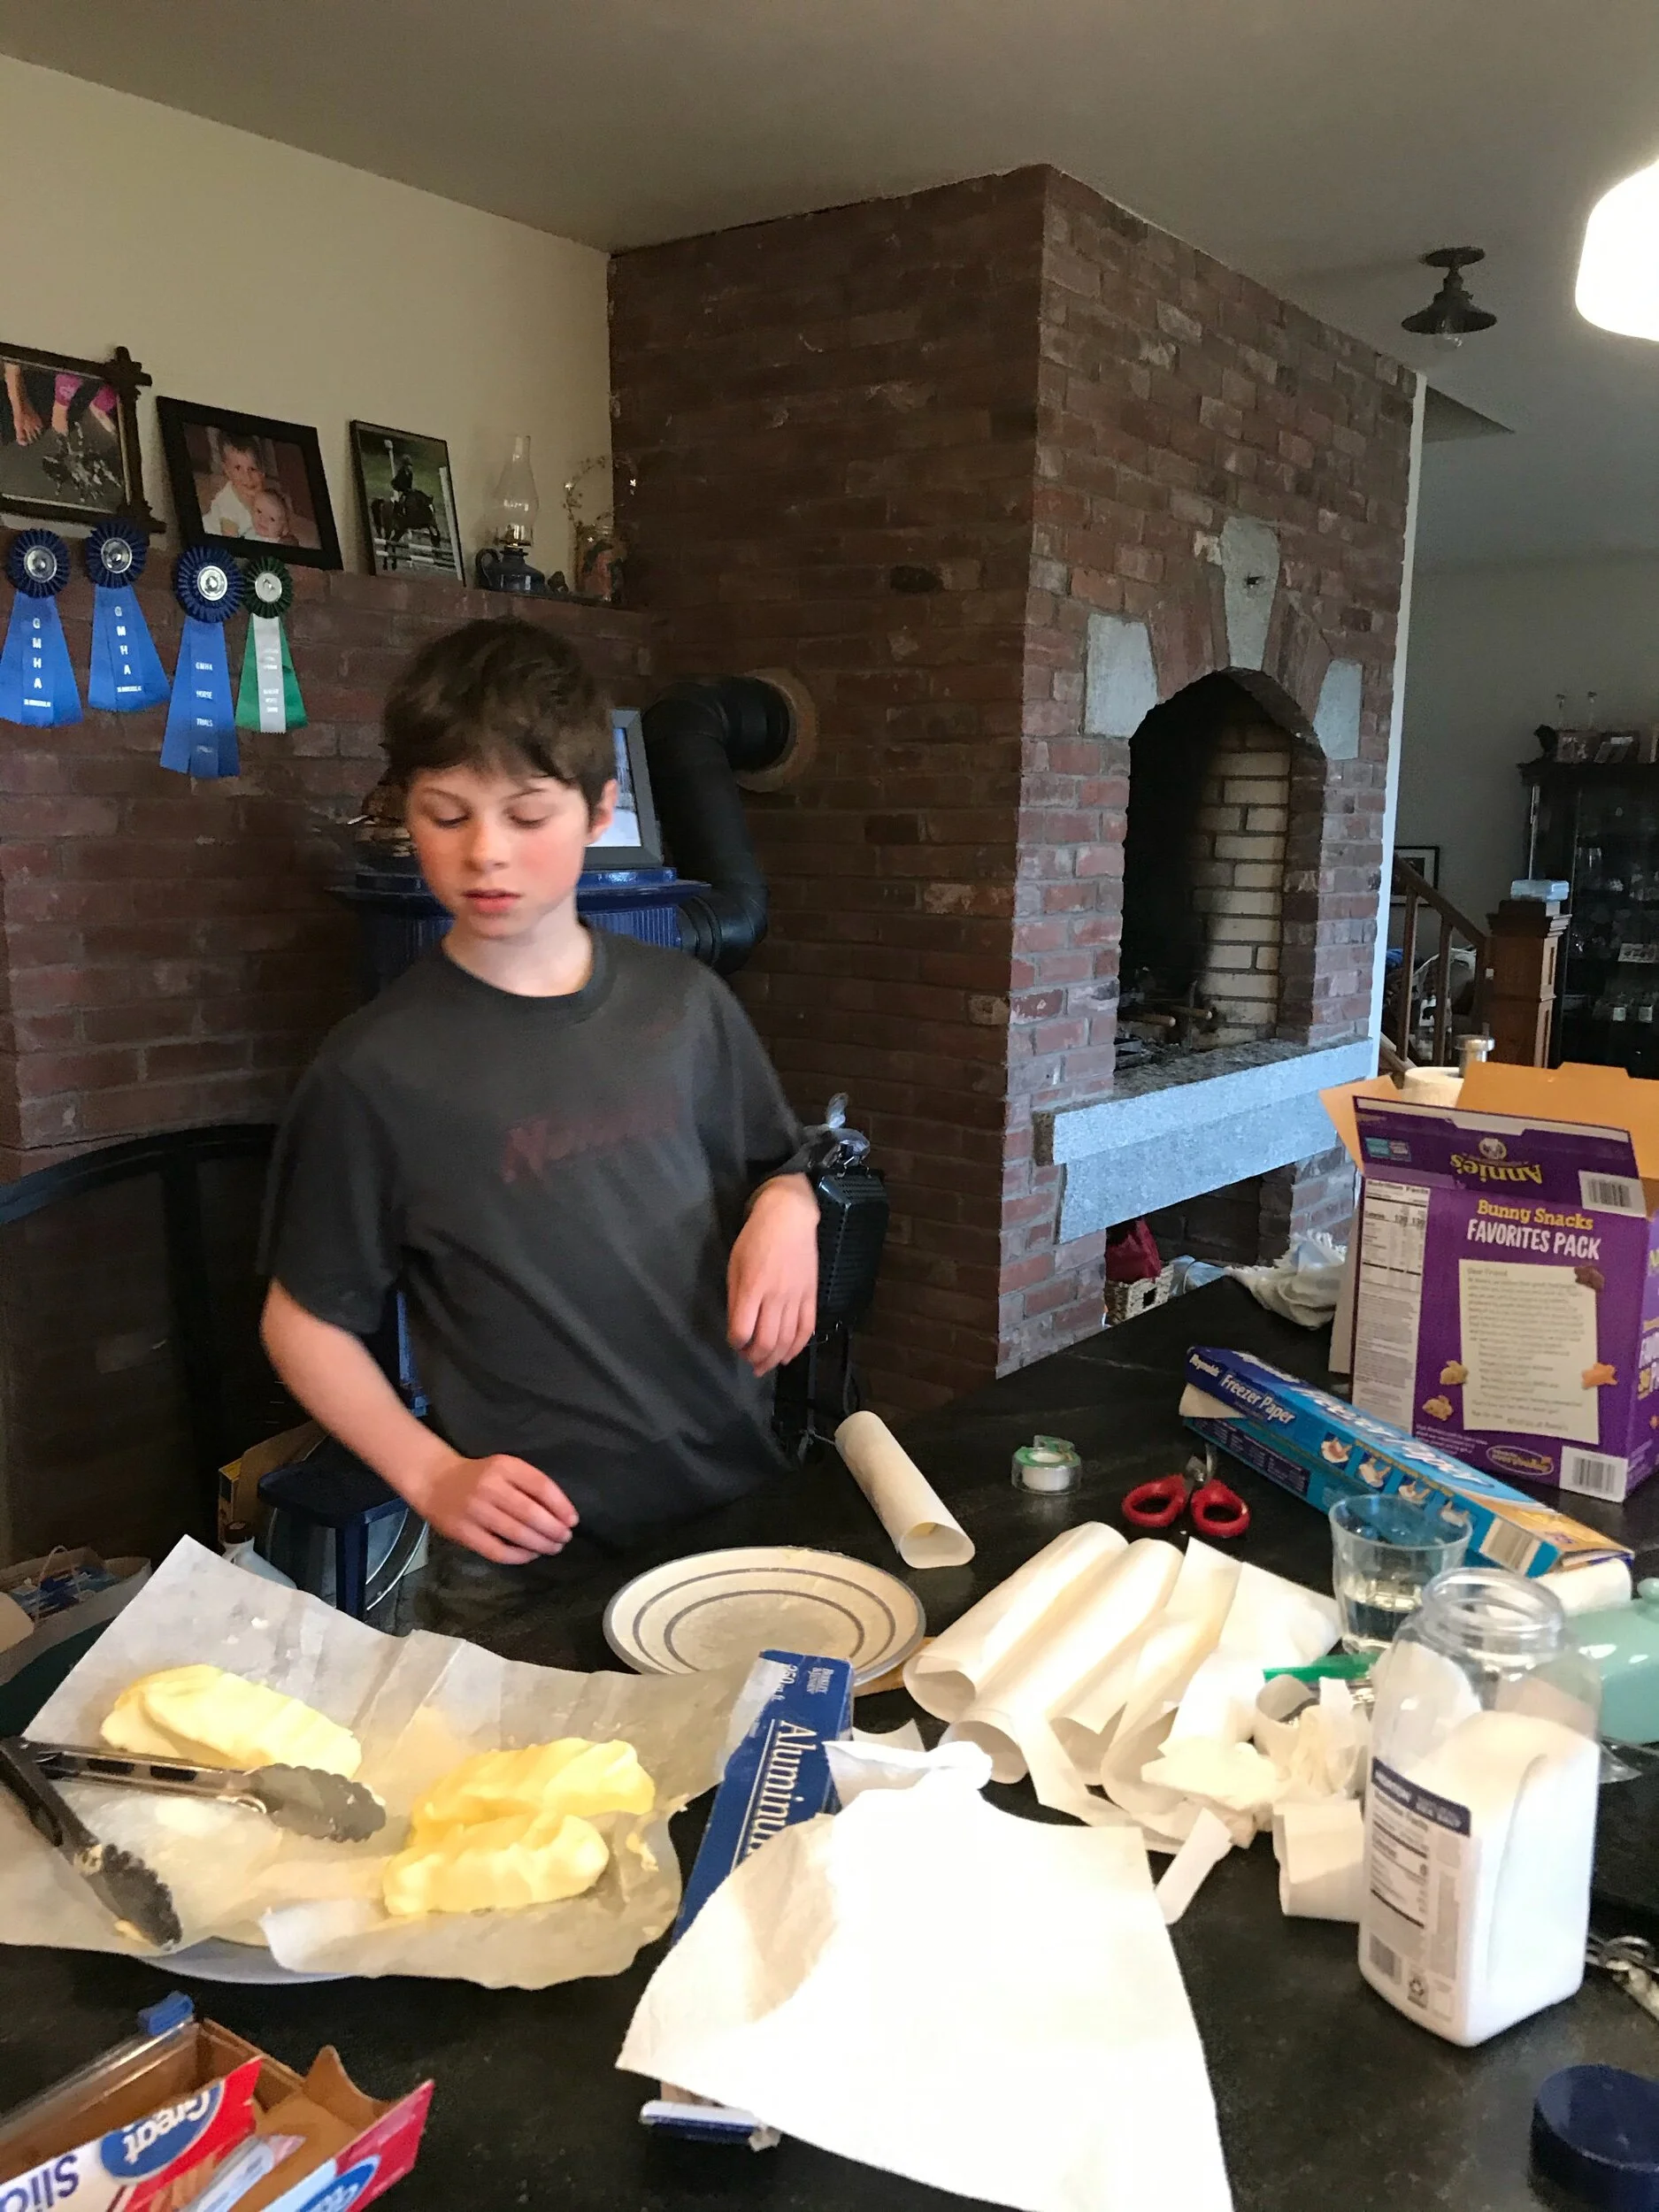
Ok then, I thought, I’ll just skip the next 2 steps, the sear and the rest and just get this thing off the bone. Then it will cool on the serving platter and stop cooking.“Ben, please come cut the meat” Silence….

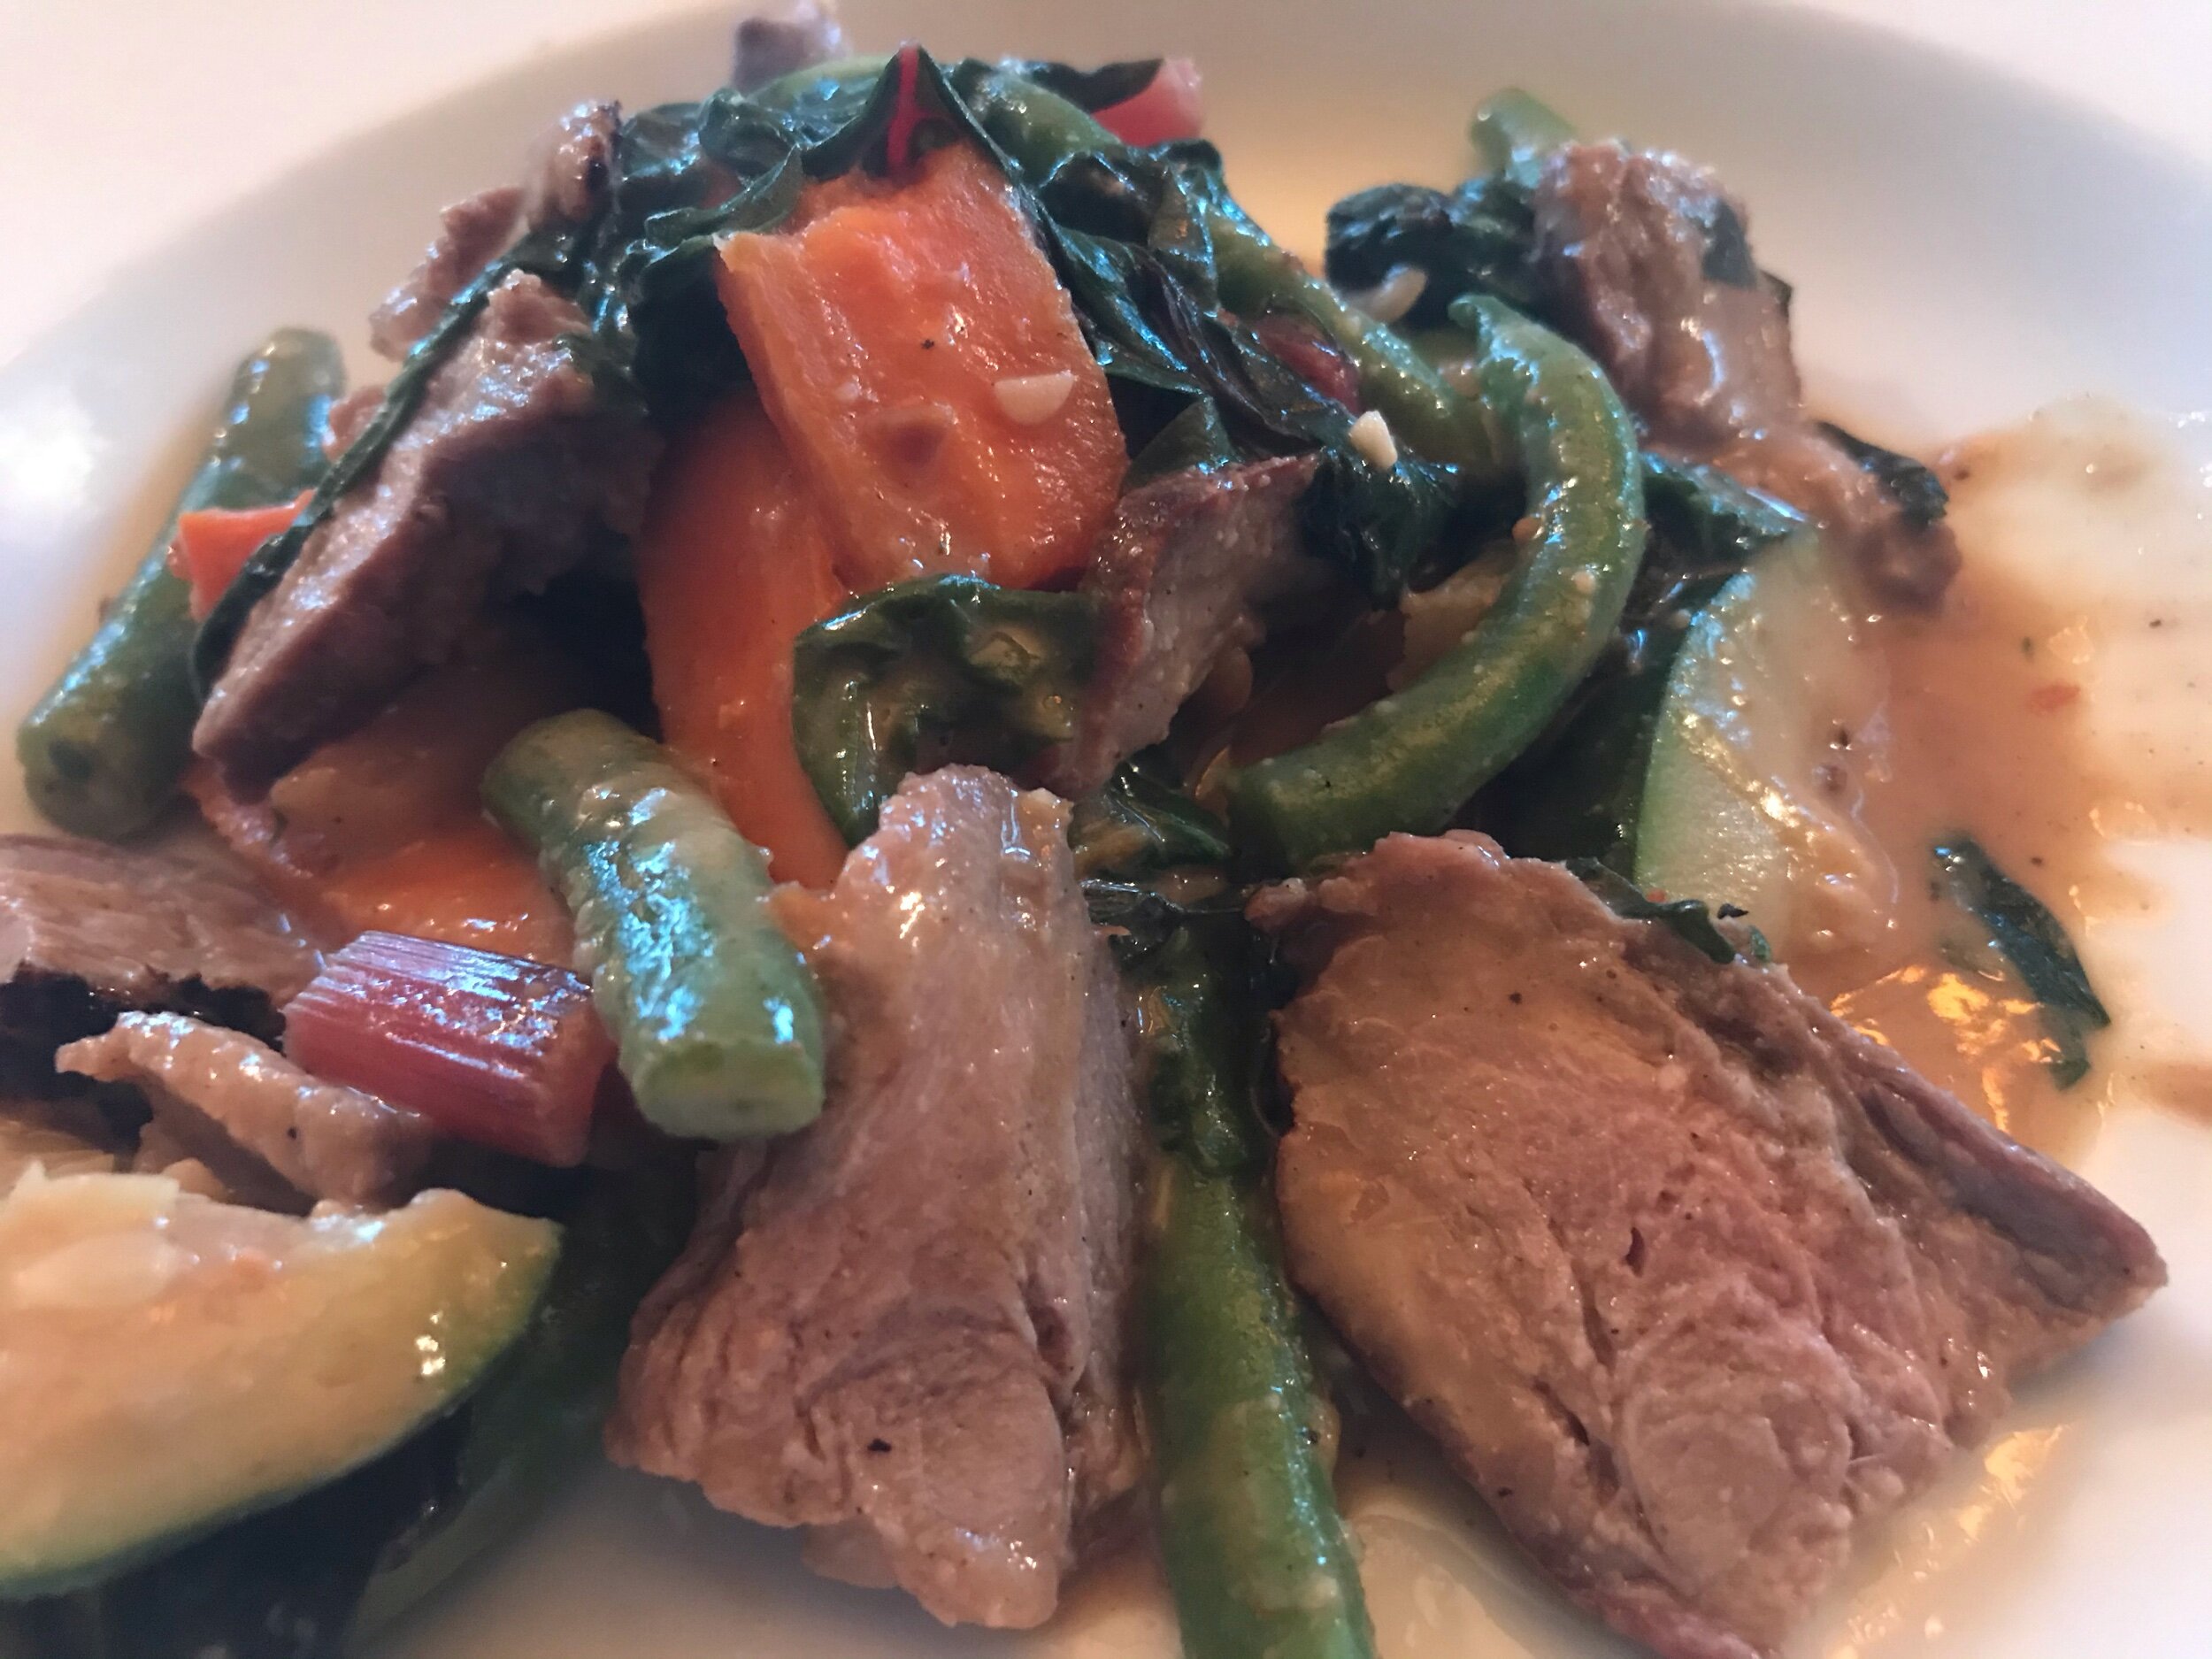
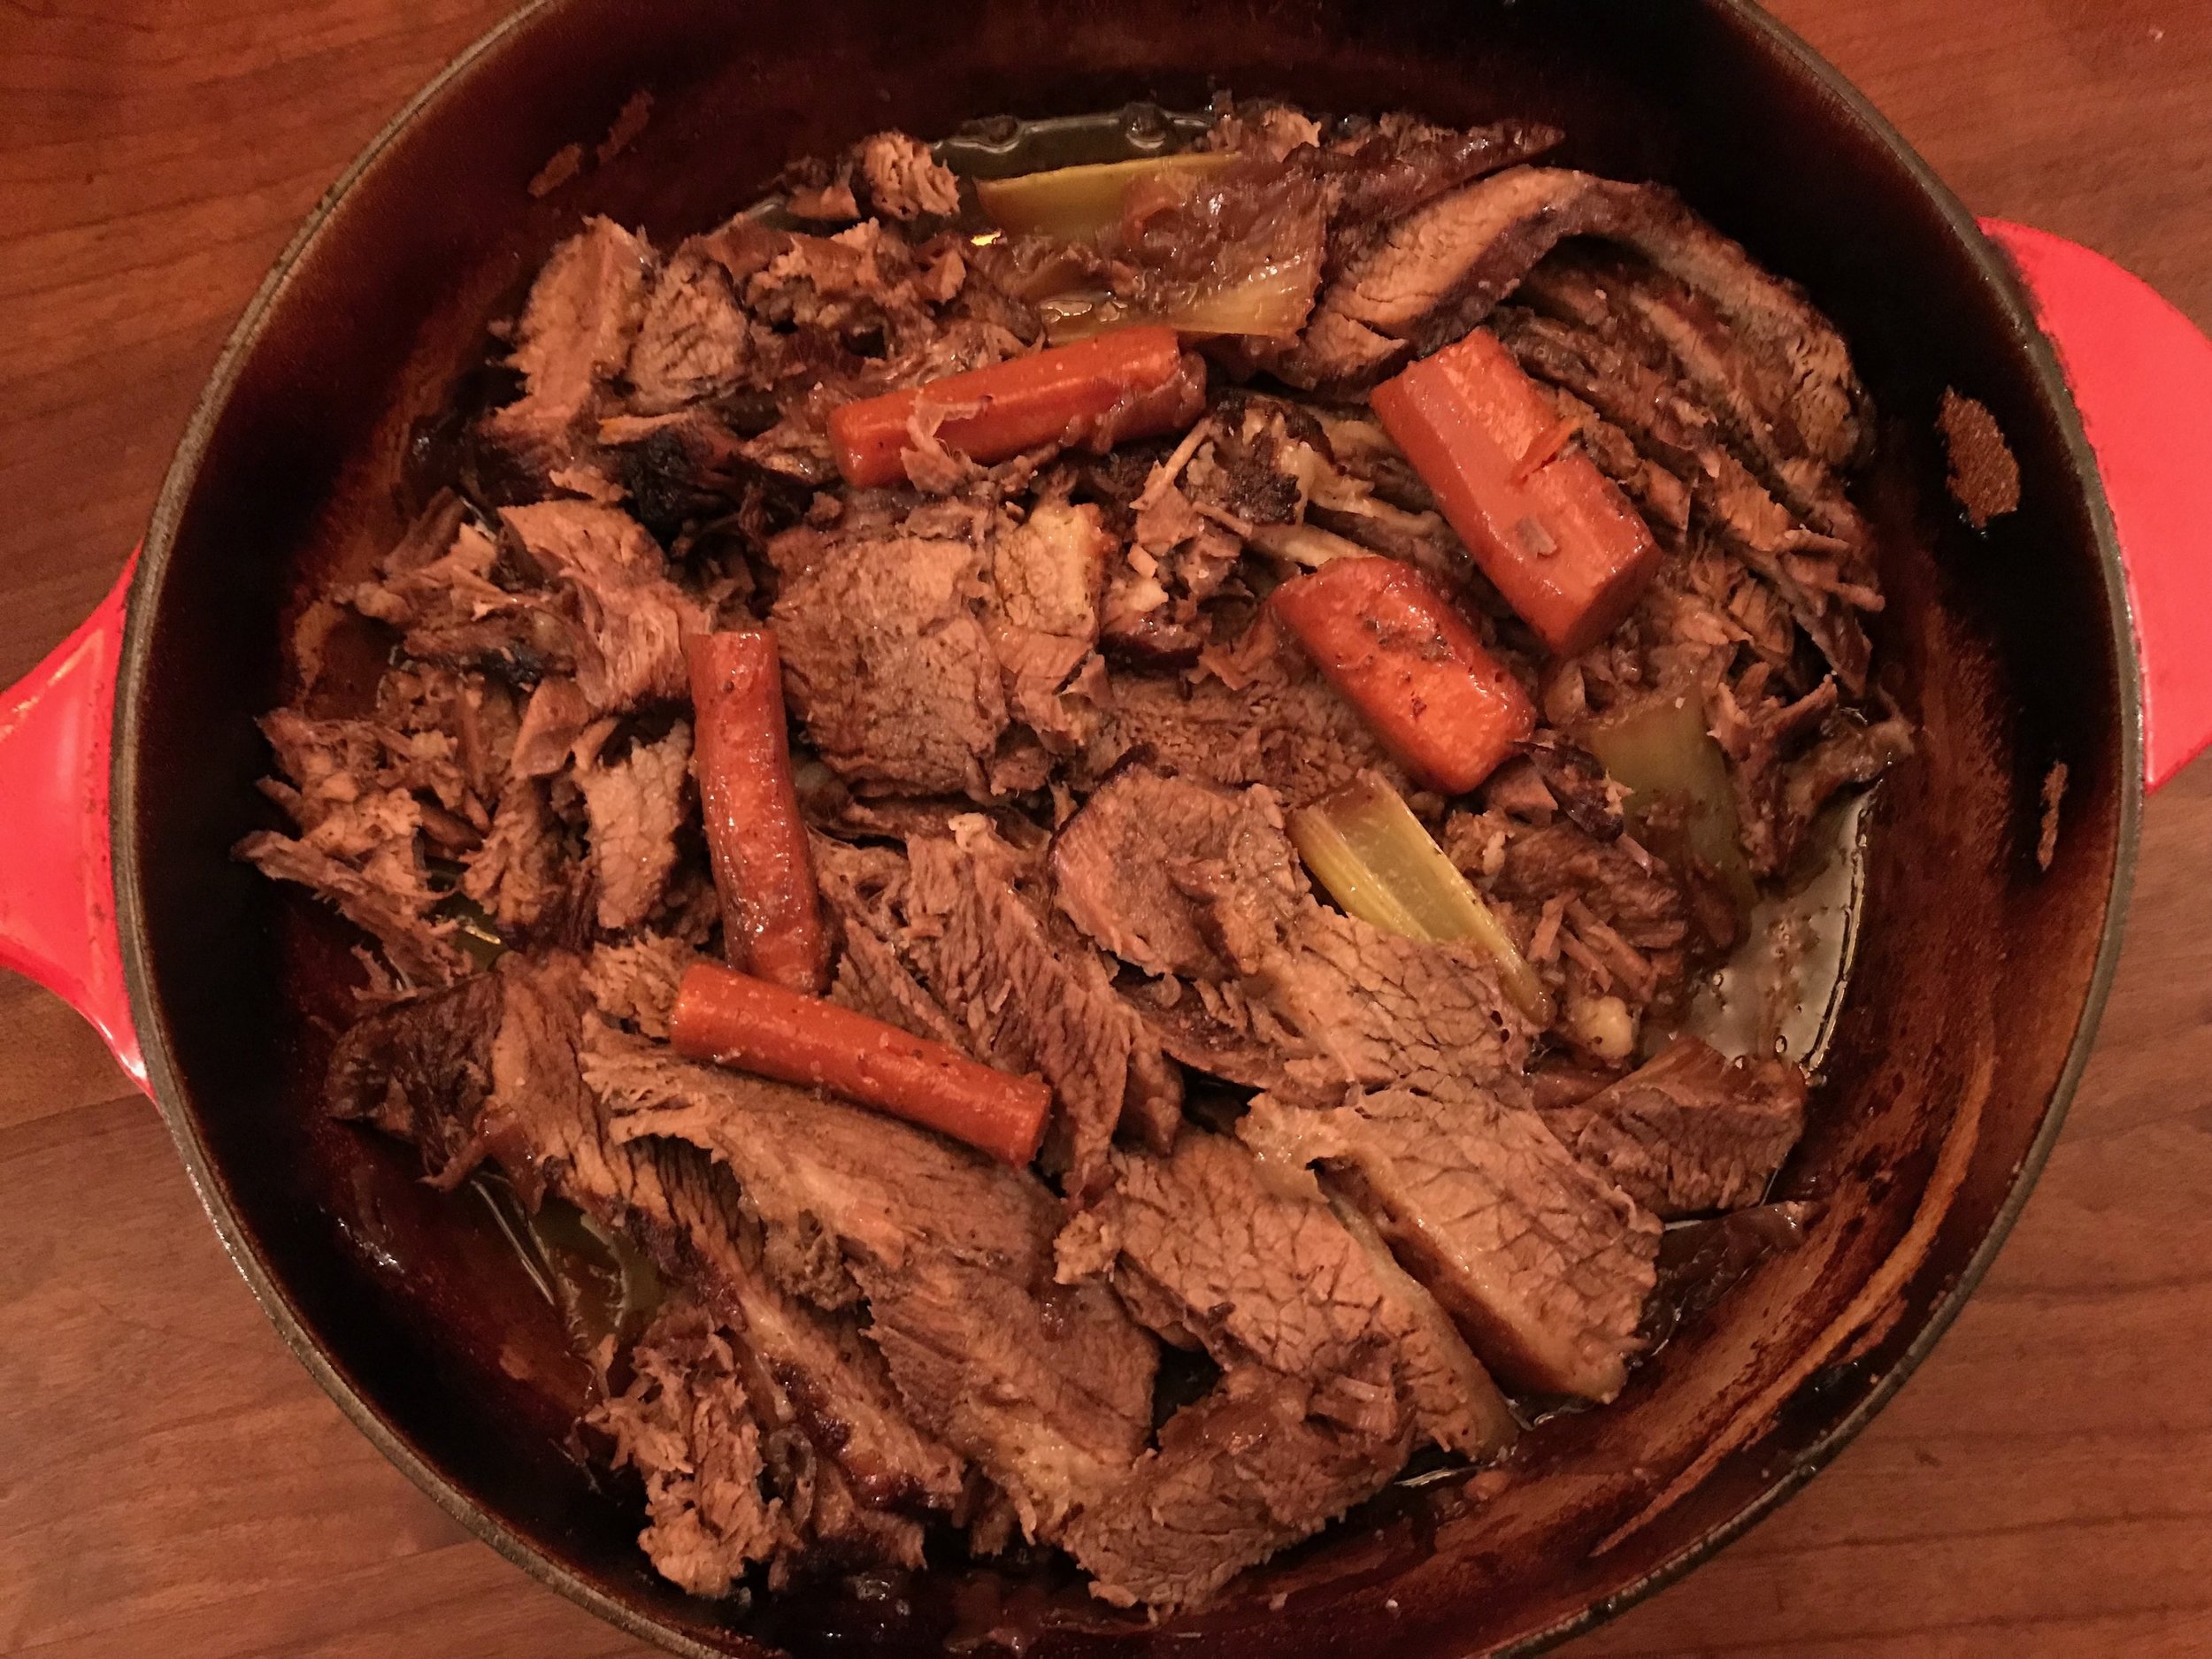
He was fast asleep and the boys were in their rooms.  So, with my trusty 6 year old helper by my side I wrestled the roast, cutting off the bones and slicing through the gorgeous Prime Rib steaks with gusto. I was going as fast as I could and throwing the pieces on the plates.  I was invigorated—each piece looked more gorgeous than the next. PHEW.

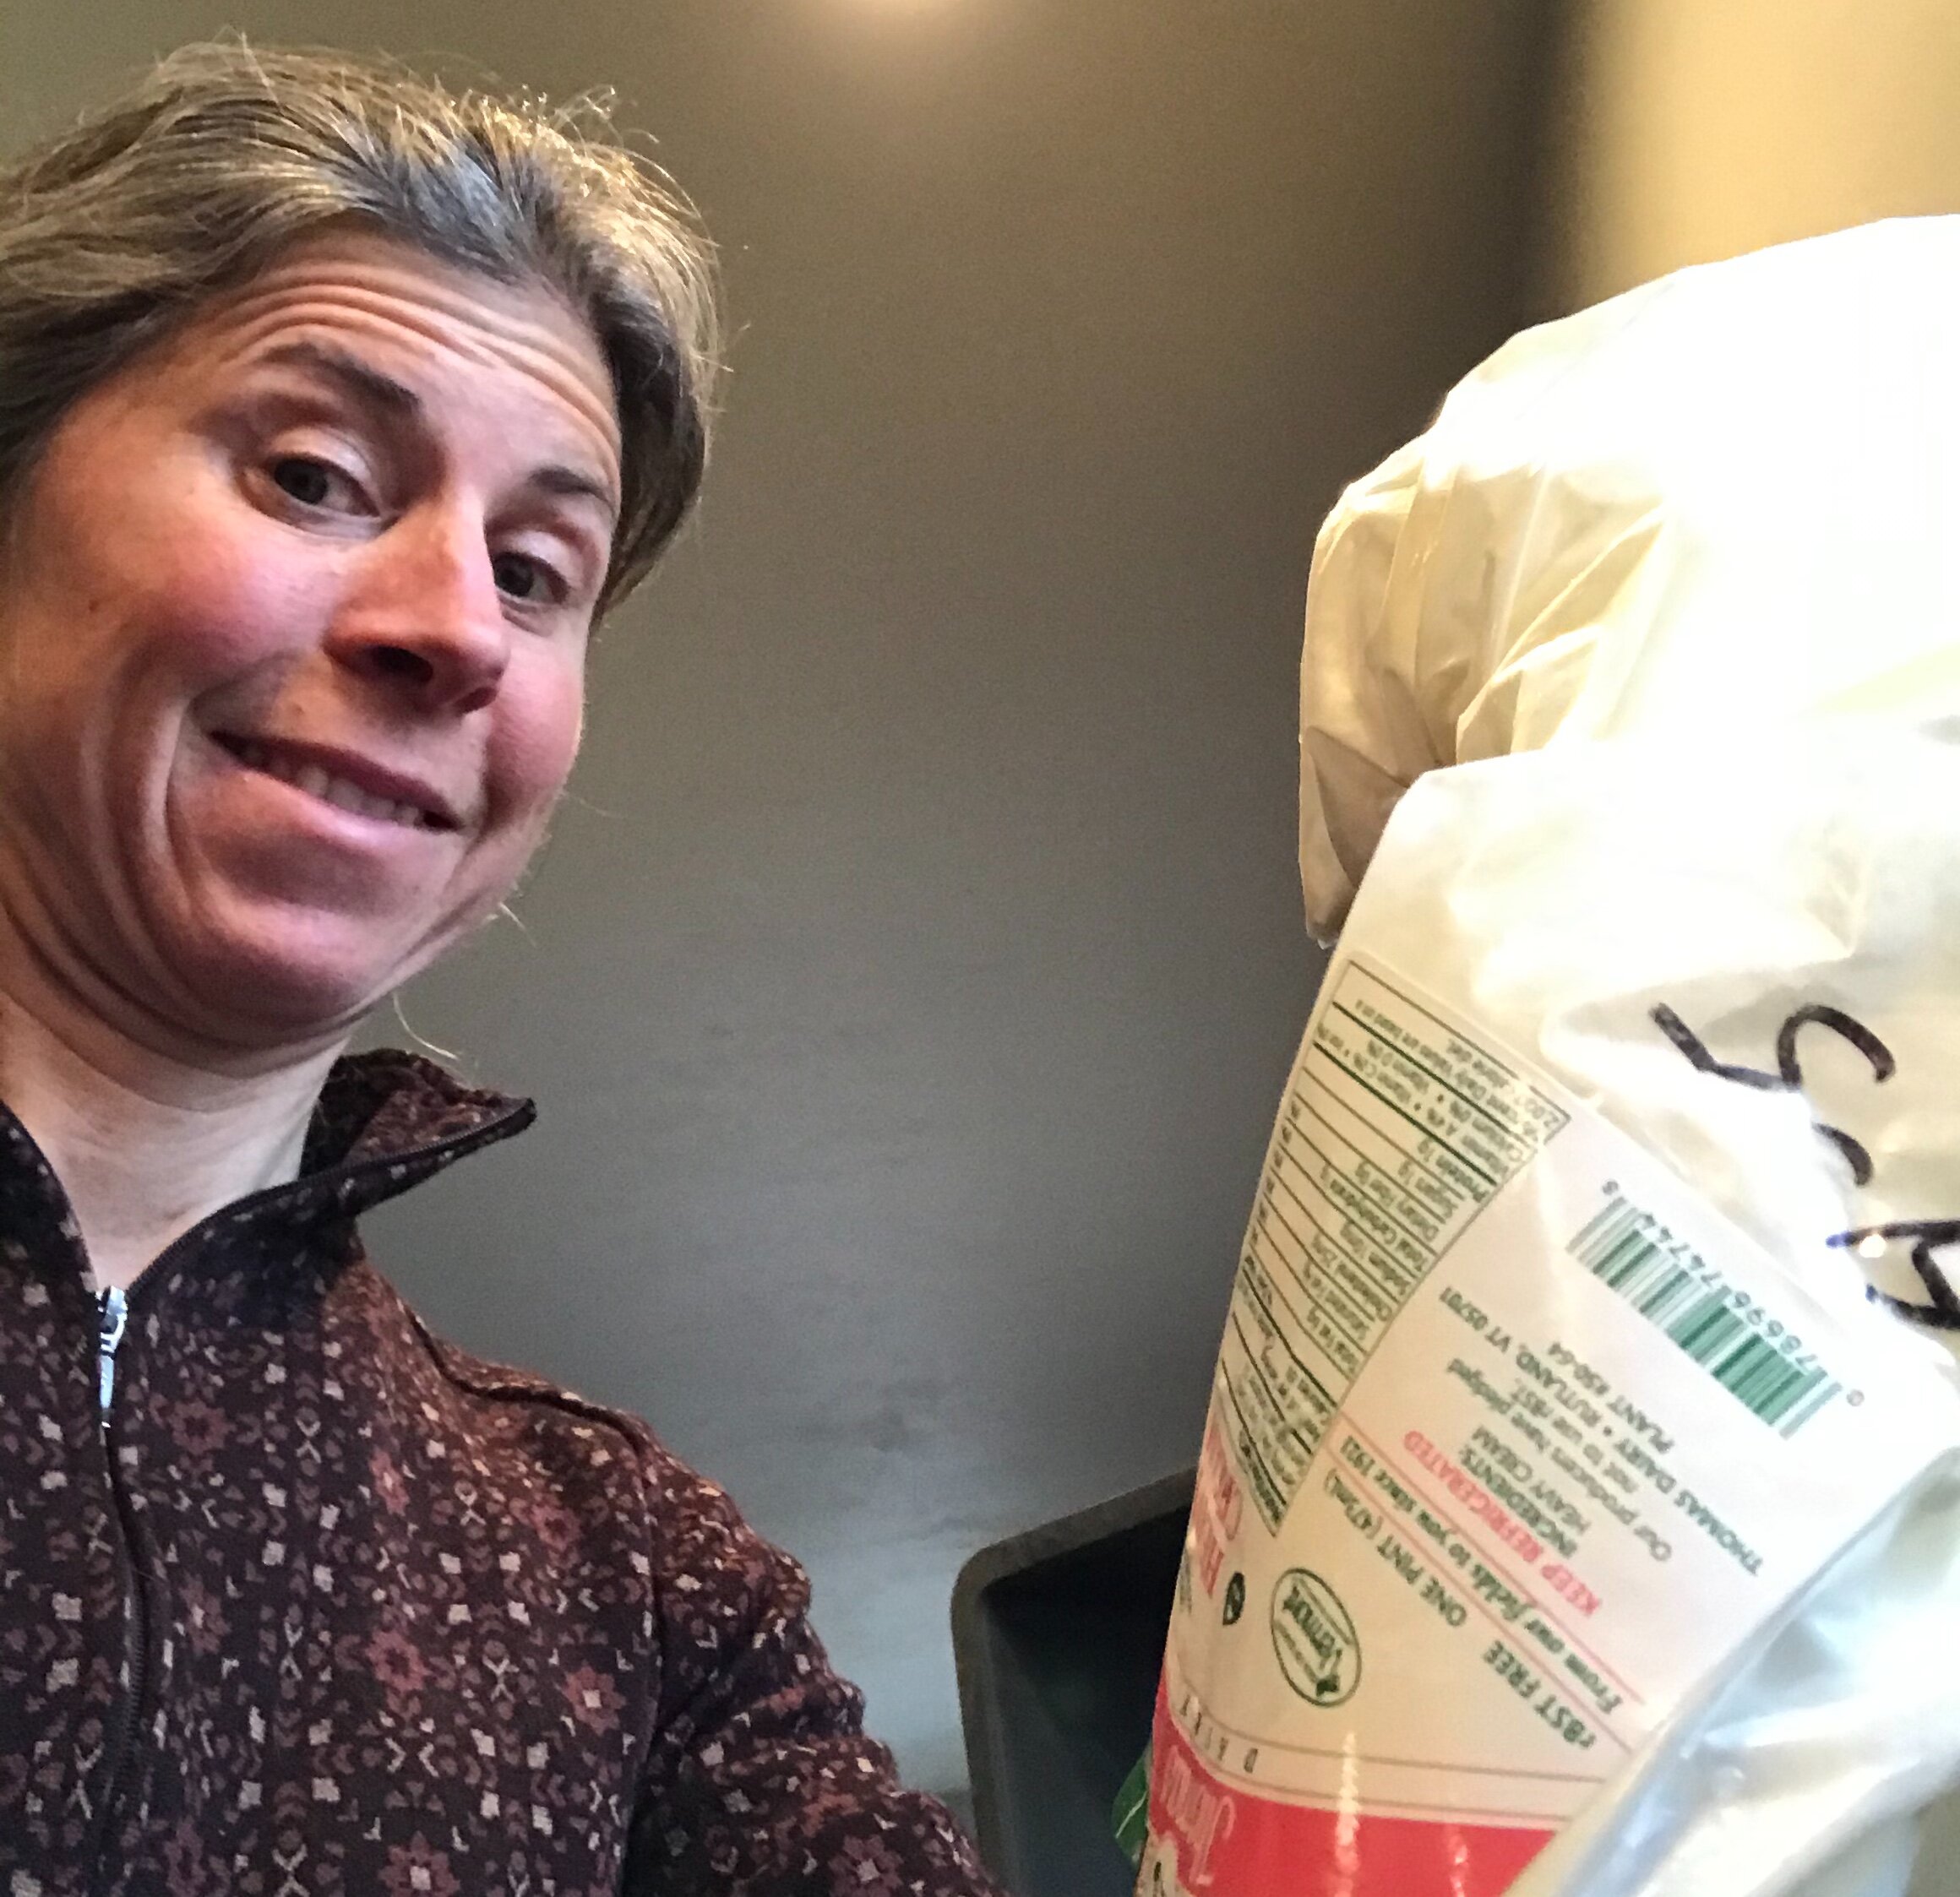
Eden caught an impromptu moment of me carving the infamous but amazing roast. Not usually my job—but I succeeded

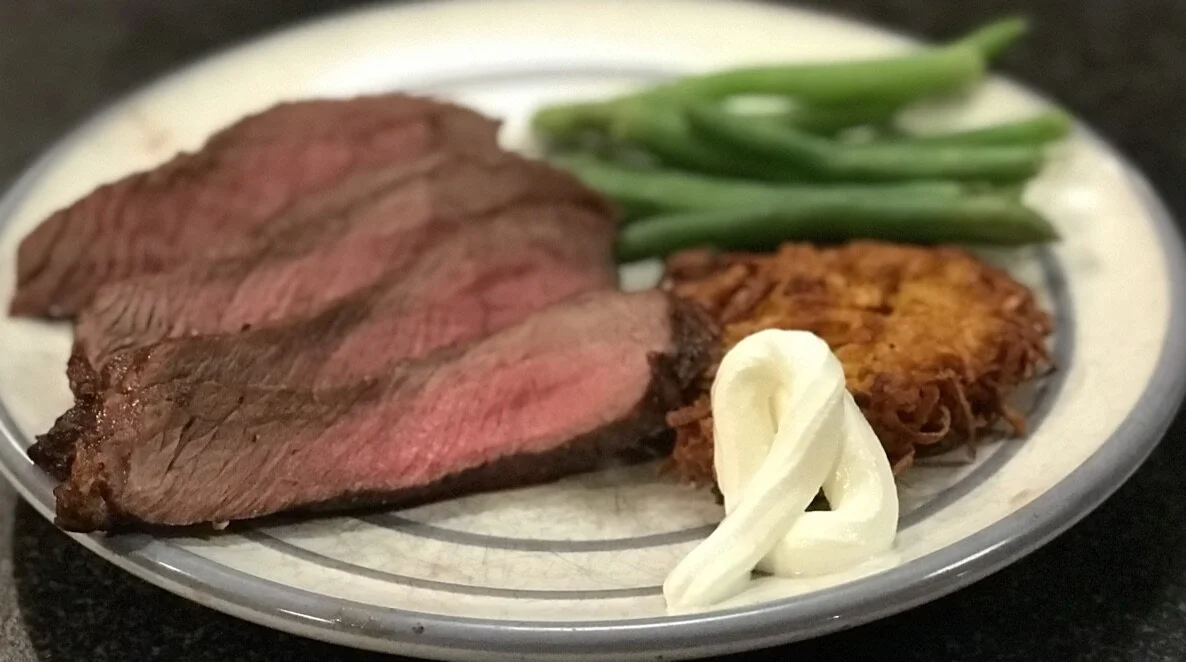
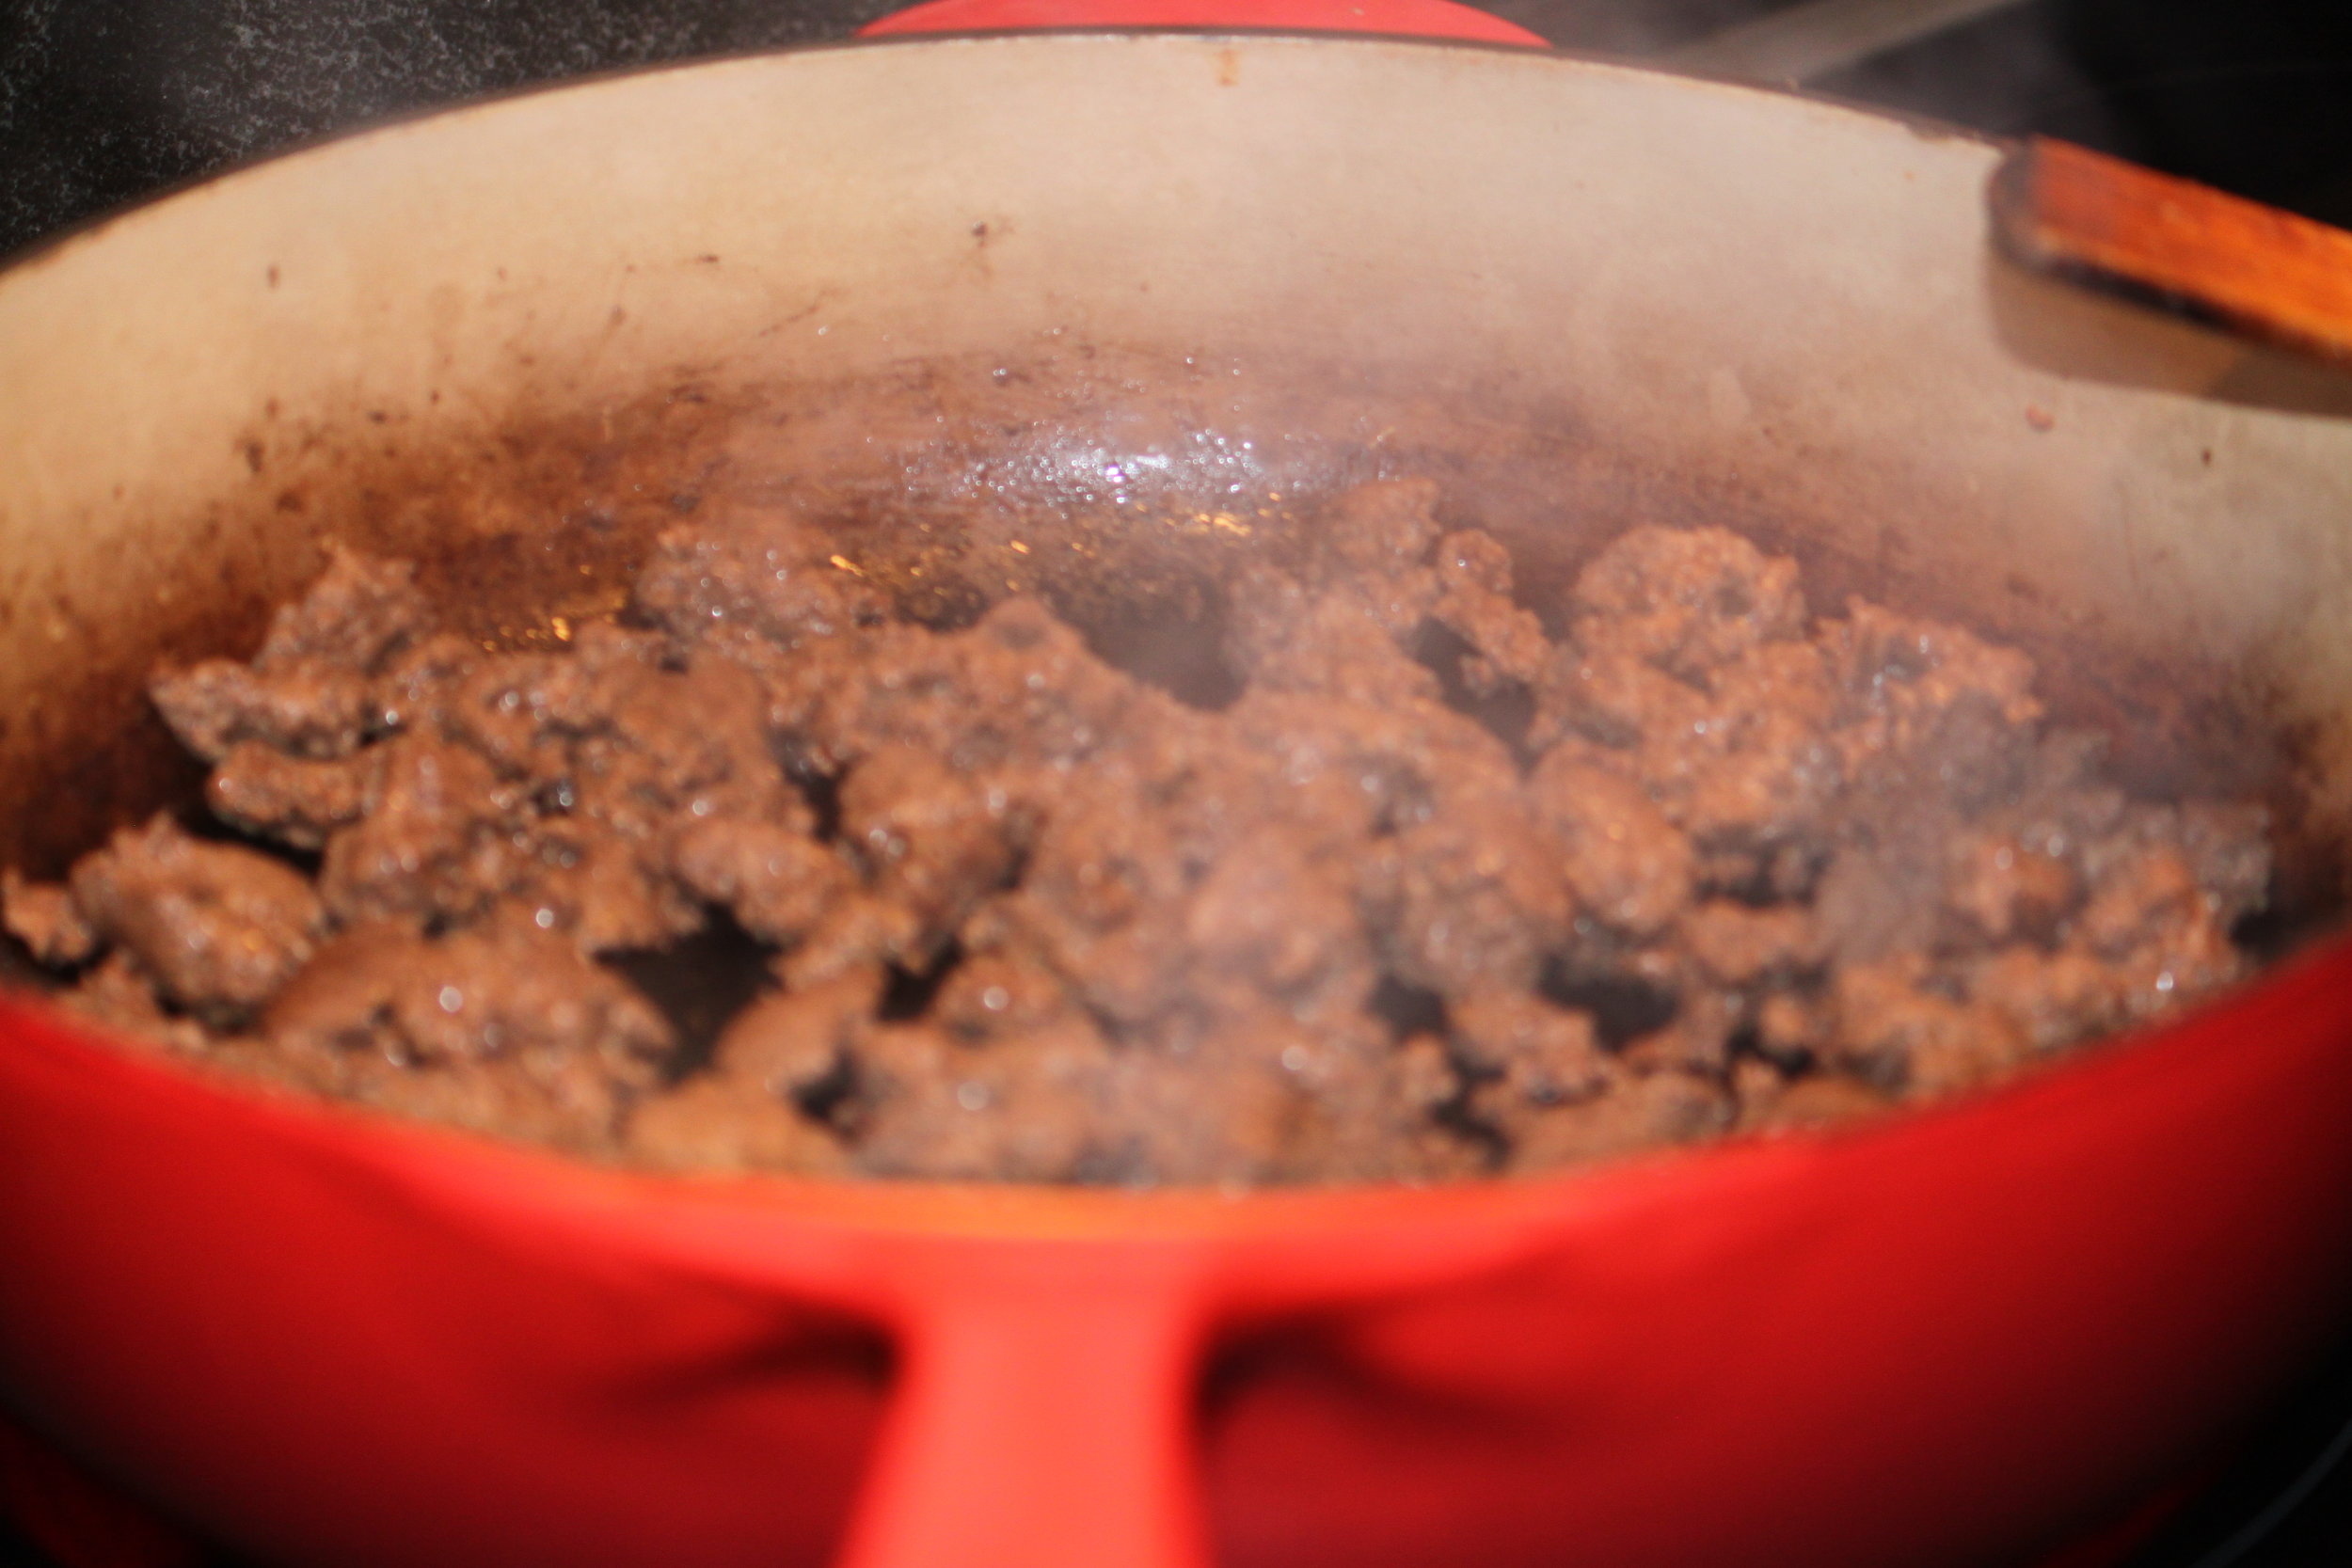
So, the sleepy Halley kids had their first Prime Rib and it was amazing!!  I made a red wine reduction sauce and added the drippings from the pan. Mashed potatoes and squash were perfect compliments.  There was a happy ending for the poorly cooked Rib ROAST.

But, I do have to say this experience gave me empathy for how people feel when I offer roasts or cuts they don’t usually cook for sale.  Ground beef customers usually say—“no thanks, I just don’t like cooking those" and I think to myself—“huh—how can that be. Just follow the directions in the recipe, it will be fine.”

But I will say, just take a chance, if you follow your instincts you can usually recover things—Just go with the flow and the flavor will shine through. We can all recover even the craziest evenings in the kitchen. 

Take care and be in touch if you have any cooking stories to share and I’ll put them in my next blog with your permission.

Cheers, Amy

Amy's TOP 4 Roast Cooking Tips

Chuck Roast after cooking from frozen in instant pot. Ready to be sliced or pulled.

Roasts are AMAZING. For the last 10 years we have sold out of steaks immediately and ground before that, lots of times the Halley's have Roasts on the menu for most of the year.

I think of them as a workhorse for every day cooking, more economical than a steak, easy to cook and easy to remake as left overs into all sorts of other dishes.

Most importantly roasts save time over the course of the week as you Cook once--Eat twice.

AND since you are not grilling over a hot flame, the meat is healthier—much healthier as frying animal fat releases free radicals.

Here are the things I have learned about cooking them through trial and error.

#1 Thawing is overrated. Cook times are longer but it this method saves tons of mental energy. Less planning, less space eaten up in your fridge thawing out. Be impulsive and put that big roast in the pot and go!

#2 Use an instant pot or oven to cook your frozen Roast.

In an instant pot a 4-5 lb frozen roasts takes 2-2.5 hours. What about the timing of the instant pot? Can I start it at lunch time to have it for dinner. YES. I do this ALL the time. My roasts sit in the instant pot for hours on warm after they are done, but I usually make instant pot roasts into pulled beef for bbq or carnitas. The slow release of the pressure makes the meat even more tender.


If you don’t have an instant pot, you can still cook the frozen roast!

Cook it in the oven! In 4 hours you can cook a 4-5 lb roast in the oven from FROZEN. For a detailed description of how to cook from frozen in the oven--which I have done also with good results check out this link How to Cook A Frozen Roast.

You can even cook fancy Rib Roasts in from frozen in the oven--check this video out

#3 Make fresh veggies to go with your roast. The crisp beans or broccoli go super well with roasted meat. One pot meals from the oven or instant pot just don’t cut it if you like the taste and feel of fresh food.

#4 Be brave and make a quick sauce from the cooking liquid. This is the step that makes your cooking rise to the next level and it’s so easy—Really, it took me a few years, but once I started doing this—my opinion of roasts changed completely. I’ll be posting a video of my version of sauce making soon.

Well friends, that’s it for now. My take on cooking roasts. It is truly easy, healthy and efficient to use this cut of meat and worth the cost.

GO to our web store to purchase or reserve SWF roasts. Until next time, be well and enjoy life and thanks for being here with us, Amy

Bale Wrapping Bro's

Haying was a big deal this year on Second Wind Farm.  For the past 9 years, since we started the farm we have been buying hay from another farmer.

Ben stepped out on a limb, bought used equipment and went for it!  We always wanted the control over the timing for our management plans, so we could fertilize, and  put the hay down when we want so that it dovetailed with our grazing.

It was a good decision, I still can’t believe we did it. It has been so rewarding so far. The last few days in this nasty yucky season we call fall, Ben and Levi keep coming in from feeding bales now and tell me how beautiful the hay is, and the satisfaction they feel that we produced it off of this farm!! It’s so special.

Beyond all the satisfaction of producing the hay,  I am most proud we all have worked together with this. How it strengthened our bond and identity as SWF farm workers.

Everyone knows haying is work—but when until you actually  do it, from fertilizer to storage you don’t have a clue!! 

Day one of 2021 Haying Ben popped the bales out of the back of the loud and clanky baler and they were littered all over the field. He told me it was my job to collect them I was the “bale trailer driver”

—-WHAAT…I thought when I saw the equipment and the steepness of the field, etc. Oh gosh, how will this work? But it did sure enough. 

Ben consolidated the bales to a couple of piles, I then had to drive this bulky weird trailer up a steep driveway—where I couldn’t see over the hood of the truck.  

Once I could see over the hood again I was to maneuver the trailer close to the piles—which was harder then it looked!  Back forward, over circle.  Oh man, the patience Ben must have had to have with my trailer backing.

Then, Ben used the bale grabbers on the tractor to pick up bales and place them on the trailer—then I was off again, the trailer driver—with the loaded trailer funky trailer to the place where we were wrapping and storing them over by our run in shed—Ben,  the tractor man followed me, unloaded the bales and then wrapped and stacked them!! 

Who would have known there were all those steps.  I think I originally thought the baler popped out these big bales—-wrapped and they somehow grew legs and transported themselves to big stacks!!

But wait, I forgot to tell you about my sappy haying moment of Day 1 of haying. My favorite part of the first day I ever hayed on SWF was when I arrived at the field for duty with the trailer.  

I fell out of the truck in a heap and was overtaken by the sweet smell of the hay.  I opened the truck doors and the kids and dogs hopped out and proceeded to frolic and jump all over the bales!!! Of course I took pictures.

Picturesque.

The second time I helped out.  I was a “bale wrapper operator”, suddenly I found my self in a complete sweat in the cab of the non air-conditioned Case tractor in the blazing sun at 95 degree temps for 4 hours.  It was so hot the wrap kept melting on us!!

The kids were all in camps—Levi usually did this job—and so Ben and I took over one hot June afternoon.

Gosh—I’ve never been so hot, or made so many mistakes. it was so cool though to see work being done right in front of me.  The bale wrapper is amazing, it makes all sorts of noises and spins the bales so that the wrap is pulled out and placed around the bales, very cool.

The over riding memory for me however, beyond my own amazement of my “JOBS” was how the boys—Levi and Reno could and did perform!

Levi was always helping every step of the way, from working on the equipment, driving the equipment—when appropriate—and wrapping, transporting—every part.  Now Reno, well at 11 yrs old…. He wasn’t quite ready—-until the day Ben taught him to wrap bales.  It was like a miracle. 

He got it immediately. When Ben came home and told me he could do it himself I didn’t really believe it.  I had that job a week ago and I thought it was pretty involved….”What, I said, Reno can do it?”  “Yep" Ben said.  “He sat on my lap and then figured it all out from watching me.” 
Reno’s new skills and independence with those skills would come to the test in the not so distant future. 

There was a haying day when Ben—the man in charge was injured.  He’s ok, don’t worry. 

He left the farm in a hurry, gave me a wave and a cryptic report of the goings on as he headed to get some medical care and said, “the boys are finishing the hay tonight, go check on them, farmer Kent will be there.”

—-WWWaat I thought, OK, I thought, Kent, Levi and I will be doing the work— and Reno will watch Eden. That will work.

So, Eden and I packed our snacks and went off, a pit in my belly as I worried about everything. 

Well, what I found when I arrived in the hay filed was a completely professional scene. 

This is the part where the Young Halley boys really worked together.

Reno was running the wrapper which means, like I did, he was in the tractor cab. The tractor is stationary in neutral running a special attachment, you’re not driving the tractor, but moving 2 levers in the right timing, in the right direction and watching the number of wraps you have put on until you reach the magic number. Then you have to pop another lever to remove the bale from the wrapper.

 It’s not all that easy—Levi in the skid steer, picking up and moving the finished bales to the wrapper and then stacking them up.  Which takes a lot of concentration and finess. 


 Levi and Reno stepped right up and wrapped and stacked 25 bales by themselves, hot and starving from a long day of work. No questions asked, no help needed. I am still in shock.  

Now of course they had expert instruction and we did have another trained adult on hand to take over if needed— Eden, Casey and I just watched, me smiling ear to ear.  

The performance was amazing.  And to think our cattle will be munching that hay that grew here, was harvested here—by us and baled and wrapped by 2 brothers.  Pretty great!

That’s it for this blog.  Take care and enjoy the holiday season. Toodles, Amy

Pozole Rojo SWF Style

Amy’s Cinco de Mayo Cooking Adventure.

This recipe was so much fun. The dimensions in the sauce were rewarding! Don’t hesitate to get some dried chiles. Hint—I can never remember to look in a store when I’m there so I broke down and ordered them online—from Texas!!

It was a cold rainy day—so I have to admit this recipe was not hard to choose. Mexican Stew is what I searched online. Finding many, many great looking recipes I settled on this Pozole Rojo recipe.

So, I took a frozen SWF pork shoulder directly out of the freezer without thawing it, took off the wrapper and popped it into the instant pot for an hour and a half with some water and garlic.

Then I cleaned out the seeds and rehydrated the 3 types of peppers, heated them with onion, garlic, cumin and sesame seeds and made a pepper sauce with my immersion blender.

Pulled the pork from the instant pot, pulled and cut it from the bone, strained the broth and mixed in the pepper sauce.

What a delight! A stew with a deep subtle heat that warms your belly! I have to note and anyone well versed in Mexican cuisine would probably notice right away my version of Pozole Rojo is missing Hominy which could be important---but I didn't have any on hand---oh well, since this was a last minute brainstorm cooking session I sacrificed total authenticity!

Let me know if you have a favorite chicken recipe using dried chiles. My next attempt at using them is going to be Red Chicken Enchiladas. I’ve been in love with chicken Mole for years, but Adobo I haven’t tried.

Until Next Time. Happy Cooking. Amy


The Skinny on Choosing Your SWF Beef Subscription

Considering a SWF Beef subscription but not sure what that means or if it will work for you?

Let me clarify.

If you sign up for a subscription you will be getting an installment of SWF Beef 4 times a year in other words, every 3 months or 12 weeks.

You will choose whether you want to pick it up or have it delivered, you will choose how and when you pay. Yearly or per installment when you check out.

Here are some scenarios—let them help you decide where you fit in, really you can’t go wrong…surely there will be some flexibility if it isn’t working out for you we can cancel and refund if you paid ahead.

Are you someone who wants just a little beef stash? Are you the only beef eater in your home?

10 lb ground bundle—you’ll have 10 lbs of ground beef to use over 12 weeks. Good for couples or single beef eaters.

Are you a family of 4 with average size appetites and only cook ground meat?

25 lb ground-same—25 lbs ground beef. Good for families who generally use, 2 lbs ground beef per week or entertain. Or families who split orders with friends or loved ones.

Are you an adventurous couple who entertains occasionally and likes to cook once and eat twice as I do Or family of 4 with lite to moderate appetites? Try one of these bundles.

Economy mixed 20 lb beef bundle. (avg 11 meals for 2 beef eaters over 12 weeks or 4 light beef eaters or families who want beef only a couple times per month)

  • 8 lbs of ground beef (4-8 meals, depending if you use 1 or 2 pkgs at at time)

  • flat iron Steak (1 meal)

  • 1-2 lbs Short Ribs, 2 Sirloin Steaks (3 meals)

  • 1 Tri Tip Steak (1 meal)

  • 1 Roast. 9.50/lb (2 meals with left overs)

Are you a true steak lover that entertains, a family of 4 who likes to grill?

Premium mixed 20 lb beef bundle (avg 11 meals for 2 beef eaters over 12 weeks)

  • 8 lbs of ground beef (4-8 meals)

  • 4 Ribeye Steaks (2 steak meals)

  • 4 T-Bone or Porterhouse Steaks (2 steak meals)

  • 2 Tenderloin Fillets. 10.50 lb (1 steak meal)

    Still not convinced you can use up a subscription. Keep reading…

    ….Say you have one beef meal per week. One week, you have a 3 lb chuck roast, next week 1-2 lb of ground beef, next week steaks.....It will be all gone!

    …..Say you don't want to eat beef every week---then have friends over and use 3 of your 4 ground beef packages for burgers on the grill or cook up all your steaks for a party. It's going to go quick, especially if you share.

    ….Say you don’t use up all of your beef and have another subscription on it’s way? You could skip…or you could hold on to it and share or entertain.

    Remember, this beef is flash frozen when it is fresh. Vacuum sealed and keeps in a freezer for 12+ months with no degradation. So, if you have overlap between fufillments, no problem, it won’t go bad. Just means you need to share or entertain.

LMK if you have questions. Thanks for being here. Cheers, Amy

10 Minute Meal Planning

Meal Planning, while there may be a few who enjoy it, most of us find it daunting.  I get it!

I have to admit, I used to procrastinate with planning meals to the point that I would end up going to the grocery store when the fridge was empty with no list. 

Honestly, without a meal plan and impulse shopping I did actually make some super meals. 

But, if I look back at the time I spent thinking about it, again and again and again through out the week. Not having a plan was a time suck and I can only say that because, I lived it!

The trick is to pick out your proteins first, and decide what method of cooking you use as you pull them out of the freezer or buy them.  

I do this on Sunday afternoon and grocery shop Monday.  So, I open my mind for 10 min to think about the week, our mood, the season and take out 4 packages of meat and fish. I put them on trays in the top shelf of my fridge.

Then, whenever I do my scheduling for the week I commit to what days each type of protein will be cooked.

Then I choose sides and add them to my shopping list on my phone.  If I am looking for a new recipe, I’ll read the recipe before Monday's shopping run and add them to my list in my phone.

To Review-my 3 step process

  1. Choose my proteins and cooking method as I get them out of the Freezer and place them in the refrigerator on trays (2 min)

  2. Place proteins on the weekly calendar (2 min)

  3. Choose the sides and review recipes if necessary and add ingredients to shopping list (6 min)

It gives you time to look forward to cooking(instead of feeling like you don’t want to cook, because you don’t actually feel like cooking)

You can binge cook or prep, to save time and messes in the kitchen if you know what you are cooking.

I find that meal planning secures even more time savings because I can cook once and eat twice by planning ahead and skip cooking from scratch 2-3x/week.

Easy leftover re makes are totally awesome. 

Thanks for being here and please share your tricks with me too!! I love learning. Cheers, Amy


Beef for a YEAR?

Hey Friends,

This is just a short post related to the fact that I would love to convince more of our current customers and future customers buy in bulk from us at SWF. I am hoping to convince some of you that might be on the fence that you really can use up a 25, 50 or 100 lbs of beef in a year.

For us, as small producers, bulk sales make sense. I am betting you understand why. Just think of the cost of a walk in freezer, a freezer truck, a person to do inventory and fill orders…..none of that works financially for small producers. So we offer something different. Bulk sales, which turns out, is more convenient for everyone—you too. Try it and you’ll see!

I have been doing this for 15 years now. Stocking up on proteins, beef, lamb, pork, chicken, garden veggies if I have a garden. It works so well for me. I love having a stocked freezer. Makes meal planning and shopping so easy.

So much security and simplicity here.

So how do I think about our beef consumption? Here is my reasoning and formula. We have 5 Halley mouths to feed. 2 adults, 2 almost adult eaters and one 1/2 eater.  We eat a variety of meats and fish and lots of veggies and cook at home for almost all our meals.  

“Cook Once-Eat Twice” is my slogan to save time and money. So don’t be shocked when you see amounts I cook, if it seems like double what you cook—that’s why.

I know from last year that almost every week we manage to use 2 lbs of ground beef. So for the year that’s (52 weeks x2 lbs)108 lbs ground beef. Let’s round to 100 lbs ground beef in case we skip a couple of burger or pasta meat sauce nights.

We prefer to have steak every other week. I generally cook 2 packages of steaks usually 2-3 lbs worth depending on the steak boneless or bone in so (26 weeks x2.5 lbs) 65 lbs of steaks for the year.

Roasts: Ben loves chuck roast, he could have it once a month if we had it—-but there are not enough chuck roasts to do that.  So we substitute with short ribs, brisket etc.  Say once a month a roast they are 3-4 lbs so (12 weeks x3 lbs) or 36 lbs of roasts.

So, we will use around 108 lbs of ground beef and around 101 lbs of roasts and steaks. 209 lbs of beef total.

Now I’ll look at what we offer at SWF for packages.  This fits pretty closely with the bulk value package with 200 lbs. That would be four 12x12 boxes of beef for the year. 

That’s my calculation. Now yours is going to look different depending on preferences and lifestyle. But give it a whirl! You might be surprised at the results. I can’t believe how much food we go through, not just beef, but everything. Growing kids….hungry adults.

Still wondering where you fit in? Need a recommendation for your situation? Here’s how I look at it.

If you have a family of four beef eaters but don’t like leftovers or might like to eat out regularly.  Cut the Halley’s order in half and order the family of 4’s favorite(50 lbs ground, 50 lbs steak and roast).2, 12x12 boxes

If you have 2 or 3 beef eaters order the Couple's favorite mixed bundle(25 lb ground, 25 lb steaks and roasts). 1, 12x12 box

If you want ground beef only 50 lb ground bundle or 2 of the 50 lb if you are a larger family who entertains in the summer. 

Good luck with the calculations. Remember you can’t go wrong. If you have too much. Just share!!

Don’t Forget To Order just Click Here for our pre order form.

Thanks for being here, Amy


Eggology 101

Hello Again Friends,

It has been a fun journey watching our young chickens begin to lay eggs as they seem to come in all shapes and sizes which has prompted many great conversations about eggs in our house!

Here are a few of the questions the kids had and the answers I came up with!

Q: Eden asked "Mommy why do chickens lay eggs?"

A: Reno’s answer “Because they have to”. Eden asks again with excitement, “Do they poop it out?” My answer to the kids “The chicken has eggs develop in their body each day. When it is ready, they sit in the nest and an egg comes out'“

The real facts: Chickens lay eggs as a part of their reproductive cycle. They are trying to establish a clutch of eggs to sit on, incubate and hatch into chicks. If you collect the eggs every day the hens keep producing eggs in an attempt to collect their clutch. A clutch is a collection, usually about 12 eggs.

Q: Reno asked this one “How do they lay eggs?”

A: My answer: “Inside the chicken’s body there is a tube where the eggs form. Gradually over the day and night the egg gets formed from the yolk first then the shell forms around that and then the white forms inside, then the egg gets harder and when it is hard enough it is let out of the chicken’s body. “

The real facts: Now this is complex, I love the science here! If you’re interested and can handle real science—12 years and up. Watch this video “How Does a Hen Make an Egg” produced by the 4H Extension. If you want an easy to understand and watch check this video out “The Making of an Egg”

Q: Levi’s Question “What determines egg size, why did our chicken’s lay these gigantic eggs, are they all “Double Yolkers” when they are this big?”

A: My answer: ” As we have seen, when chickens start laying eggs they are adorable, small pullet eggs and over the course of 3 months or so they level out to the size they will be for the particular breed. I have seen large eggs laid by older and younger chickens, I am assuming it has something to do with the length of time the egg stays in the reproductive system, if something slows down the process maybe the egg gets bigger?”

The real facts: The in depth answer related the the particulars of the function of the reproductive system that would cause egg size to change didn’t pop up. Most sources simply attribute egg size to genetics and age, nutrition etc. Oddly large or small eggs are definitely related to a hen that is not totally mature yet or older hens. But I didn’t find the scientific explanation I was seeking that would relate the some aspect of process of making an egg to egg size. If anyone knows this fact let me know.

I found that double yolk eggs, where 2 yolks are released into the shell in the egg development process are relatively rare, 1 in 1000! And as you would expect they were hatched as chicks the chicks would be twins!

That’s it for now. There are so many fun facts about eggs aren’t there! Can’t wait to get into the nutritional aspects and a few recipes next time. Take care. Thanks for being here with us. Amy


IMG_7211.jpeg
IMG_7215.jpeg
IMG_7204.jpeg

Amy's Beef Burgundy

Adjustments.jpeg

Amy’s Hearty Beef Burgundy:

Hearty, yet light this recipe has the most delicious gravy, thick and creamy. Beef is tender and has excellent texture. We serve it over polenta, potatoes or thinly sliced green cabbage and our favorite side dish is sautéed kale, broccoli and brussle sprout medley with caper butter.

This recipe serves 4-5 people

Best Cuts of Beef to use: 4-5 lb beef chuck roast, Arm or Round Roasts, 3 lbs Osso Bucco(shank), 2 lbs Stew beef or Kebab beef, 2 lbs Sirloin Steak cut into chunks.

Set Up:

I start by placing my Instant Pot under hood of our range top and turn the hood on low. I set the Instant Pot on sauté function and I add 2 Tbs olive oil to the pot.

Brown Meat and Veggies:

I brown the beef if it’s thawed. But many times I use frozen beef, so I skip browning and just sauté the onions and garlic.

Push the beef to the side and add one small onion diced and 2 crushed cloves of garlic to the pan, toss quickly to brown.

Deglaze and Add other Liquid Ingredients:

Add 1-2 cups red wine and deglaze. (My favorite wine for this is Cotes De Rhône for it’s mild flavor lack of acidity that it imparts in the sauce) Add 1 Cup SWF chicken or beef broth and 2 Tbs Worcestershire sauce.

Instant Pot:

Close the lid and double check that it is sealed. And you are done! Set the Instant Pot on the Meat/Stew Setting which is about a little less than 1.5 hours of high pressure cooking—-which takes about 2-hours to actually be finished cooking.

I set this up at lunch time, you could even do it before you leave the house in the morning. My Instant Pot will keep things warm—at a food safe temperature for up to 12 hours. It rests and becomes more flavorful in the instant pot on warm until dinner, usually an extra 2-3 hours after it is done cooking.

When I get home I open the pot and get started with the final prep. Which might be the most important step!

Don’t worry if your creation doesn’t look very appetizing after pressure cooking. You’ll find that the roast is smaller and that the juice or sauce has some fat on top of it. These are all the start of an amazing gravy.

Take out the roast out of the pot and strain off some of the fat if you need to. I find the only beef cut that I need to strain fat off off after cooking is the Osso Bucco. If the volume of fat is fairly low incorporating the fat that is cooked off is actually good for you. It contains many of the healthy omegas you want to gain from grass raised beef.

Make the Gravy:

Set the instant pot on the saute function again. Take 1/4 cup of flour and place it into a 2 -4 cup bowl and add 1/2-3/4 cup cold water or broth and whisk it until it is a thick paste. Add 1-2 ladles full about 2-3 cups of your wine broth from the instant pot To your flour paste and whisk until thick, smooth and hot and then slowly add your broth paste to the instant pot broth while whisking. Your sauce should look thicker now, but not thick enough!

Then....the magic step. That one of my cooking mentors told me about 20 years ago when I first started cooking. One of the best combinations she said was “Beef, red wine and.....drumroll..... Lipton’s Onion Soup Mix!” So one packet of dried onion soup mix goes in to our pot and bam. Sauce. I let it bubble for about 2-5 minutes or until it looks good and then turn it off. It will burn if you keep it on Sautee in the instant pot—believe me I’ve done it!

Plate your Meal:

Cut off the strings on the roast and cut it into 6 or so 1/2 inch slices and cover your sides and beef in sauce OR place all the meat back in the sauce to coat and soak it up (Ben’s Favorite) leave it to rest for a few minutes, then serve with your sides. Yumm... every bite is delicious.

Let me know how your Beef Burgundy tastes. Surely you will substitute ingredients, but don’t omit the Lipton Soup Mix!
Have fun in the kitchen. Best, Amy

Swimming in an Endless Pool? Swimming upstream?

As the absolutely gorgeous blue sky and phenomenal sun and breezes wash over me as I walk back and forth amongst the animal groups, I wonder how I can describe this feeling I have. So, I keep thinking about farming and my life right now and this is what comes to mind—maybe it’s like swimming in an “Endless Pool”? Maybe I was just hot last week when it hit 87 degrees and wanted to swim? No, that’s not what I’m talking about.

I haven’t yet had personal experience with an endless pool. I am imagining it feels like you swim and swim and your surroundings never change. You’re feeling good, like your getting a work out, you know it is the right thing to do, but it seems strange, like maybe you should be getting somewhere?

This is how my spring has been, and you? I know as mom’s, dad’s grandparent’s spring chores and daily housework can feel just like my farm chores, so I thought many of you could identify with this thought and image.

Why does it feel endless—because it is endless. In my life right now I have lots of mouths to feed every few hours. In addition to the usual horse and kid feedings, for the last 6 weeks the big time consumer has been the “birds” as we call them.

The Cornish Cross broiler chicks to be exact. This year we chose to re vamp our systems and build new hoop style coops to be used on pasture. So, when I wasn’t feeding or watering them, we’ve(Eden and I and sometimes Levi) been working on the coops (trying not to tie up the real builder in the family farmer Ben-who did help with the basic structure).

The coop building process has been interesting. Tedious is an understatement when it comes to installing hardware cloth and tarps to a hoop style coop. Then we then had to install the doors, the pull ropes—feeders and waterers—“it is going to be worth it” I keep telling myself.

When the coops were done we had to move the birds over, which again took patience, but the outcome was great!

Check out this video of us moving the meat birds from the “old”A frame on wheels to the new mobile hoop coops we just constructed so that they can have fresh air, sunshine and grass to eat while being protected.

Even in fast forward this video seems slow, but life is kind of slow isn’t it—totally fast, but totally slow. Just thought I would share, hopefully will get a laugh…

Enjoy this beautiful splendor nature is giving us, it rocks!

Butter...Butter and more Butter

Butter! From Mixer, to squeezing, to packaging here on the farm

SWF Farmhouse School at Home Day 9

During these most uncertain times, when a lot of people were stocking up on paper goods, peanut butter and other essentials, we were motivated to stock up too. But on what? We already have stocked freezers, protein is there, we are a member of a CSA for veggies, bake our own bread. But what about dairy? And what can we produce ourselves if we needed or wanted to, given the ingredients? Butter!

The idea hatched when chatting with our neighbors about home dairying and bam, 5 gallons of heavy cream from a local dairy farm arrived. When I saw that container I went—ohh boy, I love whipped cream, and need some buttermilk for pancakes and biscuits, but beyond that….how am I going to use all of this!! Then the light bulb went off BUTTER!.

So, being the organized mother that I am—ha—I did some prep work for several days before embarking on the big challenge. I experimented and kept looking for the quickest way to get to the finish line so that we could get our butter made before the cream expired!

I sat back and imagined all sorts of learning moments, talking points, some of which transpired. But as you might expect, the actual process was definitely different than I planned. 

Big surprise, my students were not interested in my cool discoveries, talk about times gone by or science lectures, they just wanted to get the job done and start baking with it and and eating it, before we were finished of course.

Except Eden, AND another surprise for me, they were kind of bothered by the mess— she loved the mess, squeezing the butter milk out of the butter and into the bowls.

I’ll admit, there were lots of “moments” including shrill noises and complaining!

Through thick and thin we turned 5 gallons of heavy cream into butter—

This resulted in 14 lbs of butter and countless gallons of buttermilk —all in the home kitchen—It was super messy.  

Very messy....it was a true test of my patience and the perseverance of the children....wow, I thought farming projects were hard, but this became crazy. Especially when it was time to cook dinner and the kitchen was still half coated in buttermilk.

There were bowls of buttermilk, bits of butter, dirty towels everywhere and a slippery kitchen floor. 

I needed them to squeeze, package, pour, and if they didn’t keep helping I was going to go nuts—-and we couldn’t start and stop easily and abort the mission because we were making a big mess that I didn’t want to clean up twice—-the mess—-it took so long to clean up the butter fat all over the counters, mixers, handles on the sink..OMG...we had buttermilk everywhere.

We did it in about 4 hours, phew….

It is amazing to see the satisfaction when we all dip our knife into that super butter or go to the freezer and pick out another butter stick. 

This was what we did:

  1. Used our favorite Kitchen Aid Mixer to beat the cream until it turned into butter 

  2. Pour off buttermilk and save for cooking

  3. Squeeze the butter through a towel to get the remaining buttermilk out of the butter

  4. Mix in salt

  5. Shape into sticks —this was hard—

  6. Package them in freezer paper and tape, this was hard—the tape quickly got greasy!!

  7. Pack them in a box in the freezer

Now for the Interviews:

Reno:

What did you think about making butter?

“It’s pretty easy to make because we only spend one day and we get months and months of butter”

What math concepts did you use?

“Almost every time I bake now—which is a lot.  I use Grams, to find out how much a stick weighs for the cookies. I have to find conversions. First in almost every recipe you melt right amount of butter and put in sugar and brown sugar and eggs and mix them smooth. First, I have to find out how many grams of butter I need—all recipes say how many cups, we made a chart for this and we use decimals. When I get the butter out of the freezer and I put it on the scale, measure it in grams”. 

How did your use your hands? 

“To rip the tape, cut and pack it in freezer paper and shape it into squares. It was greasy.”

How long did it take?

“4 hours a very long time, I had to have tons of snack breaks”

Was it worth it?

“Yes, because we have months of butter and there is a pandemic going on and you don’t have to go to the store so much.”

What does it taste like?

“It smells like cheese don’t eat it by itself “

Levi:

What was the hardest part of making butter? “It was a mess”

Did it go well? 

“We had a great outcome.  But it was a mess. I felt overwhelmed.”

Would you do this again? “Yes.”

What is your favorite recipe to use butter in? “Everything, butter on bread is best:”

Eden:

How much do you like butter?” Scream....”

What was it like to feel the butter in your hands? “Silly.....”

That’s it, our butter adventure is over, and let me tell you we have eaten up a lot of butter since!Reno is a baking machine and somehow all his baked goods disappear!

Thanks for being here, and please tell me about your own pandemic cooking adventures. I know lots of us are finding comfort in the kitchen. Take care and be well,

xoxx Amy

Levi scraping out the butter and saving the buttermilk

Levi scraping out the butter and saving the buttermilk

Reno shaping and packaging home made butter

Reno shaping and packaging home made butter

Me, in charge of management and the heavy cream!

Me, in charge of management and the heavy cream!

SWF Chicken Soup Or Broth Bliss?

Could there possibly be a better time for chicken soup and home made broths? I don’t think so personally.

When I am sipping a broth, I feel relaxed and fulfilled at least for a moment!

Truly positive emotions and feelings are kind of hard to come by right now for me and probably most people.

The other emotions—which I won’t even mention are so prevalent and persistent popping into and out of your head on a regular basis—down with you Negative thoughts!! Give us a Break already—

Let the Broth Bliss begin…..

And—as I highlighted in the last blog, the proposed health benefits of broths go on and on, and now, today again as I surf the web I became painfully aware of why we are urged to drink warm liquids during a time where any one of us might be fighting off a super virus —I think should almost a requirement to make and eat broth!

So, jump in and join the fun. Here is my latest attempt at a cooking Vlog with Levi Halley behind the camera with recipes too. Enjoy and feel free to comment.

SWF Chicken Soup Recipes

Traditional on the Stove Method

  1. Thaw and Roast Whole 6 lb SWF Chicken (375-1H 15 min), carve off meat and serve as desired 

  2. Place chicken bones in a large pot with 4 qts of water and 1 Tbs organic apple cider vinegar

  3. Bring to a boil and then turn down to a simmer for 2 hours, turn off for the night, turn on in the morning, bring to boil, turn down to simmer, 2-6 hours. Turn off at dinner time, take off heat, strain out bones and reserve chicken meat that comes off the bones.

  4. Leave chicken broth in pot or pour into large container, refrigerate for several hours or overnight

  5. Skim off fat

  6. Sautee with 1 TBs olive oil 1 onion, diced, 1 clove crushed or diced garlic, 2 peeled carrots, 1 rib celery coarse chopped in a soup pan

  7. Strain in broth, I fill a 4 quart soup pot

  8. Season with 1TB Kosher Salt, 2 tsp granulated garlic, 1 tsp celery seeds, 1/4 ground pepper

  9. Simmer for 15-30 min

  10. Add noodles or rice cooked on the side

  11. Package left overs

Instant Pot Method

  1. Place frozen chicken in instant pot, add 1 C water, salt and pepper top of bird. Pressure cook for 10 min per lb. Remove whole chicken and carve off meat as desired. 

  2. Place all bones back into instant pot, add water to 2/3 fill line and add 1 Tbs cider vinegar

  3. Pressure cook on Broth setting 2 hours 30 min

4. Remove bones and cool broth overnight

5. Skim off fat with wide spoon 

6. Sautee in 1 TBs olive oil,  1 onion, diced, 1-2 cloves crushed or diced garlic, 2 carrots peeled and chopped, 1 rib celery coarse chopped in a 4 qt soup pot

7. Add in Strained in broth

8. Season with 1TB Kosher Salt, 2 tsp granulated garlic, 1 tsp celery seeds, 1/4 ground pepper

9. Simmer for 30 min

10. Add noodles or rice cooked on the side

11. Package left overs

Thanks for being here with us and enjoy some soup. Don’t forget, you can order beef and chicken NOW! Contact me or go to our online store.xoxx, Amy

Let’s simmer. Get ready to sip some wholesome SWF Beef Bone Broth

The proposed health benefits of a grass-fed home made bone broth are boundless….from tightening your skin, fixing your leaky gut, lubricating your joints, strengthening your skeleton and will help you loose weight.

I have to admit, I am a bit of a skeptic and…..I’m trained in evidence based practice—it’s hard for me to swallow food fads without scientific evidence.

But this time—when I can see the gelatin—and taste the grit that pops out of these bones as you simmer them, I am convinced—a practice that has been going on for centuries, must be good for you.

Now, Let’s get cooking! Watch my How TO video and be in touch so you can get some of our soup bones to work with and see for yourself!

Our SWF bone broth recipe is so simple it’s silly.

The first and most important step being—getting your hands on some of our SWF beef soup bones. Marrow bones are the best.

The second most important step is packaging your broth. If you don’t plan this step and get containers of the correct size your precious broth might become a refrigerator ornament that eventually waters a tree. So, think about how you want to use the broth while it is simmering.

It can be consumed daily as a warm drink, we like it with lunch. Put in sauces or to steam veggies in, gravies, soups and stews, rice and risotto. We do all of the above, so I leave it in the fridge in various sized containers so people can grab and go.

Beyond the health benefits, I want to tell you my family has fallen in love with broths lately. So satisfying, warms you right up, clears stuffed nasal passages. The kids are actually requesting them.

Have Fun, I can’t wait to help you get some broth going. Thanks for being here and take care, Amy

Holiday Cooking Nostalgia

Cooking Brings us Together

Cooking Brings us Together

I’m not sure if this hits anyone else this time of year, but for better or worse, I always get nostalgic about times gone by and amazed by the quality and quantity of memories that bubble up in my mind about people and times gone by.  

The holidays serve as book marks in my brain that I just can’t ignore!

“Holiday Nostalgia” for me is when I think of experiences I have had with people, that are memorable and still apply to my life in some way. Food and cooking always rise to the top this time of year. When I think about cooking, my Great Aunt Aurora comes to mind. She was a big part of our Christmas celebrations growing up.

Now, I’ll be honest. What I remember most about Aunt Aurora’s cooking is her FUDGE and sweet Italian Cookies, birthday cakes and playing Pochinno. But….I did get the pleasure of having her Fabulous Beef Stew too.

On college breaks, when she was 100 years old!!! I actually sat down with her time after time, and had her go through recipes with me and she re wrote the basic, most important recipes for me so that I could have my own copy. It was definitely a connection that I won’t forget. Below find one of these, “core” recipes that Aurora Bardosi shared with me!

IMG_1600.jpeg

What do you notice? Beautiful handwriting? Clear yet vague instructions? Yes, there are many assumptions here, that the cook knows how much of each ingredient to use—— but if you cook for a while, don’t you know that? Do you have to run to the store to get ingredients?—No, use specific cuts of meat——no. I personally Love it! Just enough direction to get you started and let the rest unfold—and don’t forget to taste!


Oh, I want to mention that I am so excited to share more that I’ll be blogging on this topic over the winter. Last week my mother gave me my Aunt Aurora’s 1926 Edition Better Holmes and Gardens cookbook, you know the kind you have pasted things in, written and rewritten, and is stuffed with recipes that you add every year. Well, Aurora was very organized, so nothing is out of line with this cook book. But it is a window into the past which is so cool. So be out on the look out.

In the mean time, Go out there and get your shopping done and don’t forget to give the gift of beef! We have SWF Beef in stock and we do need your support.

Ground beef and steaks are so easy to use, stays fresh for a year, not kidding, we have great packaging and it was frozen properly for long shelf life.

In addition to improving your health, giving you minerals from the earth and omegas better than what we pop in our vitamin pills——it won’t contribute to clutter in the home. So, contact me ASAP! 

Have a wonderful Holiday Season! Amy

public.jpeg
public.jpeg

The Thrill of the Grill

Need some Grilling Inspiration?

Is the excitement of the first grilling of the season that we all felt in April when the snow melted wearing off for some people? I know it has for me…feel like summer is going way to fast….need to slow down and be outside enjoying nature instead of answering work emails or going on instagram?  

Our Current “Go To” outdoor meal is so easy and satisfying it doesn’t seem possible—- which is why I am calling it a “Grill Thrill”—I’m thrilled that I don’t have to marinate or skewer or plan ahead. Just thaw and go. Read this blog to see how your grill night compares to ours! And please share your ideas, I need inspiration too.

Meal #1- Halley Summer Grill Thrill

Step 1- Grill Prep- Start wood fire grill up to 1 hour ahead of time. If you don’t have a wood fired grill that’s ok. A fire pit and a “Tuscan Grill” to use in it will be amazing and economical!  While the fire is burning down prepare your burgers and sides. It won’t take an hour to prep the burgers and slaw so you’ll have an excuse to put your feet up and listen to your favorite tunes for a minute or two while the fire takes it’s time burning down to large coals. 

Step 2 A - Food Prep- Take your SWF Burger that has been thawed and broken into chunks, sprinkle with 2 tsp salt of your choice, 2 tsp garlic pepper( I’ve been using “Don Giovanni Gourmet Garlic Pepper Seasoning”). Mix the burger with the seasonings by hand and patty up 4 per pound for lighter appetites or 3 per pound for the average burger lover.

Step 2 B - Make your sides- My summer 2019 favorite- Cole Slaw. Use 1 small head organic cabbage and a few carrots, cut in to 1/4’s and put in the food processor with the grater attachment. Wish together 1/4 cup Greek Yogurt or Mayo, 3 TBS apple cider vinegar, salt and pepper to taste, add dressing to shredded cabbage in a large serving bowl and toss(serves 6-8)

Step 3 - Grill - Grill burgers about 8 min or to your liking over wood fire, top with Vermont Farmstead Cheese part way through “ Governor’s Cheddar” is our favorite. Serve on a Thomas English Muffin that has been split and warmed over the fire.  

Step 4 - Plate - Add condiments to hot burger- Garlic pickles-sliced thin voted best by “us” at supper night a month ago, or mushrooms and leeks (sautéed), spicy home made ketchup or pickled onions....slice the burger in half and eat. 

Meal # 2 Greens and Beef

 Slice one left over burger cut into 8ths and place it on a bed of farm fresh arugula or lettuce from the market, shave some parmesan cheese over the top, add whatever else you have in the fridge, like roasted veggies, tomatoes etc . Dress it and eat.  Perfect, easy, the Smokey flavor of the wood grilled burger is the best on the second day! Just keep it simple and your hunger will be banished.

Want Help Creating Healthy, Easy Meals for Your Family?

The first step is getting your hands on some amazing ingredients

Contact me to get started with delicious, clean and natural beef. Order your SWF burger in our online farm store or meet us in Woodstock, VT on the Green for “Market on the Green” on Wednesday July 3!

Order ahead if you would like a bulk package or are feeding a crowd over the holiday or during the summer, we’re almost always around, give a shout and we’ll get a package together for you and meet up or deliver. 

Thanks for being here. Until next time, Amy

Grilling pizza, pre burger night—here on the farm

Grilling pizza, pre burger night—here on the farm

Ahh…what you see can see when you’re grilling…

Ahh…what you see can see when you’re grilling…

Instant Pot Fun

I’m with you if you don’t want another kitchen appliance that collects dust and takes up space on the counter.

After hitting a cooking slump this winter I went for it, and bought an Instant Pot despite my inner resistance. How could I turn down a device that potentially will make cooking faster, clean up easier and be super healthy? Read on to find out about my experiences and conclusions.

IMG_4258.jpeg
IMG_4393.jpeg

Trial#1-Whole chicken. 

We LOVE our whole chickens, but I want them to cook quicker!—I placed a thawed whole 6 lb chicken in the instant pot on top of the rack, pushed the poultry button for 45 min high—result, delicious, tender juicy but, pale and stringy. Pro:Amazing burritos and chicken pasta and pizza the second time around. Only one easy to clean pot that went in the dishwasher, Con: texture
      2nd attempt whole 6 lb chicken: Same procedure but this time I took the chicken out, placed it on a roasting tray basted it and broiled it in the oven for 5-8 min. I deboned it and chilled it before carving.  Looked sad, split down the middle, but tasted —Excellent! Nice and crispy and the meat texture was perfect, like Deli sliced chicken breasts.  Make it ahead and chill if you want beautiful slices and reduce the recommended cooking time!

—Update— split the bird in 1/2 before broiling and reduce cook time by 5 min. Perfection!


Trial #2-Chicken Broth

Nice and clear, super quick, easy, easy, easy. But, the smell . . .not the broth itself, but the top of the instant pot when you take it off stinks, like burnt rubber chicken. Research says you need to deodorize it after making certain foods—-not what I wanted to hear. For the broth, I filled the 8 qt instant to the 2/3 mark with water, added the bones from the chicken, put in 2 TBS cider vinegar and pushed the broth button.  2 hours later it was done.  I let it cool, strained it and bam. Ready—normally this process took me 24-48 hours so a major time savings. Pro: speed and palatability, Con: smell

Trial #3-Rice

Lundenburg brown short grain rice 1 cup, 1.5 cups SWF chicken broth. Multigrain setting. 35 min later, done, perfect creamy rice.Pro perfect consistency and no boiling over on the stove, Con: no time savings

Trial #4-Beef Chili

Followed a recipe, browned meat on the sauté function (use pot under stove hood while browning). Set it on Soup and 1 hour later the chili tasted like it had been cooking for days—delicious. Pro: flavor, speed

Trial #5-Broccoli Soup

Followed an instant pot recipe, used beef broth from a previous meal, put the fresh broccoli in and bam, amazing, the creamiest soup I’ve ever made and did not use the immersion blender, did not have cheese stuck all over my cast iron pan.  Pro: flavor and consistency, Con: no real time savings and lots of steps to put the soup together.

Trial #6- Frozen Chuck Steak

2 cups chicken broth, garlic powder 1 cup red wine and frozen chuck steaks. 45 min high.  Dinner ready in 1.5 hours, took the meat out, poured the cooking liquid out, took the fat off, put 4 TBs butter back in the instant pot on saute, added 1/4 cup flour and then slowly added the cooking liquid back, seasoned with mustard!!  Amazing and the easiest ever. Pro: Flavor, texture, time savings

Conclusion: Is it worth it to cook with an Instant Pot? Yes, I think so

1. I like it because you can use it after work. Put your meal together when you get home and still have a one pot dinner in a little over an hour. Unlike a crock pot which takes all day. 

2. Just leave it. I like to go outside and do things while my food is cooking. If the phone rings or your run takes longer than expected the food doesn’t burn on the stove it finishes and keeps at a food safe temp for up to 10 hours. 

3. Fewer pots to wash. I love being able to start and finish sauces by browning garlic, onions etc in one pot.

4. I like things fast. Speed at which frozen meat is cooked, 4-10 hours in the crockpot or 1.5 hours with the same result!!! Also soups taste like they were cooked ahead.

***Be ready—It isn't Instant cooking, it is pressure cooking. It is way faster than braising or slow cooking, really tenderizes meat and preserves flavor. Some recipes have lots of steps and you have to be adventurous.

Contact me for recipes for any of my trials and share your own if you are a fellow instant potter.

See you at our first SWF Supper Club gathering for some family food and fun with Instant Pot demos. April 5th, 2019 6 pm at the farmhouse!See you there, Best, Amy

—update—5–5–5 hardboiled eggs. Place eggs on rack inside Instant Pot, pour in 1 cup of water. Pressure cook 5 min, let Instant pot release naturally for 5 min, Release pressure and place eggs in a ice water bath for 5 min and peel!

SWF Burger Rescue

Feeling stressed about weeknight dinners once in a while? procrastination, little time, a budget, boredom?

I’m in the same boat. Despite my planning this month, there have been a few days where the stars don’t line up and I need what I call a “SWF burger rescue”. Where you walk in the door and say, we’re either going out for dinner—or—Burgers!!!! Everyone votes for burger in this household.

So, I’m sharing our top 3 our favorite recipes for those days….and hope you’ll get excited about buying and cooking with SWF ground beef and share some of your own recipes with us!

IMAGE.JPG
IMG_2594.jpg
IMAGE.JPG

Just Plain and Simple SWF Burger:

Want to keep your hands clean? No time for making beef patties? Step 1: Open a 1 lb package of SWF ground beef, place on a plate or cutting board and take a large knife and slowly cut it (like you would cheese) into 3 or four squares, sprinkle with salt, round the edges, make a dimple in the middle of your burger. Step 2:  Cook uncovered with your your hood or vent on 4 min each side. Top with cheese when you flip to the second side if desired, let rest tented with foil 2-5 min once you’ve transferred them to a serving plate. Step 3: Serve!

IMAGE.JPG
IMAGE.JPG

Spicy Beef and Bean Burritos:

I can’t say enough for this recipe. It has been a fixture on our menu for so long, like 18 years. I kind of feel guilty, it is so easy, opening jars, throwing them into a pan, stirring and bam, 10 min later a delicious meal and the left overs are so easy to use. We all love it, and it keeps really well. You can even make burritos and pre-wrap them for lunches, they really don’t get soggy. You can make them super healthy by cooking your own beans and salsa from scratch, or do what I do . . .

Step 1: In a dutch oven or large cast iron pan cook 1 lb SWF ground beef on medium, 8 minutes or until golden brown.  Step 2: Add to your browned beef: 15 oz of refried black beans and 15 oz of drained whole black beans, 8-10 oz of your favorite salsa, 4 oz chopped green chillies, 1 cup of shredded cheddar cheese stir together and add the following spices: 1 tsp salt, 1 Tbsp cumin, a dash of cayenne pepper if you like it hot, 1 Tbsp of maple syrup or brown sugar. Step 3: Heat 3-5 min or until bubbling, turn off the stove, fill flour or corn tortilla shells, top with salsa and sour cream and you’re done! Serves 6-8

Spicy Beef and Bean Dip:

Those of you who have ever invited us to dinner have tasted this dip. It is almost always my go to appetizer—I crave it and love to share it!! Take only half of the above beef and bean mixture and spread into a small oven proof dish or pie plate, top with more cheddar and bake or broil until bubbly, serve with tortilla chips, sour cream, veggies and salsa.

Ben’s Beefy Pasta Sauce:

Step 1: Fill your pasta pot with water and bring it to boil before you start the pasta sauce. Step 2: Cook 1 lb SWF ground beef on medium heat 8 min or until golden brown. Step 3: Add 2, 24 oz containers of prepared marinara, mushroom or three cheese pasta sauce to your browned beef. Bring to a slow simmer for a few minutes while you cook the pasta . Voila, you’re done! Serve with Parmesan cheese. Serves 6-8

IMG_5493.JPG

This sauce too simple for you? Try this Beef and Pork Pasta Sauce.  It really makes the flavor in the SWF beef come out. ¼-½ lbe of ground pork, a leftover pork chop or a little bit of sausage all work great.

Step 1: Brown 1 lb SWF ground beef as above, push the beef to the side of the pan when finished and add ½ cup finely diced onion and 1-2 cloves garlic crushed (or prepared-chopped), sauté garlic and onion lightly, mix with beef add 1 cup of red wine, let it deglaze for a minute then add, 1 carrot cut in ¼, and 1-2, 28 oz cans of Muir Glen crushed peeled organic tomatoes. Step 2: Season to taste with Italian seasoning, basil, garlic powder, salt and a dash of maple syrup and red pepper flakes. Step 3: Simmer covered on low for at least 30 minutes, take the top off for the last 15 minutes if you like the sauce thicker. Always milder in flavor on the 2nd day or if it simmers for hours.

Thawing Tutorial:

Afraid of spoiling your beef?  Forget to take it out ahead of time? Stop--don´t abandon your beef craving taste buds. Open the freezer and take out that SWF burger!

IMAGE.jpg

Water bath thawing method:

1 lb of SWF ground beef (left in it’s tightly sealed package) thaws really well in 8 or more cups of cold water, dumped and refilled every 15 minutes.  If you start this the minute you walk in the door, by the time you have your coats off and other ingredients out for dinner, you´ll have fresh ground beef to cook with. I find it takes 30-45 min maximum, depending on how cold your freezer is. If thawing 2 lbs, I get 2 water baths going or a roasting tray and use the same method.

Or, just take it out of the freezer in the morning, or at lunch and place it in the refrigerator as it is on a small plate, it will keep for several days this way---quite a few days….I´ve tried it, trust me.

Thanks for being here! Add comments or share your own 10 minute favorites here or on Facebook. Images are great too. Can´t wait to hear from you

SWF Burger Boxes Coming REALLY Soon

Burger boxes are on there way and will go on sale next week, new sizes and delivery will be available. Stocking up on ground beef just works. It keeps well, stores easily in nooks and cranies in the freezer, is fast, nutritious, need I say more? It can solve almost any week night or week end meal struggle.

Keep your eye out for an email about SWF Burger Boxes and be in touch, Take care, happy cooking! Amy

Tantalize your tastebuds with Amy’s Hanukkah Brisket

Here’s the inside scoop on how we cooked an amazingly simple and delicious meal for Hanukkah.

As Reno and Eden gobbled down after school snacks I prepped the roast and popped it in the oven to braise.

It was chore time, we all dressed up in our warm clothes, fed and watered the horses, chickens and cows. When we returned, our home was filled with an amazing aroma. Our mouths were watering as we took of our snow clothes.

Then, I placed a spaghetti squash and spinach squares in the oven alongside the braising brisket. Bam, in another hour or so guests arrived,

I sliced the beef and the meal was on the table.  Hardly any mess, no gravy to be made. The table was quiet, only ummms and yummms and “can I have more mom” to be heard—until we lit the menorahs.

IMG_2993.jpg
IMG_2990.jpg


5 step SWF Brisket, serves 6+, prep 20 min, braise 3 hours

Ingredients:

  • SWF beef Brisket 4 lb (alternatively SWF chuck roast, lamb shanks or shoulder)

  • 2 TBS Olive Oil

  • dry rub-2 tsp kosher salt, 1/2 tsp pepper, 1 tsp garlic powder 

  • One medium onion sliced

  • 4 celery stalks cut in thirds

  • 4 carrots cut in thirds

  • 2-3 C red table wine

  • 1 C beef or chicken stock

  • 2 TBS VT Maple Syrup

Instructions:
1. Prepare Meat:4 lb SWF beef brisket, 4 SWF lamb shanks or 4 lb SWF pot roast, thawed, blotted dry, rubbed with salt, pepper and garlic powder
2. Brown: Place prepared meat in Dutch oven with a dash of olive oil and brown on both sides stove top on medium high, 10 min
3: Prepare Sauce and Veggies to Braise: Remove beef from pan and place on a plate. Turn down the burner to medium and add 1 sliced onion, 3-4 ribs of celery, 4 carrots in 3rds, salt and pepper to taste. Sauté until onions are transparent or slightly brown. Add 2-3 cups of red table wine, turn the heat up again to medium high and bring the wine and veggies boil, then add 1 cup of stock (I use chicken or beef, whatever is convenient) 
4. Braise:Place the browned roast on top of the veggies and wine in your Dutch oven and cover. I take the knob off my Dutch oven cover which leaves a small whole in the top of the cover-it makes the sauce thicken as it simmers down. Braise in a preheated 325 degree oven for 2.5-3 hours, turning the roast 1/2 way through cooking.
5. Plate:Take the meat out of the pan and place on a cutting board. Slice across the grain or pull it with 2 forks if it is a brisket. Taste the cooking liquid (your sauce) and season it with a little bit of maple syrup if you desire. If you see a lot of clear liquid on top of the sauce, separate it out. I set the veggies aside and pour the sauce into a 4 C liquid measure cup, the clear liquid(fat) rises to the top and I pour it off carefully and reserve the sauce that remains.  Place the meat back into the Dutch oven or a serving plate, top with the veggies and reserved sauce and you have your meal!

Where can you buy a brisket or chuck roasts? Most people have heard of smoked brisket at a BBQ restaurant but they are rarely found in a store—especially grass fed beef brisket.

If you buy one of our assorted packages you might just get one, especially if you request it. Braising cuts rival pizza at our house in the winter and fit the bill for satisfying hunger without the extra carbs!

IMG_2988.jpg

Want to know a secret?

A big secret to staying motivated to cook new dishes if you buy our products is in the organization of your freezer! When I get my meat home from the processor, I make sure it is stored in the freezer in cardboard boxes labelled according to cooking style. I have 3 types of boxes with mixed cuts; braise/roast, grill or ground.

Once a week, I take out several random cuts, put them in the refrigerator to thaw. While the meat is thawing, I find a recipe to match the cut I have randomly chosen and plan my shopping for ingredients, veggies and sides accordingly. You won’t find yourself digging around in the freezer anymore, saying things your children shouldn’t hear. You’ve gotta try it!

If you are new to SWF, now that you are thinking of it, request your free sample of ground beef by contacting me and make an order today. You won’t regret it!

Happy Healthy Holiday wishes to all,

Warmly, Amy


IMG_2987.jpg

Not sure about cooking a roast like a brisket? I hear you, ground meat is the go to for most of us, no mess, no fuss, thaws in a jiffy, predictively amazing. Now roasts on the other hand— Roasts—get a bad rap, dry, easy to over cook, gravy to be made, huge groups of guests needed to share with—Not So—this recipe is so simple, low stress and predictable that it challenges those stereotypes.


Get Inspired! 3 Reasons Why You Should Change Your Food Shopping Routine

12 years ago I was expending way too much energy on food shopping—it wasn’t fun. As a practicing Physical Therapist, unfortunately I was had seen far too many examples of what can happen if you don’t take care of yourself over the years. After reading the Ominivore’s Dilema by Michael Pollan and watching the documentary by film maker Robert Kenner FOOD, Inc AND becoming pregnant, I was hormonal and horrified about the future of food systems in this country. I needed a plan to make the BEST food choices I could for my family.

I believed wholeheartedly that diet was a cornerstone to health. I was buying organic and natural foods, rotating between 3 stores in the Upper Valley. Trying to pull together the best quality food, for the best value and cooking from scratch. All that shopping and decision making was hard, time consuming and unfulfilling.

I was in a tough spot until my husband Ben came to the rescue. He bought a chest freezer with money we didn’t have, opened a Sears card and put it on a payment plan—I was horrified, what, another appliance, it is just going to cost more electricity to eat well, I thought, and the things that I buy at the store will be all freezer burnt by the time we get around to eating them.

Then he really shocked me by filling it up with MEAT—-he bought 1/4 cow, 1/2 pig, 1/2 lamb from our neighbors and friends and joined a CSA. We’ll never eat all of this I thought, this is over kill. Well, Ben took the reins and was the cook for a while and he amazed me. He would thaw out a few pieces of meat on the weekend and cook with them all week. Instead of gaining weight we both lost weight, didn’t wake up starving, didn’t crave carbs or my baked goods. I was sold.

So, get inspired and think about what buying and eating farm fresh products can do for you! I think they can do some amazing things for us as humans such as:

Boost YOUR Health: Cooking meals with locally sourced ingredients such as Second Wind Farm meats will save you time in the grocery store and the kitchen(I can show you how if you doubt this!)

Potential mental health benefits are numerous and related to the act of planning a meal or anticipation of amazing flavors, slowing down to actually cook a meal or the enjoyment of sharing excellent food with friends or family. Physical health benefits abound with increased with high quality protein and minerals, CLA’s etc from grass raised and finished meats.

INCREASE YOUR CONNECTION: Being part of our farm community by investing in our products does far more than support our farm(and give you an excuse to think about or experience Vermont hill farm life). It demonstrates that you are taking the initiative to decrease your carbon footprint, support local agriculture AND care about Vermont traditions such as living off the land.

FOLLOW TRADITION: Clearly, things have changed since Vermonter’s lived completely self sufficient lives(and I can’t say that we have made choices that enable us to do this right now), but together we can relive some of these traditions 2018 style! It always feels good to follow tradition.

Let’s try this together, challenge yourself to pick one product to buy this week that is direct from a farmer! I am going for raw milk! Kiss the Cow Farm has a great winter CSA. Take care and be in touch,

Warmly xoxx, Amy